
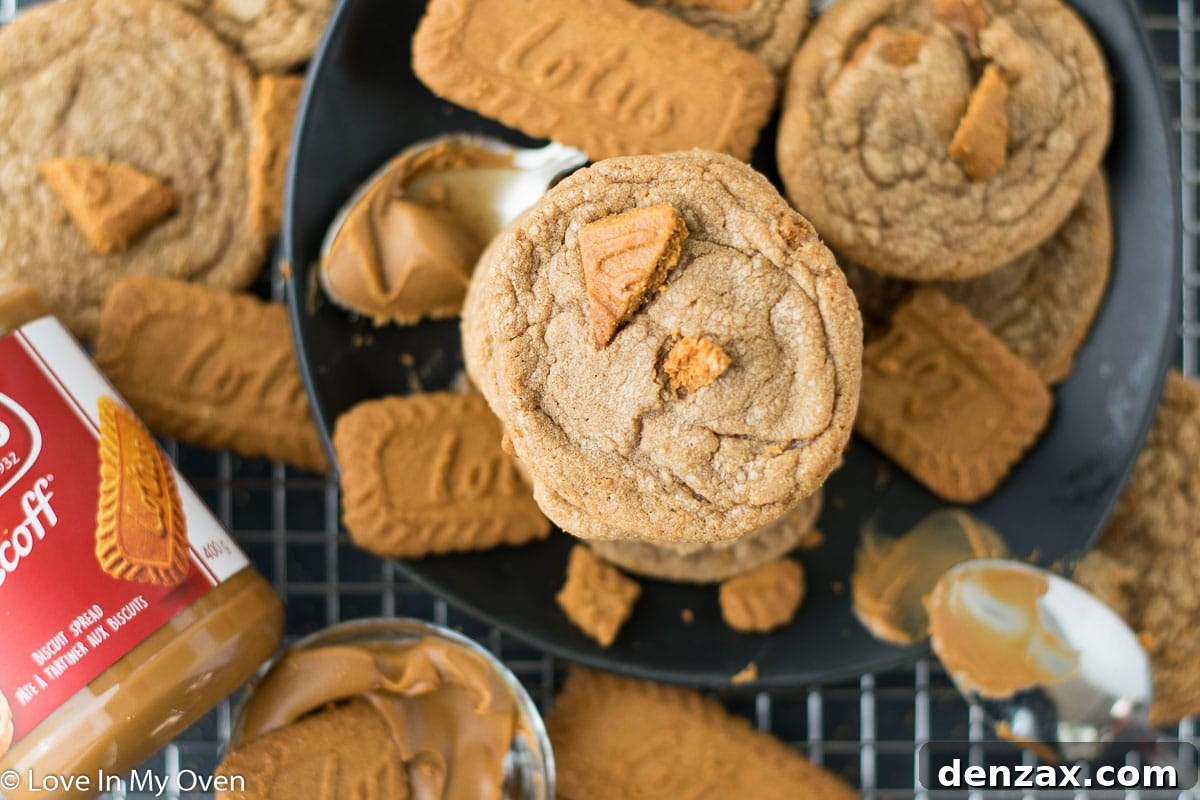
Indulge in the extraordinary flavor of Biscoff cookies transformed into a delightfully soft and chewy treat. These cookie butter cookies are a truly magical experience, combining the spiced caramelized notes of your favorite spread with the perfect homemade cookie texture. Exceptionally delicious and surprisingly simple to prepare, they are guaranteed to become a new favorite in your baking repertoire.
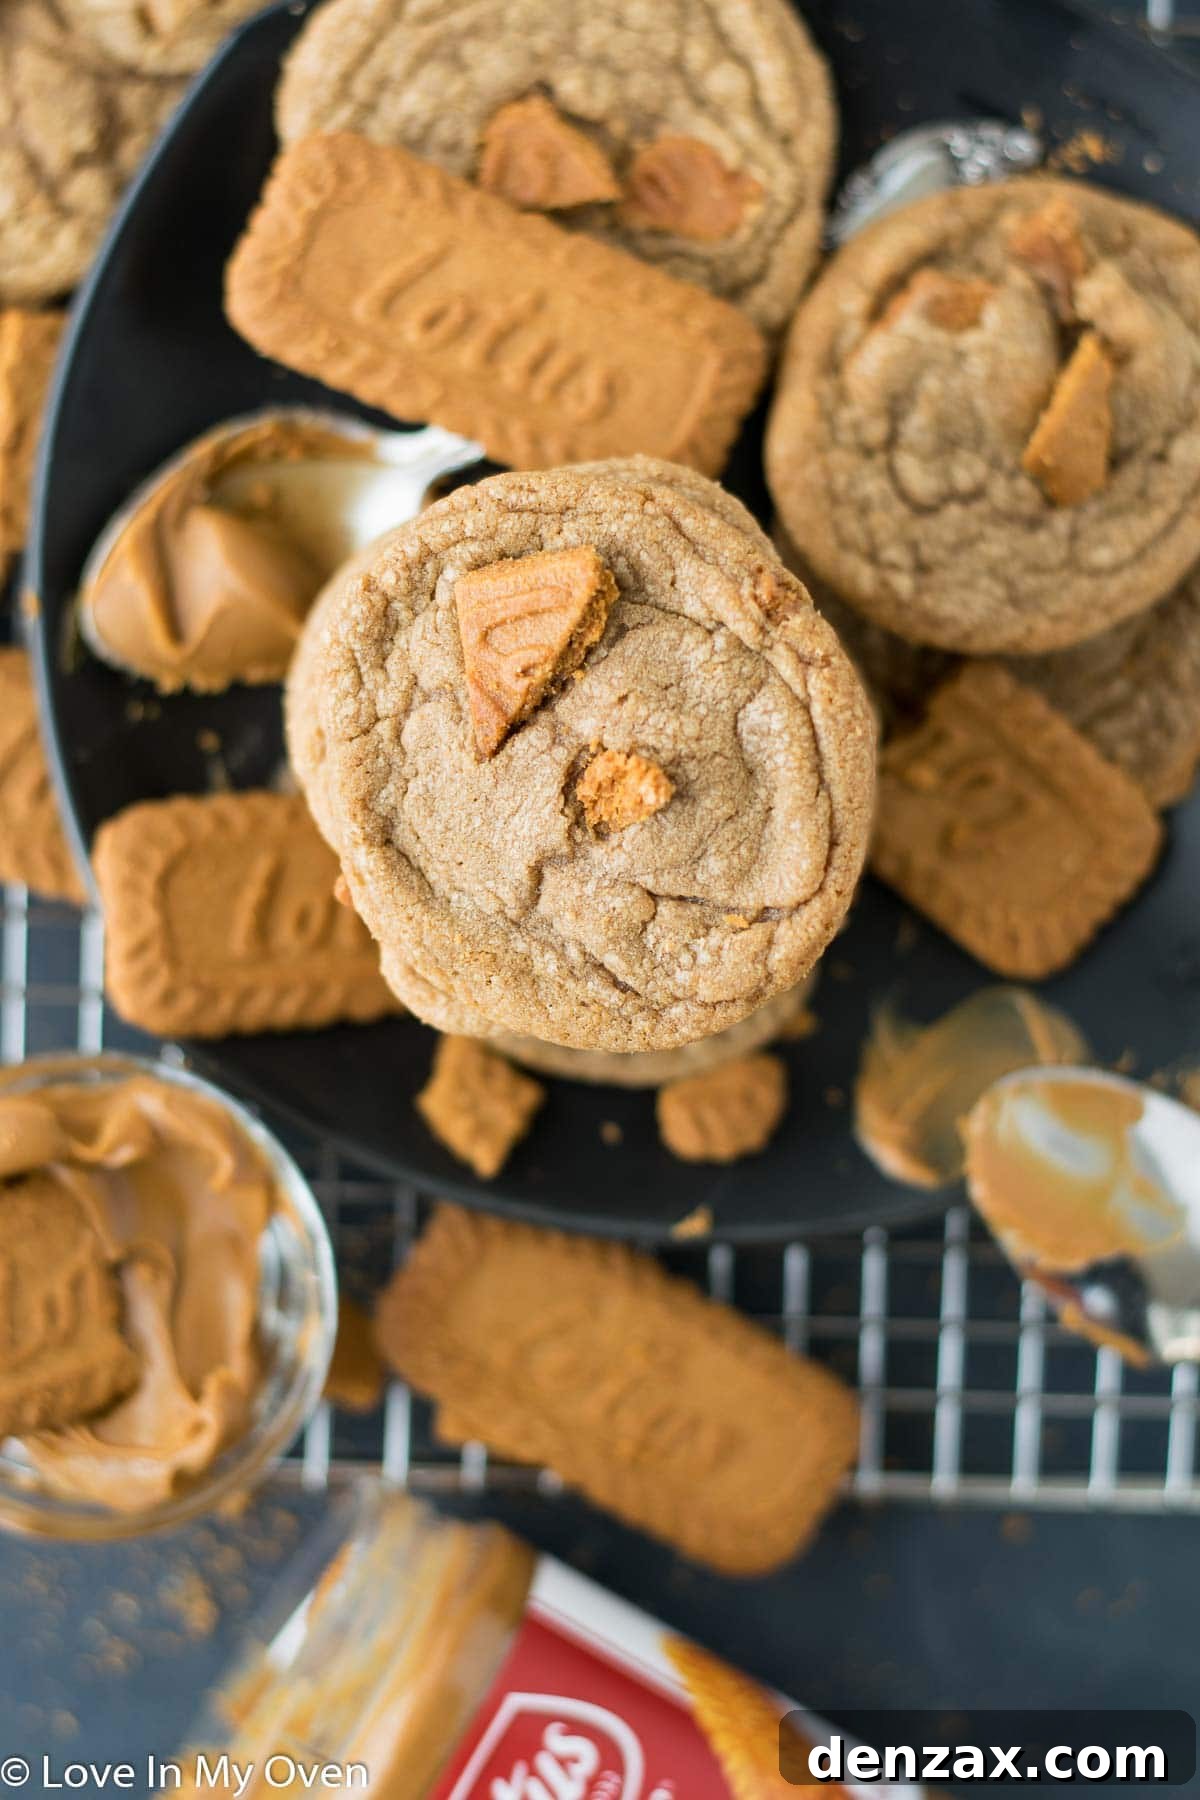
The anticipation has been palpable! After a recent sneak peek on Instagram, my inbox has been flooded with requests for this exact recipe – and for good reason. These cookie butter cookies have quickly become a sensation, and I simply couldn’t keep you waiting any longer for this highly coveted treat. Imagine the rich, spiced aroma filling your kitchen as these golden-brown beauties bake to perfection. They’re not just cookies; they’re an experience, a delightful fusion of flavor and texture that captivates from the very first bite.
I recall a comical moment during the recipe testing phase when Etienne, curious about my latest creation, asked about the ingredients. My response, “cookie butter, and chopped-up Biscoff cookies,” was met with a quizzical expression. He paused, then chuckled, “So, you’re making cookies *out of* cookies?” It truly does sound amusing when you put it that way! The concept of crushing up beloved Biscoff biscuits to incorporate into a cookie dough, along with the equally addictive cookie butter spread, might seem meta. But trust me, the result transcends any conceptual paradox. Don’t overthink the delightful irony; simply savor the incredible taste. These cookies are, without a doubt, irresistibly delicious and worth every “cookie inception” moment.

What Exactly is Cookie Butter? Discovering the Irresistible Spread
If you haven’t yet embarked on the glorious journey of discovering cookie butter, prepare for a revelation! This sweet, creamy spread is nothing short of magical and profoundly addictive. Originating in Belgium, cookie butter, often known by its brand name Speculoos spread or Biscoff spread, is essentially gingerbread or spiced shortbread cookies (like Lotus Biscoff biscuits) ground into a rich, buttery paste. Its consistency is akin to that of peanut butter, but its flavor profile is distinctly spiced with cinnamon, nutmeg, ginger, and cloves, boasting a caramelized sweetness that is utterly unique.
Unlike traditional nut butters, cookie butter contains no nuts, making it a fantastic alternative for those with nut allergies or simply seeking a different taste experience. Its global popularity has surged, largely due to its versatility and enchanting flavor. You’ll often find it alongside other spreads like Nutella or peanut butter in most well-stocked grocery stores. The most common varieties are creamy, but some also include delightful crunchy bits of crushed cookies, adding another layer of texture. The taste directly mirrors that of a classic Biscoff cookie, but in a luscious, spreadable form that makes it incredibly versatile.
The applications for cookie butter are virtually endless. Beyond being the star ingredient in these incredible cookies, it’s perfect slathered on toast, swirled into a warm bowl of oatmeal, drizzled over pancakes or waffles, or even simply enjoyed straight from the spoon (no judgment here!). It makes an excellent filling for cakes, cupcakes, or tarts, and can be incorporated into milkshakes or ice cream for an extra layer of caramelized spice. Its distinctive flavor pairs wonderfully with apples, bananas, or pretzels, creating both sweet and savory snack options. Baking with cookie butter, as we’re doing today, unlocks an entirely new dimension of its delicious potential, infusing every bite with that signature Biscoff allure.
Crafting Perfection: A Step-by-Step Guide to These Heavenly Cookie Butter Cookies
Creating these sensational cookie butter cookies is a straightforward and rewarding process, even for novice bakers. The key lies in understanding the purpose behind each step, ensuring a perfect balance of flavor and that coveted soft-chewy texture. Let’s break down the process, starting with your essential ingredients and progressing through each stage of preparation. For optimal results, ensure your unsalted butter, egg, and cookie butter are all at room temperature before you begin. This allows them to cream together smoothly, creating an emulsified base that holds air and contributes to a light, tender crumb. Cold ingredients can lead to a lumpy batter and a denser cookie.
To begin this delightful baking adventure, gather and measure out all your wet and sugar ingredients with precision:
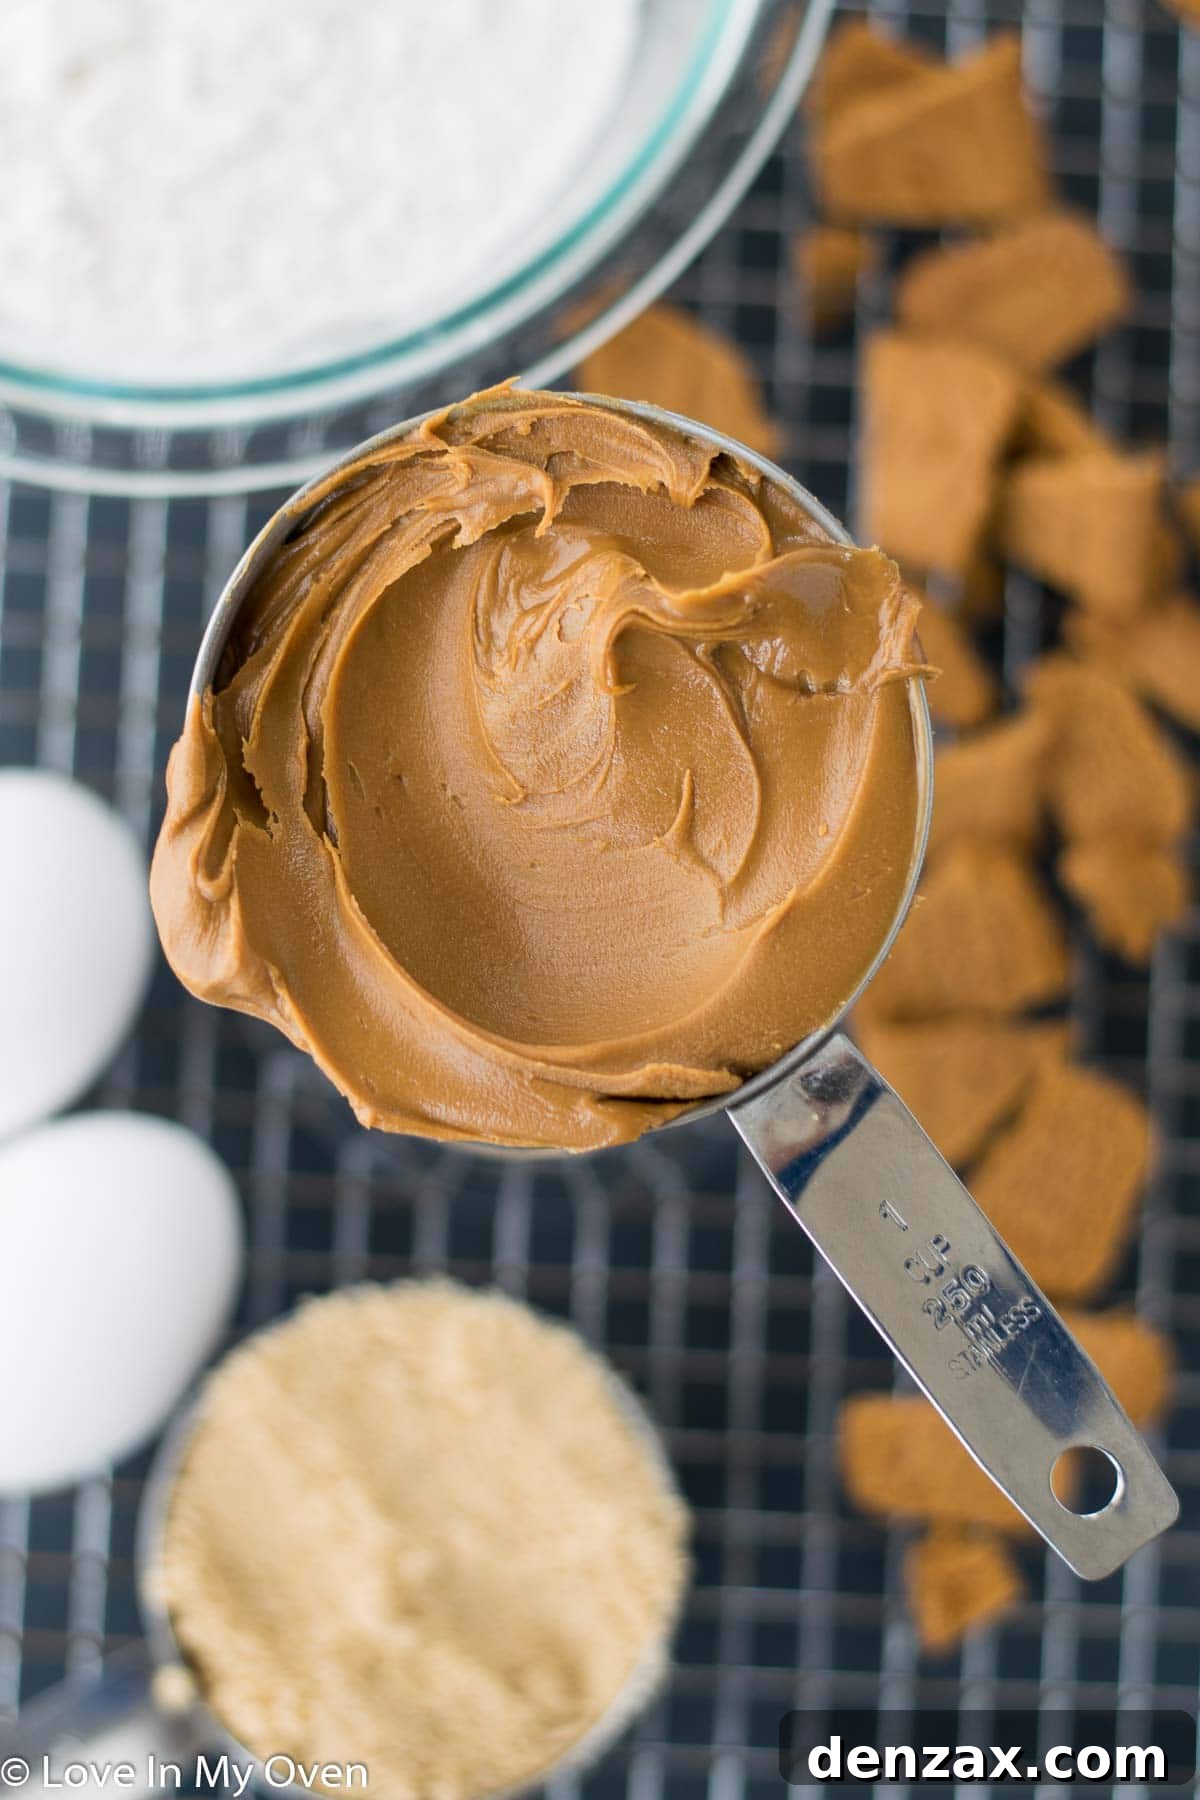
- Cookie Butter: Essential for that signature flavor. Ensure it’s at room temperature for easy blending.
- Egg + 1 Egg Yolk: The egg provides structure and moisture, while the extra egg yolk contributes to an incredibly rich, chewy texture.
- Unsalted Butter: Softened to room temperature for proper creaming. Unsalted butter gives you control over the salt content.
- Brown Sugar: Adds moisture, chewiness, and a deeper, caramelized flavor to the cookies.
- White Granulated Sugar: Contributes to the crispness of the cookie edges and helps with browning.
- Vanilla Extract: A crucial flavor enhancer that complements the spiced notes of the cookie butter. Use pure vanilla for the best taste.
Next, it’s time to prepare your dry ingredients. Sifting them together is a simple yet crucial step that helps to aerate the flour, preventing lumps and ensuring that the leavening agents and spices are evenly distributed throughout the dough. This promotes a uniform rise and consistent texture in your baked cookies. Gather these essential dry components:
- All-Purpose Flour: The structural backbone of the cookie. Measure it correctly by spooning it into a measuring cup and leveling it off.
- Ground Cinnamon: Enhances the inherent spiced flavor of the Biscoff cookie butter.
- Baking Soda: A leavening agent that reacts with the acidic brown sugar to help the cookies spread and become tender.
- Cornstarch: A secret ingredient that contributes to a wonderfully soft and tender crumb, helping to prevent a tough cookie.
- Salt: Balances the sweetness and enhances all the other flavors in the cookie.
In the bowl of your stand mixer, fitted with the paddle attachment, or using a reliable handheld electric mixer, combine the softened unsalted butter with both the brown and white sugars. Beat these ingredients on high speed for approximately 1 to 2 minutes, until the mixture transforms into a light, fluffy, and pale-yellow consistency. This process, known as creaming, incorporates air into the butter and sugar, which is vital for the cookie’s final texture. Be sure to scrape down the sides of the bowl periodically with a spatula to ensure everything is thoroughly combined.
Once the butter and sugars are perfectly creamed, add the egg and the extra egg yolk. Mix again until fully incorporated, about another minute, scraping down the bowl as needed. The eggs bind the ingredients and add moisture. Follow this by adding the pure vanilla extract, mixing just until combined. Finally, introduce the star ingredient: the room-temperature cookie butter. Mix thoroughly on medium-high speed until it’s completely smooth and evenly distributed throughout the butter-sugar-egg mixture, creating a beautifully uniform, creamy base.
With your wet ingredients fully combined, it’s time to introduce the sifted dry ingredients. Add these gradually, mixing on low speed until the flour streaks have just disappeared. The key here is to avoid overmixing. Overmixing flour develops the gluten, which can lead to tough, dry cookies. As soon as the dry ingredients are just incorporated, turn off the mixer. Use a sturdy large spoon or spatula to gently fold in the broken Biscoff cookies. These cookie pieces will provide a delightful textural contrast and an extra burst of concentrated Biscoff flavor in every bite, making these cookies truly exceptional.
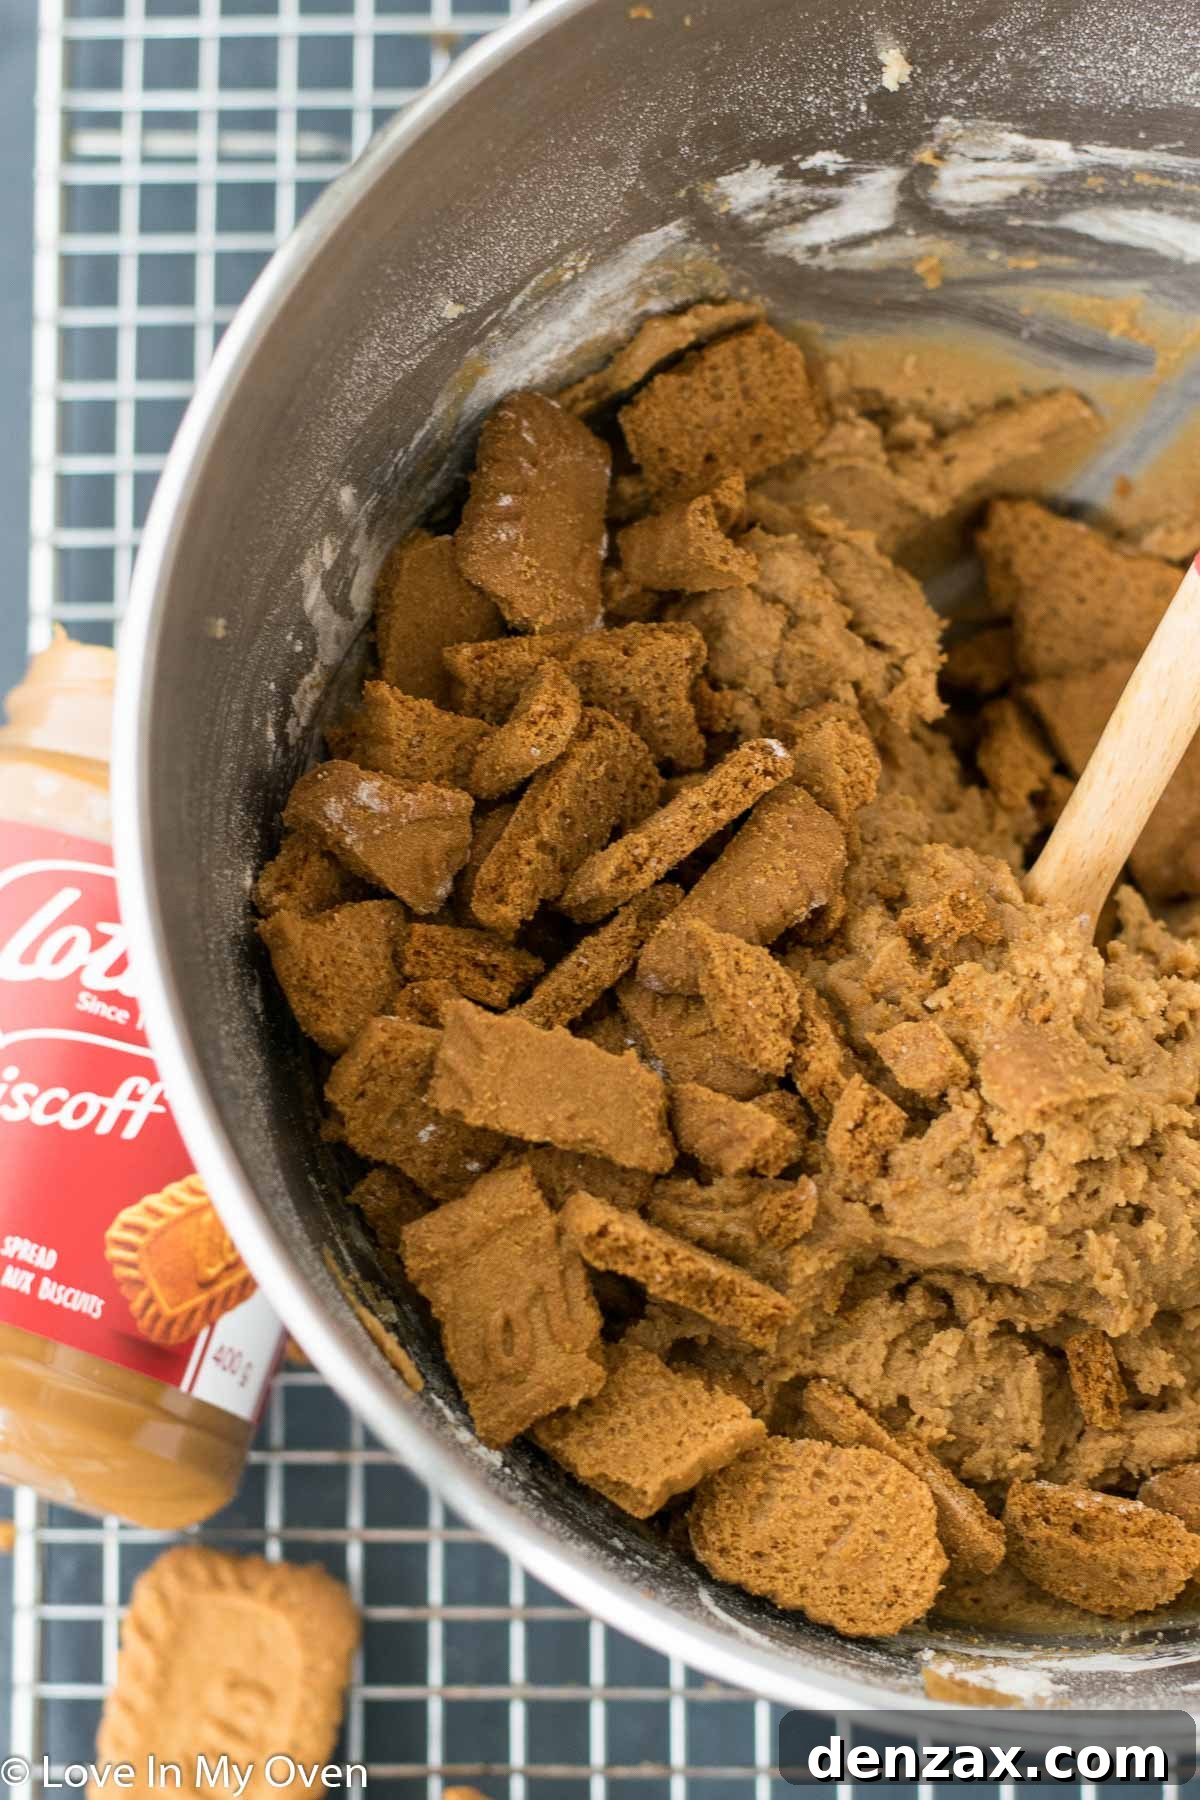
Now comes a crucial step for achieving the perfect chewy texture: chilling the cookie dough. Cover the bowl with plastic wrap and refrigerate the dough for a minimum of 30 minutes, and up to 1 hour. Chilling the dough solidifies the butter, which prevents the cookies from spreading too much during baking, ensuring they retain their thickness and chewiness. It also allows the flavors to meld and deepen, resulting in a more pronounced and delicious cookie butter taste.
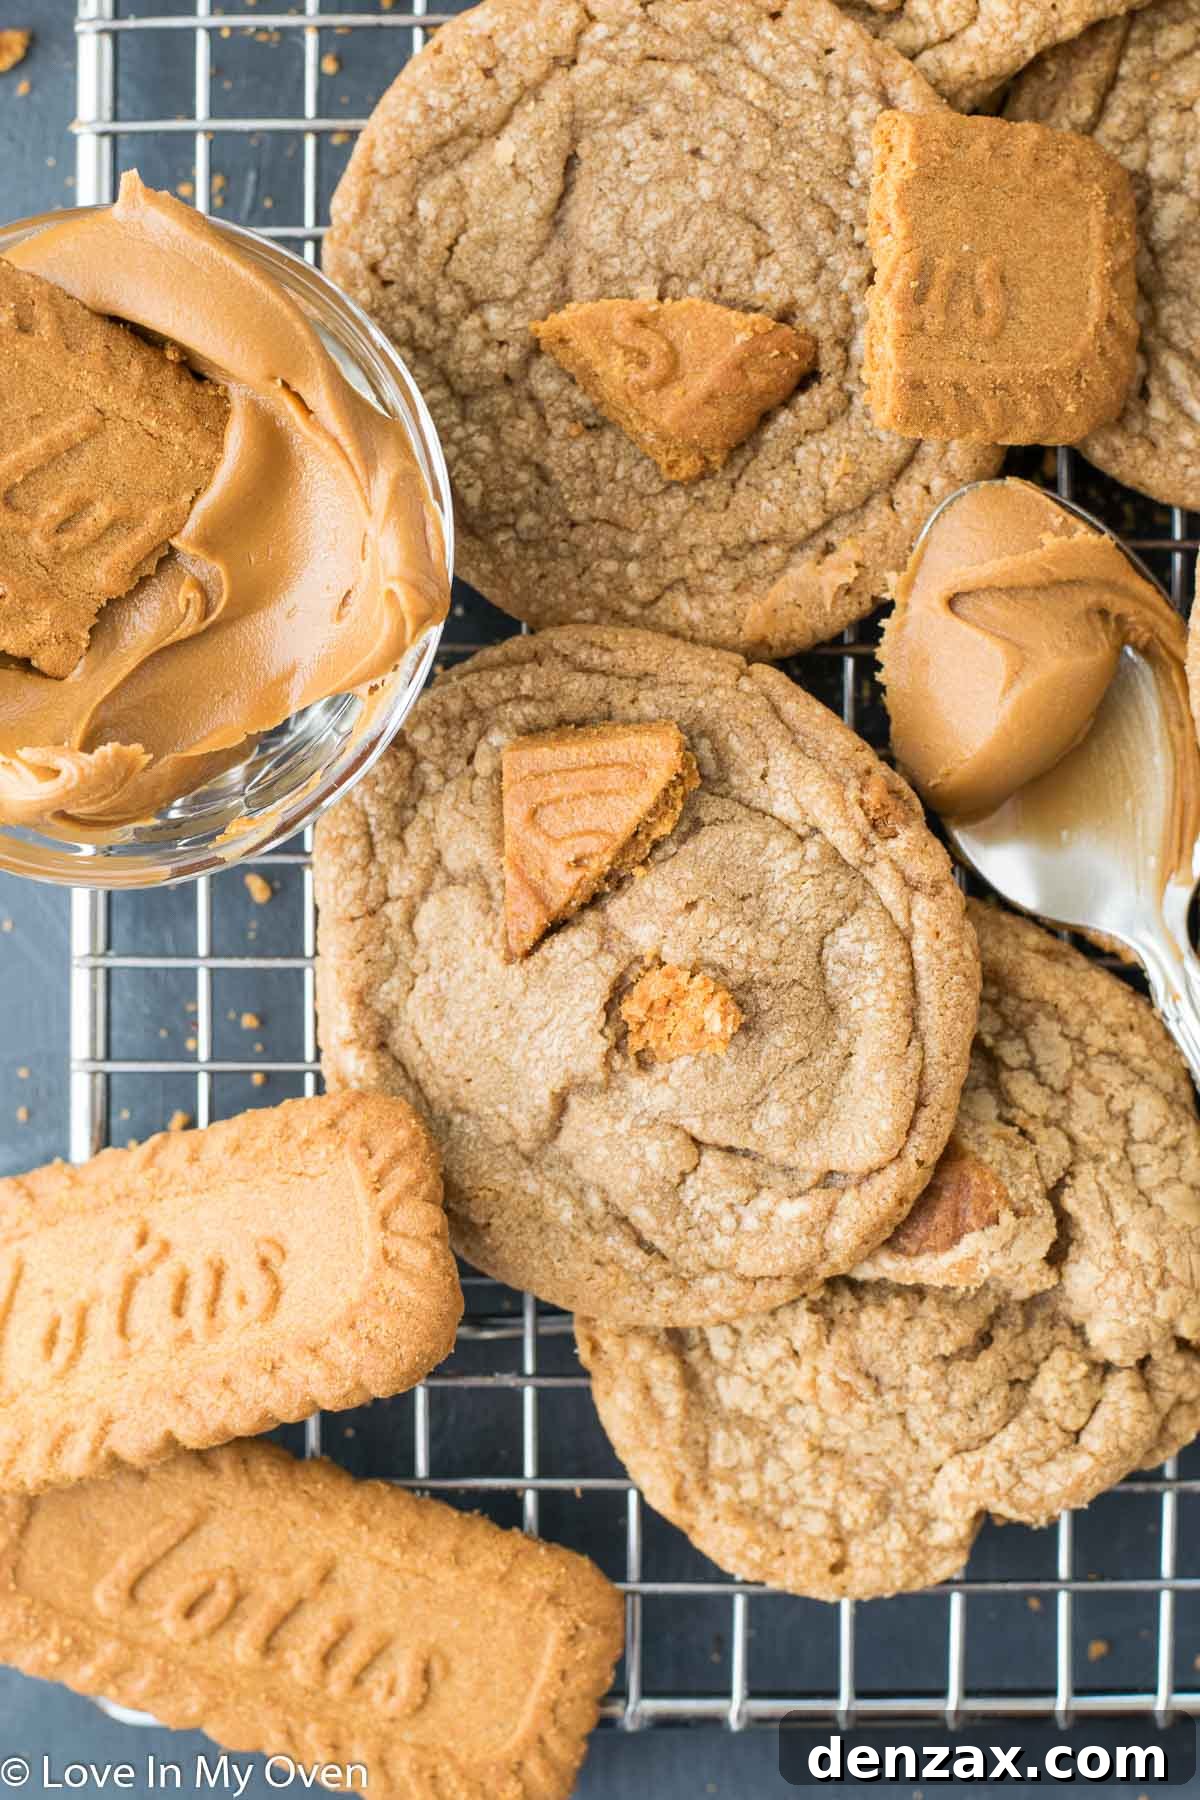
Once sufficiently chilled, remove the dough from the fridge. Using a large cookie scoop (about 2-3 tablespoons per scoop) ensures uniform cookies that bake evenly. Place the scooped cookie dough balls onto a parchment-lined baking sheet, leaving a few inches of space between each. Adequate spacing is essential to allow for proper air circulation and cookie spread, preventing them from merging into one giant cookie! (Unlike the photo above, which was arranged for aesthetic appeal, give your cookies some room to breathe!)

Bake the cookies in an oven preheated to 350°F (175°C) for 9-10 minutes. The baking time is relatively short, and it’s important not to overbake them if you desire a soft and chewy center. When you remove the cookies from the oven, they might appear slightly underbaked in the very center, perhaps a little puffy and pale. This is perfectly normal and actually ideal for that ultimate chewy texture. The edges should be set and lightly golden brown, but the centers will still look soft.
Allow the cookies to rest undisturbed on the hot baking sheet for a full 10 minutes after removing them from the oven. During this crucial resting period, residual heat from the baking sheet will continue to cook the cookies gently, allowing them to firm up and set properly without becoming dry or brittle. They will also spread out slightly more and settle into their characteristic crinkled appearance. This resting period is vital for achieving the perfect balance of crisp edges and a wonderfully soft, gooey center. After 10 minutes, carefully transfer the cookies to a wire rack to cool completely. This prevents them from becoming soggy on the bottom and allows for even cooling. It can be incredibly tempting to dive in while they are still warm and perfectly soft, but try your best to resist – the flavor deepens beautifully as they cool!

Storage and Freezing: Maximizing the Lifespan of Your Cookie Butter Cookies
One of the best qualities of these cookie butter cookies, besides their incredible flavor, is their excellent shelf life and freezer-friendly nature. Knowing how to properly store them ensures you can enjoy their deliciousness for days or even weeks to come.
Storing Baked Cookies at Room Temperature:
Once completely cooled, these cookies maintain their soft and chewy texture beautifully when stored in an airtight container at room temperature. They will remain fresh and delightful for approximately 4-5 days. After this period, while still perfectly safe and tasty, you might notice them beginning to crisp up slightly. To help them stay soft longer, you can place a slice of bread in the airtight container with the cookies; the cookies will absorb moisture from the bread. However, ensure the bread is fresh and replace it every couple of days to prevent mold.
Freezing Cookie Dough for Future Indulgence:
For ultimate convenience, these cookie butter cookies are fantastic for making ahead. You can easily freeze the scooped cookie dough balls. After scooping, place the dough balls on a parchment-lined baking sheet and flash-freeze them for about 1-2 hours until solid. Once firm, transfer the frozen dough balls to a freezer-safe zip-top bag or airtight container. Label with the date and baking instructions, and store in the freezer for up to 2 months. When a cookie craving strikes, simply bake them directly from frozen! Just add a few extra minutes (typically 2-4 minutes) to the regular baking time, keeping an eye on them until the edges are golden.
Freezing Baked Cookies for Longer Storage:
Alternatively, if you’ve baked a large batch and want to save some for later, you can freeze the cooled, baked cookies. Allow them to cool completely on a wire rack first. Then, place them in a single layer on a baking sheet and flash-freeze for about 30 minutes until firm. This prevents them from sticking together. Once firm, transfer them to a freezer-safe airtight container or bag, separating layers with parchment paper if stacking. They can be stored in the freezer for up to 2 months. To enjoy, simply thaw them at room temperature for an hour or so, or gently warm them in a microwave for a few seconds for that fresh-out-of-the-oven feel.
This recipe yields a generous batch of approximately 25-27 cookies, depending on the size of your cookie scoop. This makes them perfect for sharing, gifting, or ensuring you have plenty on hand for your own enjoyment!
Tips for Baking the Perfect Cookie Butter Cookies Every Time
Achieving cookie perfection is easier than you think with a few simple tips. These suggestions will help ensure your cookie butter cookies turn out incredibly soft, chewy, and bursting with flavor every single time:
- Measure Flour Correctly: Always spoon your flour into a measuring cup and level it off with a straight edge. Scooping directly from the bag can compact the flour, leading to too much flour and dry, crumbly cookies.
- Room Temperature Ingredients are Key: Ensure your butter, egg, and cookie butter are at true room temperature. This means butter should be soft enough to indent with a finger but not melted. This allows for proper emulsification and air incorporation during creaming, leading to a lighter, more tender cookie.
- Don’t Overmix Dry Ingredients: Once you add the flour mixture, mix on low speed only until the dry streaks disappear. Overmixing develops gluten, which can make your cookies tough and cakey instead of chewy.
- The Importance of Chilling: Don’t skip the chilling step! Chilling the dough solidifies the butter, preventing excessive spreading during baking and contributing to a thicker, chewier cookie. It also allows the flavors to deepen and meld.
- Use a Cookie Scoop: A cookie scoop ensures uniform cookie size, which is essential for even baking. Consistent size means all your cookies will be perfectly done at the same time.
- Parchment Paper is Your Friend: Always line your baking sheets with parchment paper. This prevents sticking, promotes even browning on the bottom, and makes for easy cleanup.
- Watch for Visual Cues, Not Just Time: Oven temperatures can vary. Look for the edges to be set and lightly golden, while the centers still look slightly soft and underbaked. This is the secret to a chewy center.
- Resting on the Baking Sheet: The 10-minute rest on the hot baking sheet is crucial. It allows the cookies to continue cooking gently from residual heat, firm up, and settle, resulting in the perfect texture.
- Get Creative with Add-ins: While the chopped Biscoff cookies are phenomenal, feel free to experiment. White chocolate chips or even dark chocolate chunks would pair beautifully with the spiced cookie butter flavor. A sprinkle of sea salt on top before baking can also enhance the sweetness.
Why These Cookie Butter Cookies Are an Absolute Must-Try
These cookie butter cookies are more than just a dessert; they’re an invitation to a unique flavor experience that stands out from the crowd. The marriage of soft, chewy cookie dough with the distinctive caramelized spice of Biscoff cookie butter is simply irresistible. Each bite delivers a harmonious blend of textures – crisp edges yielding to a tender, melt-in-your-mouth center, studded with delightful chunks of actual Biscoff cookies for an extra layer of crunch and flavor. They’re incredibly easy to make, yet taste like something from a gourmet bakery, making them perfect for both casual weeknight treats and impressing guests at any gathering.
Whether you’re a long-time Biscoff enthusiast or new to the wonders of cookie butter, this recipe is designed to captivate your taste buds. They are comforting, nostalgic, and utterly satisfying, embodying the essence of a warm, spiced hug. Their impressive shelf life and freezer-friendly nature mean you can always have a batch ready for unexpected cravings or last-minute entertaining. Go ahead, bake a batch, share them (or don’t!), and discover the pure magic of these homemade cookie butter cookies. They truly are a testament to how simple ingredients can create something extraordinary.
We absolutely adore cookies around here, and these cookie butter cookies fit right in! If you’re looking for more delightful inspiration, be sure to check out a few of my other favorite cookie recipes from the blog:
- Decadent Oatmeal Caramel Stuffed Cookies
- Sweet Raspberry Filled Sugar Cookies
- Comforting Pumpkin Cake Cookies
Print Recipe

Cookie Butter Cookies
5 Stars 4 Stars 3 Stars 2 Stars 1 Star
5 from 4 reviews
Author: Katherine | Love In My Oven
Total Time: 1 hour
Yield: 26–27 cookies 1x
Description
Soft and chewy with all of that Biscoff cookie flavor, these cookie butter cookies are magical! They taste delicious and are very simple to make.
Ingredients
Scale
- 1 1/4 cup all purpose flour
- 1 tsp baking soda
- 1 tsp cornstarch
- 1 tsp ground cinnamon
- 1/4 tsp salt
- 1/2 cup unsalted butter, softened to room temperature
- 1/2 cup brown sugar, packed
- 1/4 cup granulated white sugar
- 1 egg + 1 yolk
- 2 tsp pure vanilla extract
- 1 cup cookie butter, room temperature
- 1/2 cup chopped Biscoff cookies*
Instructions
- Preheat your oven to 350°F (175°C). Line two large baking sheets with parchment paper for easy cleanup and to prevent sticking. In a spacious mixing bowl, sift together the all-purpose flour, baking soda, cornstarch, ground cinnamon, and salt. Sifting ensures all dry ingredients are well combined and lump-free. Set this mixture aside.
- In the bowl of a stand mixer equipped with the paddle attachment, or using a handheld electric mixer, cream the softened unsalted butter with both the brown and granulated white sugars on high speed. Beat for approximately 1-2 minutes until the mixture is visibly lightened in color, fluffy, and well-aerated. Stop the mixer and scrape down the sides of the bowl with a spatula to ensure all ingredients are evenly incorporated. Next, add the whole egg and the extra egg yolk, beating for another minute until fully combined and smooth. Scrape down the bowl once more. Incorporate the pure vanilla extract, mixing just until it’s blended into the batter. Finally, add the room-temperature cookie butter and mix on medium-high speed until it’s completely smooth and thoroughly combined with the butter-sugar-egg mixture.
- With the mixer running on its lowest speed, gradually add the reserved dry ingredients to the wet mixture. Mix only until the flour streaks have just disappeared and the dough is combined. Be careful not to overmix, as this can lead to tough cookies. Once the dry ingredients are incorporated, remove the bowl from the mixer. Use a large wooden spoon or sturdy spatula to gently fold in the chopped Biscoff cookies. Cover the cookie dough tightly with plastic wrap and chill it in the refrigerator for a minimum of 30 minutes, and up to 1 hour. This chilling time helps the dough firm up and prevents the cookies from spreading too much during baking.
- Once the dough is adequately chilled, remove it from the fridge. Using a large cookie scoop (roughly 2-3 tablespoons per scoop), portion out the cookie dough into balls. Place these dough balls onto the prepared baking sheets, ensuring they are spaced about 2 inches apart to allow for proper spreading during baking. Bake the cookies in the preheated oven for 9-10 minutes. The cookies are ready when their edges are lightly browned and set, while the centers still appear slightly soft and puffy.
- Carefully remove the baked cookies from the oven. Leave the cookies on the hot baking sheets to rest for an additional 10 minutes. This crucial resting period allows the cookies to continue baking slightly from residual heat, firm up, and set their chewy texture. After 10 minutes, transfer the cookies from the baking sheets to a wire rack to cool completely. Allowing them to cool fully ensures the best texture and flavor development.
Store cooled cookies in a sealed, airtight container at room temperature. They will remain wonderfully fresh and chewy for 4-5 days. For longer storage, cookies can be stored in the freezer for up to 2 months; note that their texture might become slightly crispier after freezing and thawing.
Notes
*Adding chopped Biscoff cookies is optional, but highly recommended for an extra boost of flavor and delightful texture! I simply break them into roughly 1/2-inch pieces by hand.
- Prep Time: 20 minutes
- Cook Time: 10 minutes
- Category: cookies
- Method: oven bake
- Cuisine: american