
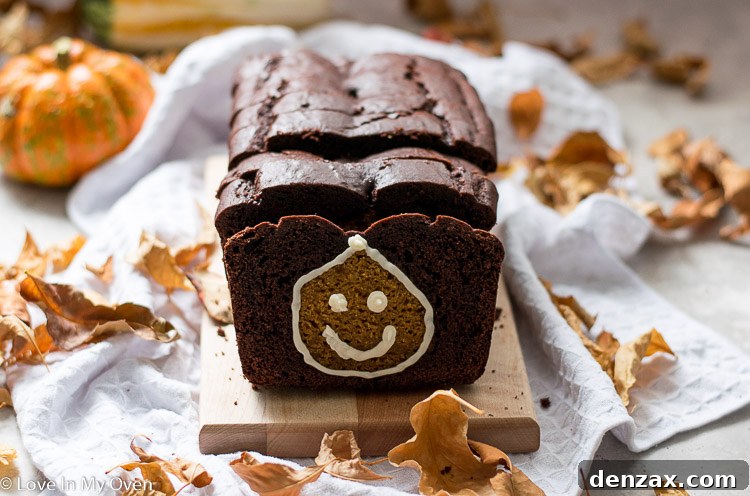
Discover the secret to a truly delightful pumpkin chocolate loaf – a charming surprise awaits inside! This incredibly moist and easy-to-make pumpkin bread promises to enchant every palate.
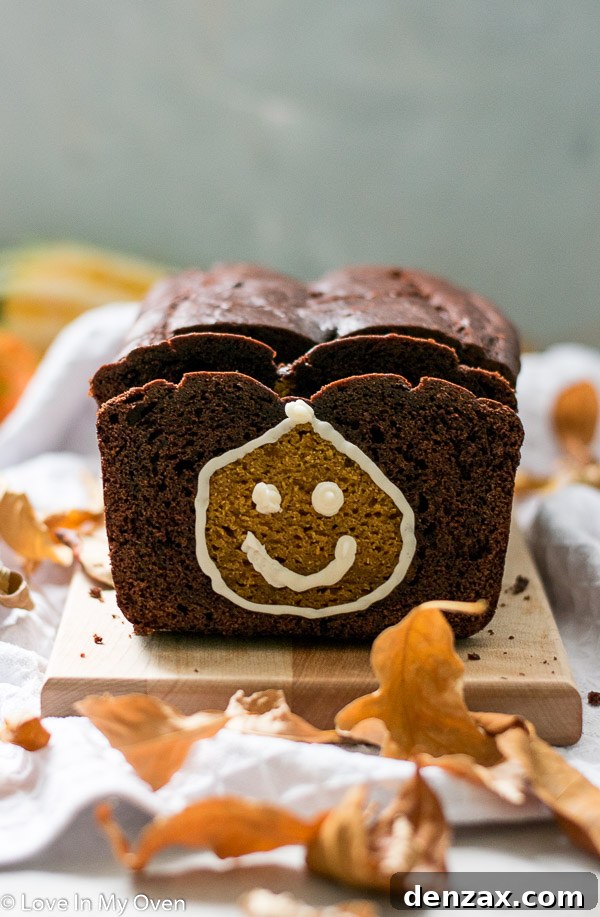
*Please note* this post was originally published in 2017. Photos have been updated and text revised; the beloved recipe remains unchanged.
There’s something truly magical about baking, isn’t there? It’s more than just following a recipe; it’s an act of creation, a moment of culinary artistry, and a way to spread warmth and joy. This feeling was wonderfully reinforced just recently when I indulged my passion for baking by attending a cupcake decorating class. Hosted by Crave Cupcakes, a local gem renowned for creating the most exquisite cupcakes in the city, it was an experience that truly highlighted the beauty of presentation and the power of a perfectly crafted treat.
Crave Cupcakes has an almost iconic status; the mere sight of their distinctive packaging often elicits an excited “oooh, Crave!” from anyone who recognizes it. And for good reason – their cupcakes, though a tad pricier, are absolutely worth every penny. During the class, I had the fantastic opportunity to learn advanced decorating techniques, including the intricate reverse rosette and their signature two-toned Crave swirl. The class was not only incredibly fun and informative, but they also generously provided mini cupcakes to keep our creative energies (and hunger) at bay throughout the session. Despite a slight buttercream overdose by the end of the night, it was a truly enriching way to spend an evening, and it’s certainly sparked some new ideas for beautiful desserts to feature on the blog in the future. This experience served as a perfect reminder that sometimes, the most delightful surprises are those crafted with a little extra care and creativity.
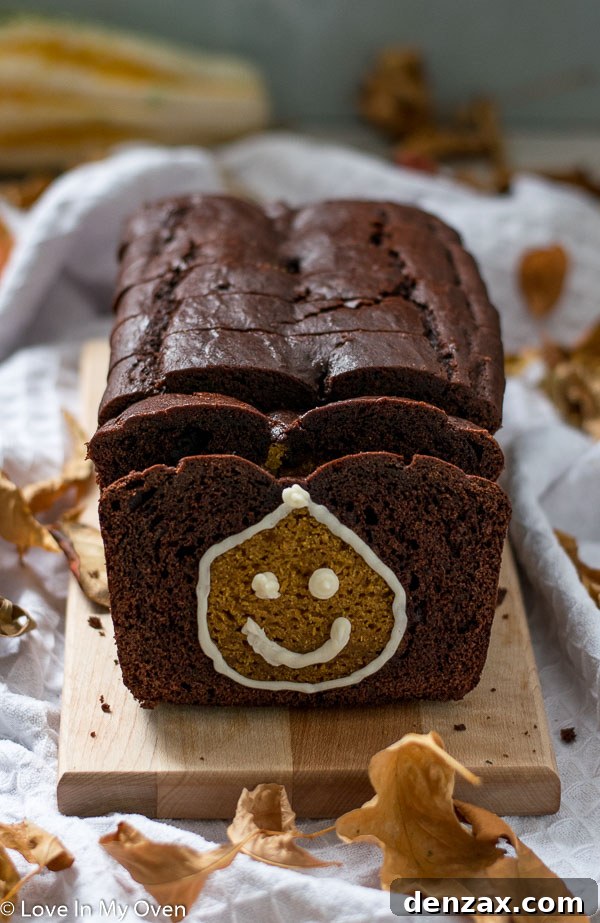
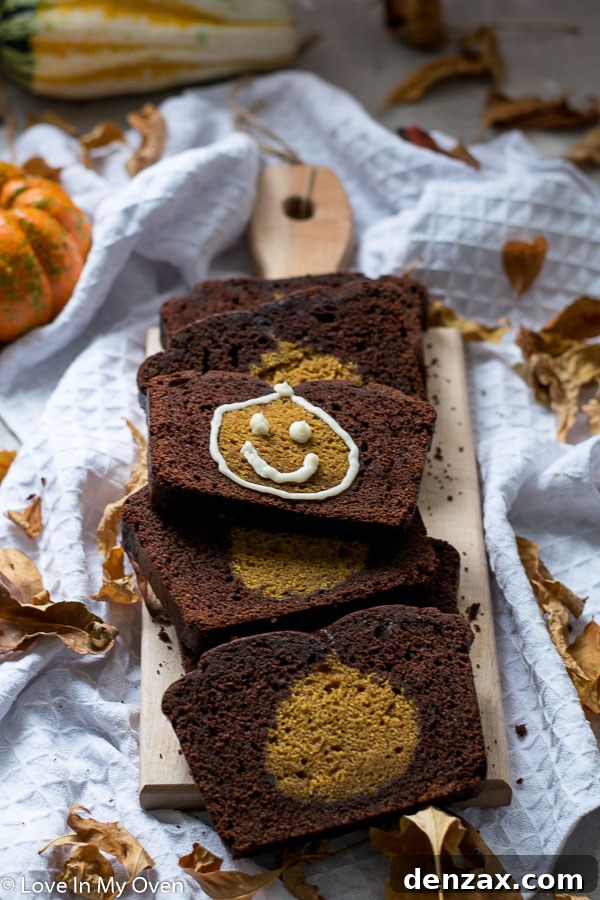
And speaking of delightful surprises, let me introduce you to the star of today’s post: this incredible Pumpkin Chocolate Loaf! It’s not just any loaf; it’s a “peekaboo” loaf, hiding a charming secret within its moist, rich interior that is guaranteed to bring smiles.
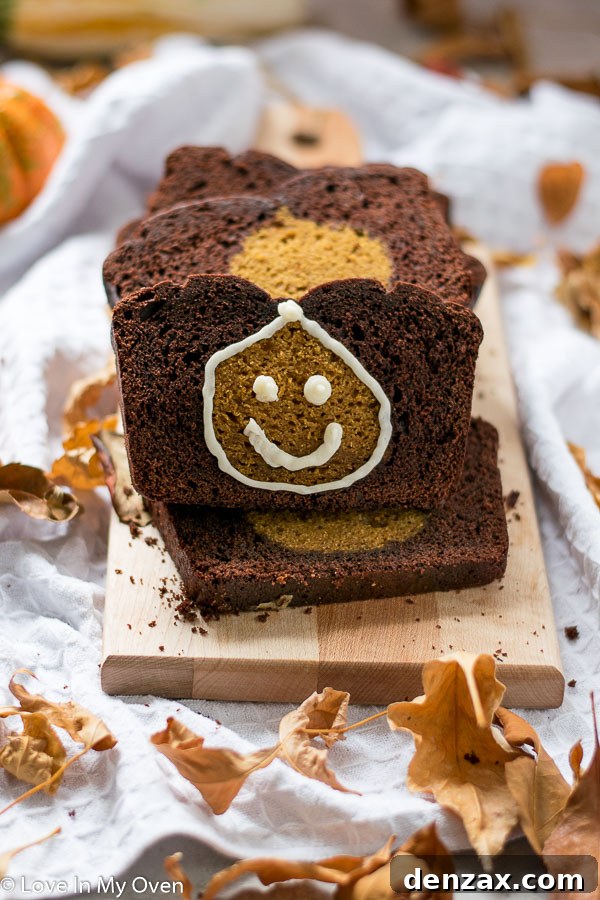
Mastering the Art of the Peekaboo Loaf: A Step-by-Step Guide
At first glance, creating a peekaboo loaf might seem like a daunting task, something reserved for expert bakers. However, I assure you, it’s surprisingly easy and incredibly rewarding, though it does require a bit of patience and dedicated time. The magic lies in baking two distinct loaves and then artfully combining them to reveal a hidden shape in every slice. For this recipe, I chose a pumpkin shape for the interior. Why pumpkin? Well, besides having a perfect pumpkin cookie cutter on hand, it perfectly aligns with the cozy, pumpkin-filled season we’re currently enjoying. And what better to complement the warm, earthy notes of pumpkin than the deep, comforting richness of chocolate? This chocolate loaf recipe is a personal favorite, often my go-to when strong chocolate cravings strike, allowing me to enjoy a decadent treat under the guise of a “loaf” rather than a full-fledged cake, making it feel a little less indulgent (though no less delicious!).
Before you embark on this delightful peekaboo baking adventure, make sure to allocate sufficient time for the entire process. You’ll need to bake the first loaf (the pumpkin loaf, in this case) and allow it to cool completely before you can even begin cutting out your shapes. This cooling period is crucial for achieving clean, well-defined cut-outs without crumbling the bread. Think of it as a pleasant, half-day baking project – perfect for a relaxed weekend afternoon.
Both the pumpkin and chocolate loaves are baked in a standard 9×5 inch loaf pan, ensuring uniformity in size. The most critical aspect to remember throughout this creative baking journey is the selection of your cookie cutter. It must be short enough to fit neatly within the height of your baked loaf. There’s nothing more disappointing than choosing an adorable, intricate pattern only to find that the top half gets sliced off! Opt for a cutter that allows for a small margin at the top and bottom of your loaf slices to ensure the full shape is revealed.
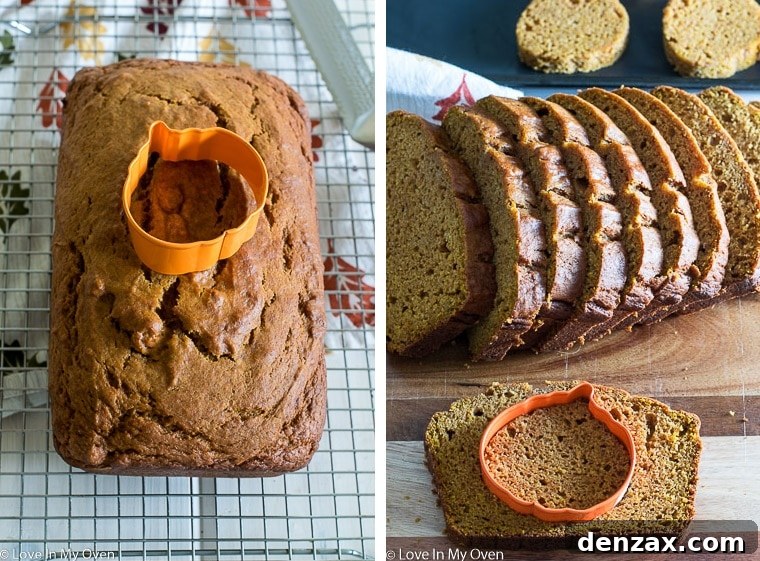
Once your pumpkin loaf has cooled down completely – this step cannot be rushed – carefully slice it into uniform 1-inch thick pieces. Now comes the fun part: preparing your cut-outs! Using your chosen cookie cutter, gently press firmly into each pumpkin loaf slice to create your desired shapes. Arrange these delicate cut-outs on a baking sheet lined with parchment paper or a silicone baking mat. This ensures they won’t stick and are easy to handle. Pop the baking sheet into the freezer for approximately one hour. Freezing the cut-outs is a vital step; it helps them firm up, preventing them from losing their shape and color during the second bake when they are enveloped in the chocolate batter.
While your pumpkin cut-outs are chilling, it’s the perfect time to prepare your rich, decadent chocolate loaf batter. This ensures a smooth transition to the next baking phase. When the frozen cut-outs are ready, prepare your loaf pan for the final assembly. Line it meticulously with parchment paper, leaving an overhang on the sides to easily lift the finished loaf, and then generously spray it with a non-stick cooking spray. This double precaution guarantees a clean release of your beautifully crafted peekaboo loaf.
Pour just enough chocolate batter into the bottom of the prepared pan to create a thin, even layer, covering the base. This layer acts as a foundation for your hidden design. Next, carefully arrange your frozen pumpkin cut-outs in a neat row down the center of the pan. Ensure you leave a margin of about 1 to 2 inches at each end of the pan; this space helps to encapsulate the design fully and creates a sturdy, cohesive loaf. You might find you have a few cut-outs left over – a bonus snack for the baker! Finally, pour the remaining chocolate batter evenly over the top of the cut-outs, making sure they are completely covered and submerged. Gently tap the pan a few times on the counter to release any air bubbles and ensure the batter settles around the shapes. Now, it’s ready for the oven!
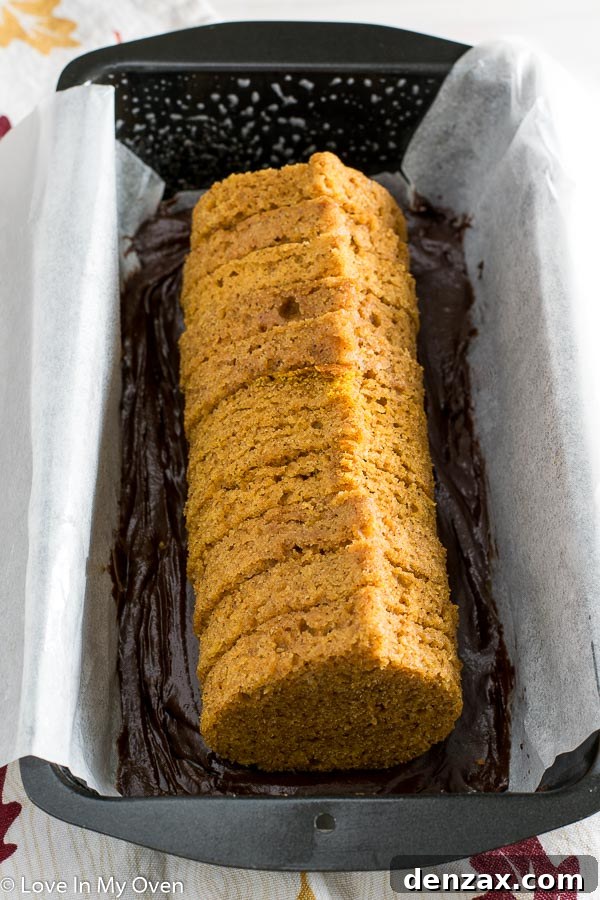
Beyond the Pumpkin: Endless Creative Possibilities for Your Peekaboo Loaf
While a pumpkin shape beautifully captures the essence of autumn, the beauty of the peekaboo method lies in its incredible versatility. You are absolutely not confined to using a pumpkin shape! This clever technique can be adapted to any flavor combination of loaves, as long as both recipes are designed for a standard 9×5 inch loaf pan. The possibilities are truly boundless, limited only by your imagination and your cookie cutter collection.
Imagine the joy of a Christmas-themed loaf, perhaps with festive tree or star shapes hidden within a gingerbread or cranberry bread. Or consider a springtime treat with delicate flower cut-outs baked into a lemon poppy seed or berry loaf. For a child’s birthday, vibrant animal shapes could be embedded in a funfetti loaf. The key is to choose contrasting colors and complementary flavors to maximize both the visual appeal and the taste experience. This makes the peekaboo loaf an ideal showstopper for any occasion, allowing you to personalize your baking to suit any holiday, celebration, or simple craving.
If you’re planning to serve this special loaf to guests, I highly recommend keeping the surprise a secret until the very last moment. Slice it right in front of them, and watch their faces light up as the hidden image is revealed. Not only is the unexpected visual a fun trick, but the delightful two-toned flavor profile – the sweet spice of pumpkin perfectly harmonizing with the rich cocoa of chocolate – makes for an unforgettable culinary experience. It’s a guaranteed conversation starter and a truly unique way to elevate your baking.
As we look forward to the weekend ahead, I hope you have a lot of excitement planned – and perhaps, a cozy evening of Netflix watching, ideally with a slice of this amazing loaf in hand! Happy baking!
XO
If you adore pumpkin, you’ll absolutely love my pumpkin cake cookies! They’re another fantastic way to enjoy the season’s favorite flavor.
And for more delightful loaf recipes to inspire your baking adventures, be sure to check out these other favorites from my kitchen:
- Raspberry Chocolate Chip Banana Bread
- Vanilla-Bean Rooibos Bread
- Healthier Banana Bread

Pumpkin Chocolate Peekaboo Loaf
5 from 1 review
- Author: Katherine
- Total Time: 4 hours 40 minutes
- Yield: 1 loaf
Description
The best part about this pumpkin chocolate loaf? The surprise inside! This easy, delicious pumpkin bread is super moist and is sure to delight!
Ingredients
Pumpkin Loaf
- 2 cups all-purpose flour
- 1/2 tsp baking powder
- 1 tsp baking soda
- 1 tsp cinnamon
- 1 tsp nutmeg
- 1/2 tsp all-spice
- 1/2 tsp salt
- 2 large eggs, room temperature
- 3/4 cup oil (canola, grapeseed)
- 3/4 cup brown sugar
- 1/2 cup white sugar
- 1 3/4 cups pumpkin puree (not pumpkin pie filling)
Chocolate Loaf
- 1 3/4 cups all-purpose flour
- 3/4 cup cocoa powder (not Dutch-processed)
- 1 tsp baking powder
- 1/2 tsp baking soda
- 1/2 tsp salt
- 1/2 cup unsalted butter, softened to room temperature
- 1 cup brown sugar
- 1/2 cup white sugar
- 2 large eggs, room temperature
- 1 tsp pure vanilla extract
- 1 cup milk (1%, 2% or non-dairy)
Instructions
- Preheat the oven to 350 F (175 C) and line a 9×5″ loaf pan with parchment paper and/or spray with non-stick cooking spray.
- In a large mixing bowl, whisk together the flour, baking powder, baking soda, cinnamon, nutmeg, all-spice, and salt. In another large bowl, lightly beat the eggs, then whisk in the oil, and both sugars. Add the pumpkin puree and stir thoroughly. Slowly add the dry ingredients to the wet, stirring until just combined. Pour the batter into the prepared loaf pan and place into the pre-heated oven for 50-55 minutes, or until a toothpick inserted in the center comes out clean.
- Allow the loaf to cool for 10 minutes in the pan before removing and cooling completely on a wire rack. Once cooled, slice the loaf into 1″ slices. Using your chosen cookie cutter, cut out the shapes and place them on a baking sheet prepared with parchment paper or a silicone baking sheet. Place the shapes in the freezer for 1 hour.
- During the last 15 minutes of freezing time, prepare the chocolate loaf batter. Preheat the oven to 350 F (175 C) and prepare another 9×5 loaf pan by lining with parchment paper and/or spraying with non-stick spray.
- Combine the dry ingredients together in a mixing bowl. In the bowl of a stand mixer fitted with the paddle attachment, or using an electric mixer, beat the butter on high until soft and fluffy, about 1 minute. Add in both sugars and beat until fluffy, 1-2 minutes. Add the eggs one at a time, and then the vanilla extract, beating in between.
- Add half of the dry ingredients to the wet ingredients, with the mixer running on low. Add half of the milk, then the remaining dry ingredients, slowly mixing together. Add the remaining milk and mix on low until well combined.
- Remove the frozen cut-outs from the freezer. Add just enough chocolate batter to the prepared loaf pan to cover the bottom. Line up the frozen cut-outs in the center of the pan, leaving 1 to 2″ at each end of the pan (you may have a few cut-outs leftover). Pour the remaining batter evenly over the top of the cut-outs, ensuring the pumpkin loaf is covered. Place the pan in the oven for 50-55 minutes, or until a toothpick inserted in the center comes out clean.
- Cool the loaf in the pan for 10 minutes, before removing and cooling completely on a wire rack. Slice, and serve.
Loaf will keep at room temperature, in a sealed container for 3-4 days, or 6-7 days in the fridge. The loaf can also be frozen (once cooled) for up to 2 months.
Notes
- Choose a cut-out that is only slightly higher than the height of your loaf pan to ensure it will fit.
- Method adapted from The Itsy Bitsy Kitchen.
- Prep Time: 40 minutes
- Cook Time: 2 hours
- Category: bread
- Method: oven bake
- Cuisine: American