
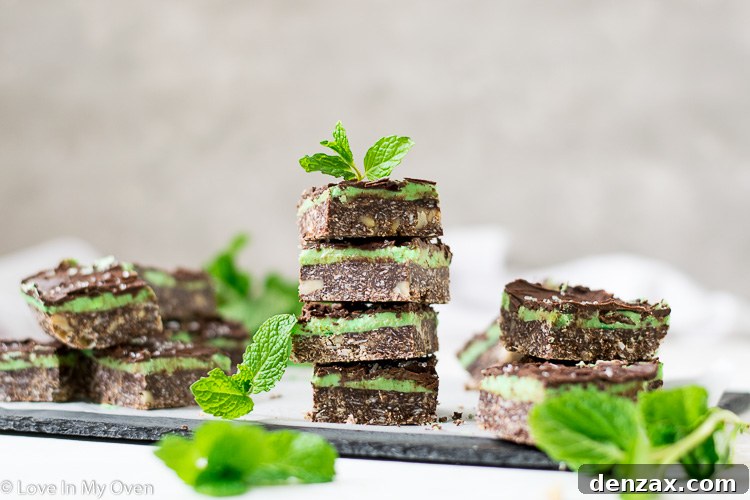
The Ultimate Mint Nanaimo Bars: A Refreshing Twist on a Canadian Classic
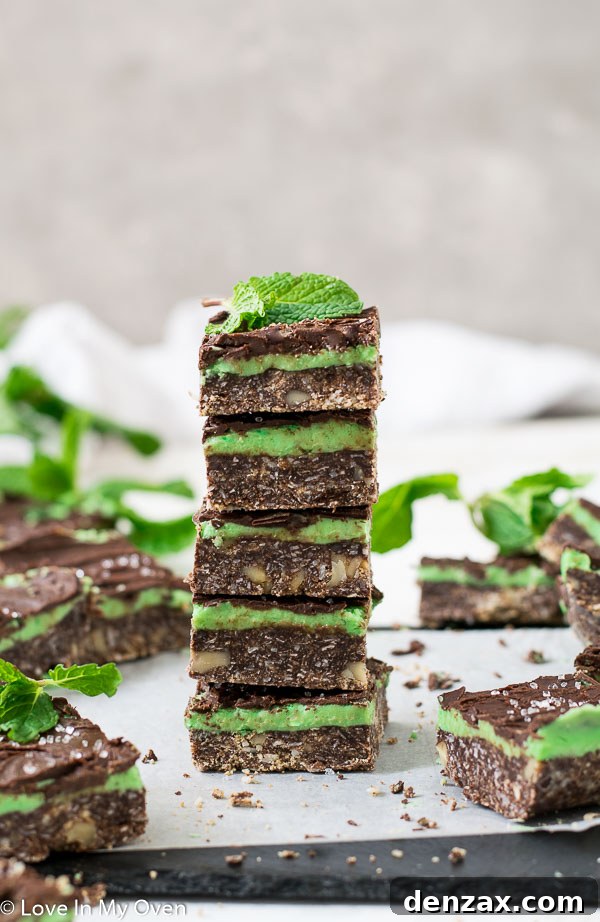
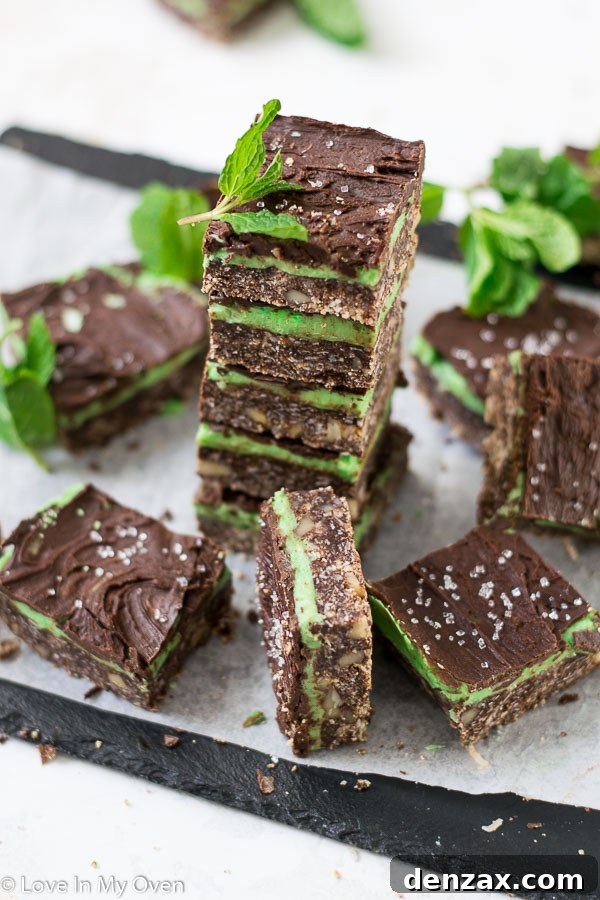
Prepare to fall in love with these Mint Nanaimo Bars! This recipe delivers the BEST mint chocolate Nanaimo bar experience, offering a delightful and vibrant twist on Canada’s beloved traditional no-bake dessert. A true family favorite, these minty squares are perfect for any occasion.
*Please note: This post, originally published in March 2017, has been updated with enhanced text and new photos. The classic recipe, however, remains exactly the same for you to enjoy!
As St. Patrick’s Day approaches, the call for vibrant green treats becomes irresistible. While I’ve already tackled a celebratory green recipe – my famous Green Monster Donuts – I couldn’t resist throwing another festive, emerald-hued delight into the mix. And what better candidate than these incredibly refreshing Mint Nanaimo Bars?
These decadent mint chocolate squares immediately came to mind. They’re not just a treat; they’re a celebration, bringing a burst of color and a cool, invigorating flavor to any dessert spread. Imagine the delight on faces when they bite into these beautiful, layered bars!
A Journey to Nanaimo: Tracing the Origins of a Canadian Icon
Have you ever had the pleasure of visiting Nanaimo, British Columbia? I have! It was a memorable family trip back in 2016, a lovely little vacay to Vancouver Island before our new baby arrived. Despite the chilly and windy weather, it was a fantastic adventure, even taking us to the stunning Tofino beach (please excuse the slightly grainy cell phone photos!).


One rainy day, seeking an indoor activity, we stumbled upon the Nanaimo Museum. My son, Etienne, absolutely adores museums, so it was a perfect choice! While much of my time was delightfully spent chasing a curious toddler who had discovered the endless joy of automatic doors, I did manage to soak in some of the exhibits. I distinctly remember reading about the fascinating history of the original Nanaimo bar and how it genuinely originated in this charming city. Of course, it’s always the food-related sections that truly stick in my mind! I even snapped a picture of the exhibit:
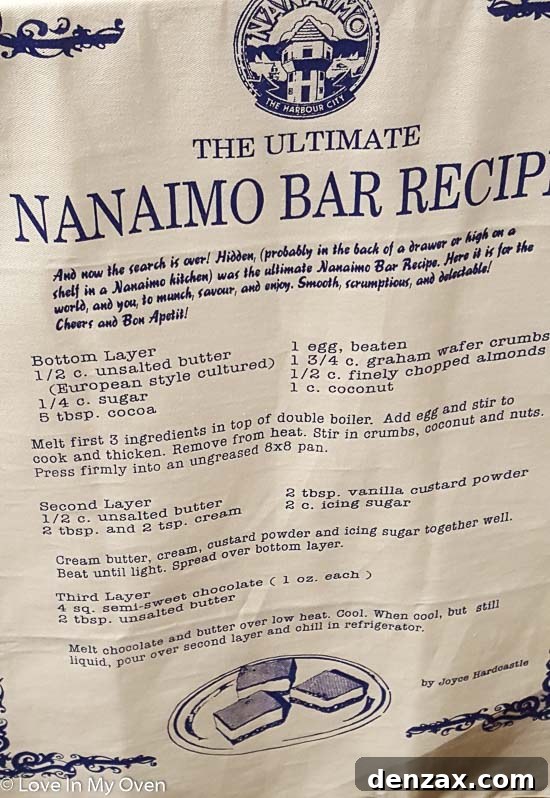
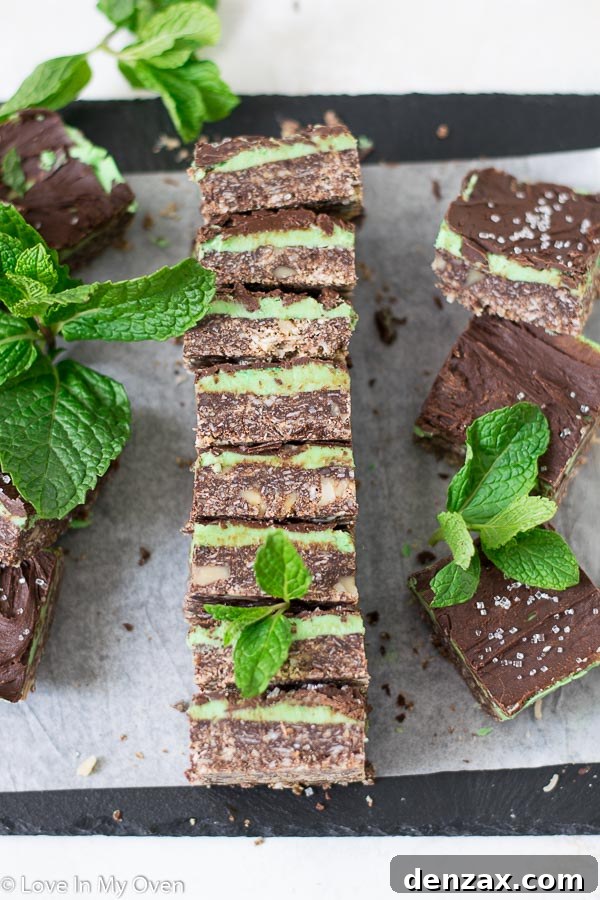
The Nanaimo bar is more than just a dessert; it’s a Canadian cultural icon, a no-bake wonder consisting of three distinct layers: a crumbly chocolate-coconut base, a rich custard-flavored buttercream, and a smooth chocolate ganache topping. It’s truly a testament to simple ingredients coming together to create something extraordinary. Understanding its roots in Nanaimo makes enjoying each bite even more special.
What Makes Mint Nanaimo Bars Uniquely Delicious?
Our Mint Nanaimo Bars stay true to the beloved structure of the original, but with a few delightful twists that elevate them to a new level of indulgence. The most obvious difference, of course, is their vibrant green hue and invigorating peppermint flavor. Instead of the traditional almonds in the base, we opt for chopped walnuts, which add a slightly different texture and earthy note that beautifully complements the mint and chocolate. This small change makes a significant impact on the overall flavor profile, creating a more complex and satisfying experience.
These bars have been a cherished family favorite for generations in my own family. My mom would often prepare them around Christmas time, and they were always the first to disappear from the dessert tray. The fun, festive green icing alone is enough to captivate anyone, but once you introduce that cool, crisp peppermint flavor, these bars transform into something truly extraordinary – far beyond your average Nanaimo bar. The combination of rich, dark chocolate with refreshing mint creates a harmonious balance that is both decadent and uplifting. It’s a flavor pairing that consistently wins hearts and palates, making these bars perfect for holiday gatherings or simply as a special treat.
Crafting Perfection: How to Make Mint Nanaimo Bars
Making these Mint Nanaimo Bars is a rewarding process, resulting in a stunning and incredibly delicious no-bake dessert. Each layer is simple to prepare, and the assembly is straightforward, making it an accessible recipe for bakers of all skill levels. Here’s a detailed guide to creating these irresistible treats:
The Crunchy Chocolate Base Layer
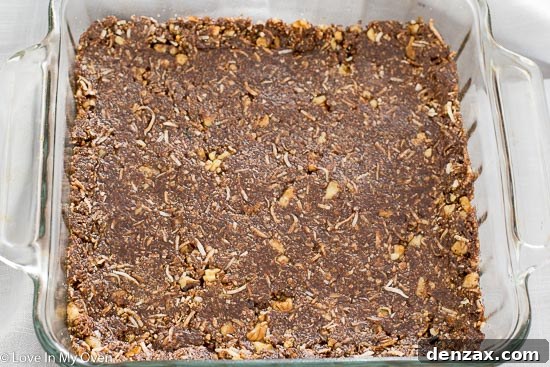
We begin with the foundation: a rich, crunchy chocolate base. This layer provides the perfect textural contrast to the smooth filling and topping. In a medium-sized bowl, combine finely chopped walnuts, shredded coconut, and crushed graham cracker crumbs. The graham cracker crumbs bind the base, while the coconut adds a tropical chewiness, and the walnuts provide a satisfying crunch. These ingredients are foundational to the classic Nanaimo bar texture, providing the perfect canvas for our minty twist.
Next, in a saucepan, gently melt together unsalted butter, a touch of sugar (coconut palm sugar offers a subtle caramel note, but granulated sugar works just as well), and cocoa powder. Stir this mixture until it’s beautifully smooth and glossy. Allow it to cool slightly for about five minutes – this crucial step prevents the beaten egg from cooking when added. Once cooled, stir in the vanilla extract and the beaten egg, ensuring everything is well combined. This egg helps to bind the base firmly once chilled.
Pour the liquid chocolate mixture over your dry ingredients and stir until every crumb is thoroughly coated. Transfer this rich mixture into a generously greased 8×8 inch pan (lining it with parchment paper is also an excellent option for easy removal). Using the back of a spoon or your hands, firmly press the mixture down to create an even, compact layer. This is key to a stable base. Once pressed, refrigerate the pan for at least 30 minutes to allow the base to firm up completely.
The Fluffy Peppermint Filling: The Heart of the Mint Nanaimo Bar
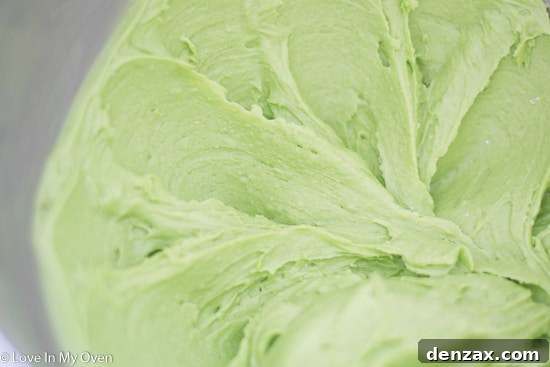
Now for the star of the show: the vibrant, smooth, and utterly delicious peppermint filling. This is where the “mint” in Mint Nanaimo Bars truly shines! To start, cream together softened unsalted butter, icing sugar, and custard powder. Custard powder is a magical ingredient here; it’s similar to instant vanilla pudding mix and is essential for achieving the signature thick, smooth, and slightly custardy texture of Nanaimo bar filling. If you don’t have it on hand, it’s worth seeking out for the authentic experience.
To achieve that stunning green color without artificial dyes, I use a simple spinach puree. Don’t worry, you won’t taste the spinach – it’s purely for the natural vibrant hue! To make it, simply blend a handful of fresh spinach with about 1/4 cup of water until it forms a smooth, brilliant green liquid. Add this puree sparingly, about a tablespoon at a time, to your creamed mixture until you reach your desired shade of green. If the filling becomes a little too loose from the spinach puree, you can add a touch more icing sugar to restore its perfect consistency.
Finally, stir in the pure peppermint extract. I typically use a full teaspoon for a robust mint flavor that beautifully complements the chocolate, but you can adjust this amount to your personal preference for a more subtle hint of mint. Spread this dreamy, peppermint-infused filling evenly over the chilled chocolate base. Once again, return the pan to the refrigerator for another 30 minutes to allow the filling to set and firm up.
The Decadent Chocolate Topping
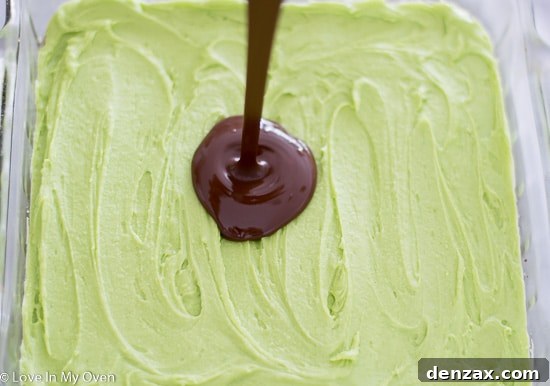
The final layer is a rich, glossy chocolate topping that seals in all the goodness. In a microwave-safe bowl, combine chopped chocolate (good quality chocolate makes a difference here!) and a teaspoon of unsalted butter. Heat this mixture in short bursts, typically 30-second increments, stirring well after each interval. This method helps to prevent the chocolate from seizing and ensures a smooth, melted consistency. Alternatively, you can melt it gently over a double boiler.
Once the chocolate and butter are fully melted and smooth, spread this luxurious topping evenly over the firm peppermint filling. Work quickly as the chocolate will begin to set as it cools. Return the pan to the refrigerator for one last chill, about 30 minutes, or until the chocolate topping is completely hardened and ready for slicing.
Once the chocolate topping is firm, carefully remove the bars from the pan and cut them into 16 squares. A sharp knife, wiped clean between cuts, will give you the cleanest edges. Serve these magnificent Mint Nanaimo Bars and watch them disappear!
Storage and Serving Suggestions
One of the best qualities of these Mint Nanaimo Bars, beyond their incredible taste, is their excellent shelf life. They are perfect for making ahead, which is a huge bonus when planning for parties or holiday gatherings. These delightful bars will stay fresh in an airtight container in the refrigerator for up to a week. This means you can prepare them days in advance and simply slice and serve when needed, making entertaining a breeze. For longer storage, you can freeze them in a sealed container for up to two months. Just be sure to separate layers with parchment paper to prevent sticking. When ready to enjoy, simply thaw them in the refrigerator.
If you’re serving them as part of a festive holiday tray or at an event, they’ll hold up perfectly at room temperature for the day, though chilling them slightly before serving enhances their firm texture and refreshing mint flavor. These bars are not only a fantastic dessert but also a beautiful addition to any dessert buffet, offering a burst of color and a unique flavor profile that stands out. Whether it’s for St. Patrick’s Day, Christmas, or just a sweet craving, these Mint Nanaimo Bars are always a hit!
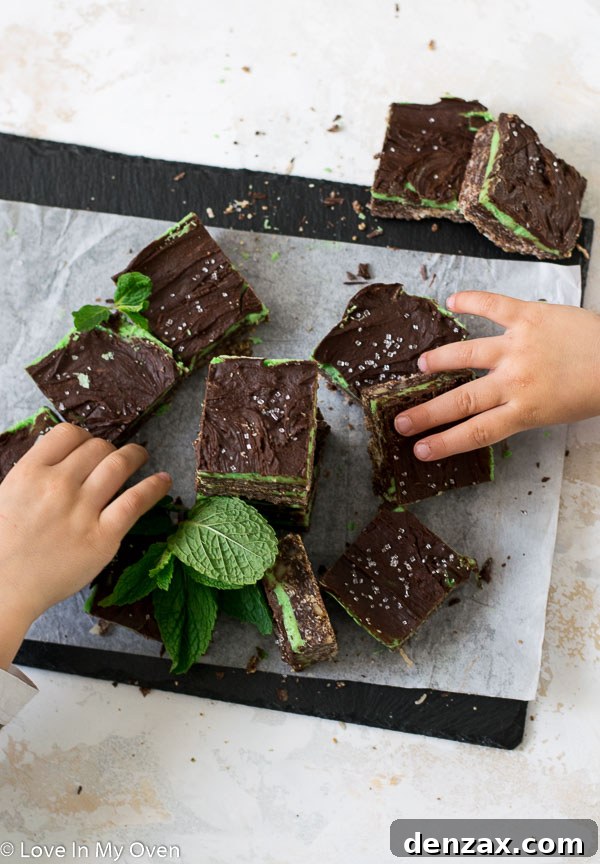
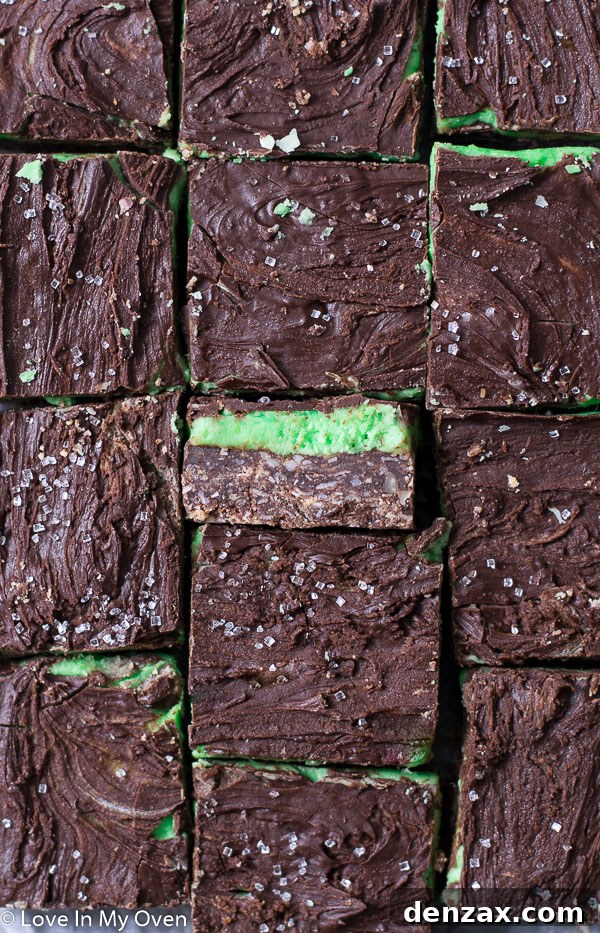
If you’re a fan of rich, layered desserts, you might also enjoy these other delightful brownies and bars:
- Irresistible Chocolate Caramel Shortbread Bars
- Classic Chewy Butterscotch Brownies
- Decadent Chocolate Caramel Bliss Bars
Print Recipe
Mint Nanaimo Bars
5 Stars
4 Stars
3 Stars
2 Stars
1 Star
5 from 2 reviews
- Author: Katherine
- Total Time: 1 hour 30 minutes
- Yield: 16 bars 1x
Description
You will agree that these mint Nanaimo bars are the BEST Nanaimo bar recipe once you try them! These mint chocolate Nanaimo bars are a family favorite and a fun twist on a traditional Canadian dessert!
Ingredients
Scale
Bottom Layer
- 1/2 cup chopped walnuts
- 1 cup shredded coconut
- 2 cups graham cracker crumbs
- 1/2 cup unsalted butter
- 1/4 cup coconut palm sugar*
- 3 tbsp cocoa powder
- 1 egg, beaten
- 1 tsp vanilla extract
Middle Layer – Filling
- 1/4 cup unsalted butter, softened
- 2 1/2 cups icing sugar *see notes
- 2 tbsp custard powder
- 2 tbsp milk, room temperature
- 2 tbsp spinach puree* or 2–3 drops green food coloring
- 1 tsp pure peppermint extract
Top Layer
- 4 oz chocolate, chopped
- 1 tsp unsalted butter
Instructions
- Generously grease an 8×8 pan or line with parchment paper. In a medium sized bowl, mix together the walnuts, coconut and graham cracker crumbs. Set aside.
- In a medium sized saucepan, melt the butter, sugar and cocoa powder together. Stir until the mixture is smoothed, and then set aside to cool for 5 minutes before adding the vanilla and beaten egg.
- Mix the liquid ingredients with the walnut and coconut mixture and stir until completely coated. Press the mixture firmly into the bottom of the 8×8 pan and place in the refrigerator to set for 30 minutes.
- Cream together softened butter, icing sugar, custard powder and milk. If using spinach puree, add 1 tbsp at a time or until desired green color is reached. You may need to add more icing sugar to thicken the filling. Add in 1/2 to 1 tsp of peppermint extract.
- Spread the filling evenly over the top of the hardened bottom layer and place into the refrigerator for another 30 minutes. In a microwaveable bowl, melt together the chopped chocolate and butter. Heat in 30 second increments in order to avoid seizing. Spread the melted chocolate evenly over the pan and refrigerate once more, about 30 minutes. Cut into 16 bars and serve.
Bars will keep in the fridge in an airtight container for up to 1 week, and in the freezer for up to 2 months.
Notes
- You may substitute regular granulated sugar for the coconut palm sugar.
- If you are not using the spinach puree to color your filling, you will need less powdered sugar. Start with 2 cups.
- Spinach puree: blend a handful of spinach with 1/4 of water until completely blended and there are no small bits visible. Use sparingly in the filling until the appropriate green color is reached.
- Prep Time: 1 hour
- Cook Time: 30 minutes
- Category: desserts
- Method: oven
- Cuisine: canadian
Recipe Card powered by Tasty Recipes