
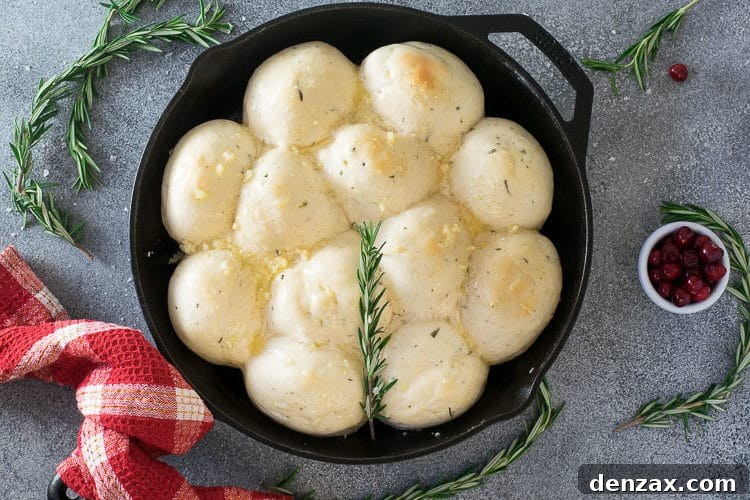
No holiday meal is complete without fluffy dinner rolls! These 30 minute dinner rolls are made extra special with fresh herbs and garlic butter! Try these skillet dinner rolls today!
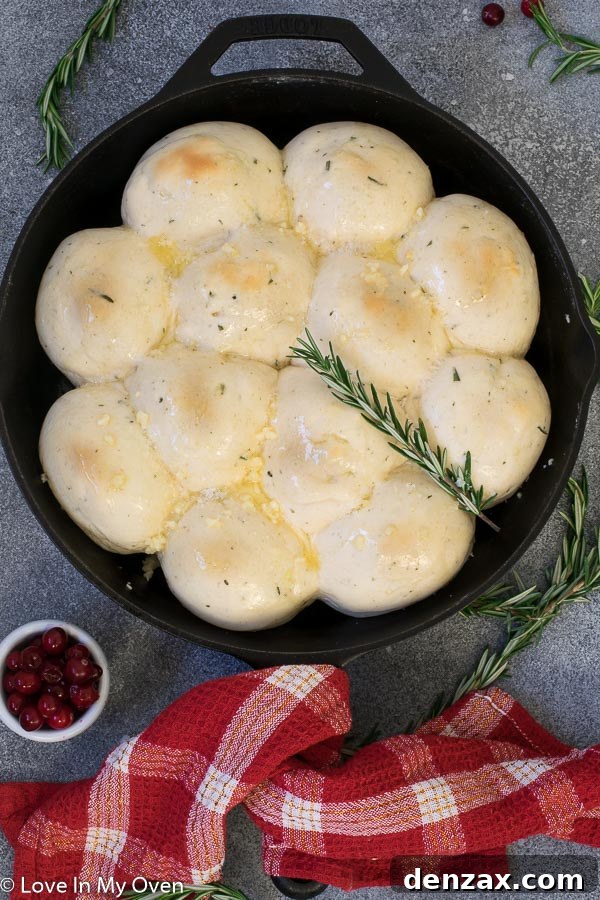
The Ultimate 30-Minute Dinner Rolls: Your Fast Track to Homemade Bread Perfection
There’s something uniquely comforting about a basket of warm, fluffy dinner rolls on the table. For many families, especially during bustling holiday seasons or busy weeknights, these humble yet essential bread rolls are an absolute must-have. Whether it’s Thanksgiving dinner, a festive Christmas feast, or just a simple family gathering, homemade dinner rolls have a way of bringing everyone to the table, and often, they’re the first thing to disappear! In my own household, these quick dinner rolls are a guaranteed hit, a comforting staple that even the pickiest eaters eagerly devour.
While my mom’s legendary homemade buns might take an entire day of love and labor, sometimes life calls for a quicker solution. That’s where these incredible 30-minute dinner rolls come to the rescue! This recipe is specifically designed for those moments when time is short but the craving for fresh, warm bread is strong. You’ll be amazed at how easily and quickly you can whip up a batch of tender, irresistible rolls, straight from your oven to the dinner table in under half an hour. It’s truly a miracle in the kitchen, proving that delicious homemade bread doesn’t have to be a daunting, time-consuming task.
If the idea of working with yeast has ever intimidated you, put those fears aside! This recipe for easy yeast rolls is remarkably fool-proof, making it perfect for beginners and seasoned bakers alike. We utilize active dry yeast, which is known for its fast-acting properties, ensuring a quick rise without compromising on texture or flavor. You’ll witness the magic of yeast activation firsthand, building confidence with every bubbly, foamy step. This isn’t just a recipe; it’s an invitation to discover the joy and satisfaction of baking your own quick dinner rolls.
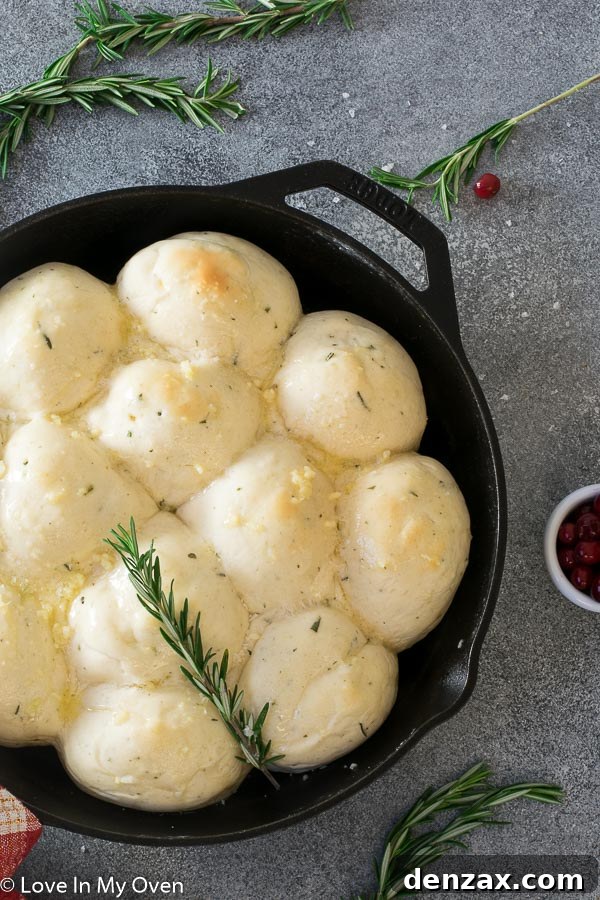
What truly elevates these fast dinner rolls from good to extraordinary is the thoughtful addition of fresh herbs and a decadent garlic butter topping. My personal favorite is fresh rosemary, which infuses the rolls with an aromatic, earthy depth that pairs beautifully with a touch of sea salt. The subtle fragrant notes of rosemary elevate the simple bread to something truly special. And let’s be honest, while the garlic butter might be listed as “optional,” it’s absolutely essential for that irresistible golden finish and burst of savory flavor. It transforms these fluffy dinner rolls into a truly gourmet experience, making them impossible to resist. Each bite is a harmonious blend of soft bread, fragrant herbs, and rich garlic.
Crafting Your Perfect 30-Minute Dinner Rolls: A Detailed Step-by-Step Guide
Activating the Yeast: The Essential First Step for Fluffy Rolls
Every great bread journey begins with active yeast. Although these quick dinner rolls don’t require an extensive rise time, properly activating your yeast is crucial. It ensures your rolls will achieve that desirable light and airy texture. Start by combining your active dry yeast with very warm water. The water temperature is absolutely key here – too hot, and it can kill the yeast, rendering it ineffective; too cold, and it won’t activate properly, leading to dense rolls. Aim for lukewarm, around 105-115°F (40-46°C) – think bathwater warm, not scalding. Let this mixture rest for about 5 minutes. You’re looking for a foamy, bubbly layer to appear on the surface; this is a clear sign that your yeast is alive and ready to work its magic. If you don’t see any foam or bubbles after 5 minutes, your yeast might be expired or the water temperature was off. Don’t be discouraged; simply discard the mixture and start again with fresh yeast and carefully calibrated water. This step is a small investment of time that pays off in perfectly risen rolls.
Mixing the Dough: From Simple Ingredients to a Harmonious Blend
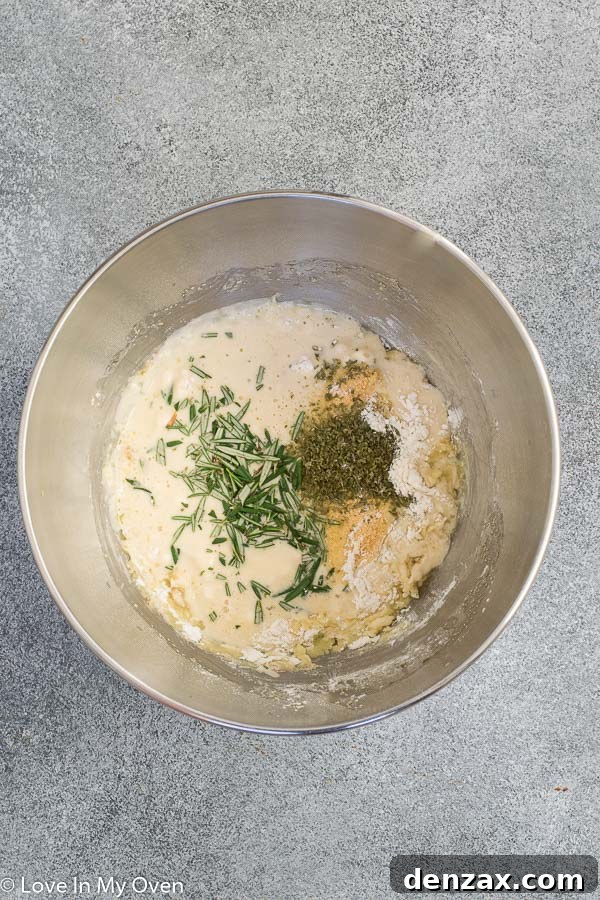
Once your yeast is happily activated and foamy, it’s time to introduce the other foundational ingredients. Add olive oil, honey (which not only adds a touch of sweetness but also acts as food for the yeast, encouraging a vigorous rise), a lightly beaten large egg (for richness, moisture, and improved texture), your chosen fresh and dried herbs (like rosemary and parsley), and a pinch of sea salt. Mix these wet ingredients thoroughly until they are well combined. Then, gradually incorporate the first cup of all-purpose flour. At this initial stage, I find my stand mixer fitted with a paddle attachment makes quick work of it, blending everything beautifully in about a minute on low speed. However, if you don’t have a stand mixer, a sturdy wooden spoon and a bit of elbow grease will yield equally fantastic results. The goal here is to get a smooth, cohesive mixture before adding the bulk of the flour, ensuring all flavors are evenly distributed.
Kneading for Perfection: Developing the Gluten for Optimal Texture
Now for the remaining flour – approximately 3 cups. If you’re using a stand mixer, switch from the paddle attachment to the dough hook. On medium-high speed, let the mixer knead the dough for approximately 5 minutes. As it kneads, observe the dough’s consistency carefully. It should transform into a soft, pliable mass that pulls away cleanly from the sides of the bowl without being overly sticky. If it still feels too sticky after a few minutes of kneading, add an additional tablespoon of flour at a time, allowing it to fully incorporate before adding more, until you reach the desired smooth, elastic texture. For those kneading by hand, turn the dough out onto a lightly floured surface and knead vigorously for 5-7 minutes. The kneading process is vital for developing the gluten in the flour, which gives the dinner rolls their characteristic chewiness and helps them rise beautifully. You’ll know the dough is perfectly kneaded when it feels smooth, elastic, and bounces back slightly when gently poked.
Fresh Herbs vs. Dried: Customizing Your Flavor Profile
A common question arises when it comes to the flavorful additions: Do you have to use fresh rosemary? The simple answer is no, not necessarily. While fresh herbs undoubtedly impart a more vibrant, aromatic, and potent flavor that truly shines in these rolls, dried herbs are a perfectly acceptable substitute, especially when you’re in a hurry or don’t have fresh sprigs on hand. For this particular recipe, if you’re opting for dried rosemary, use about 2 teaspoons. Feel free to experiment with other dried herbs too, such as thyme, oregano, or a savory Italian blend, to customize the flavor profile of your quick dinner rolls to your personal preference. The beauty of this recipe lies in its adaptability!
Shaping and Resting: The Final Touches Before Baking
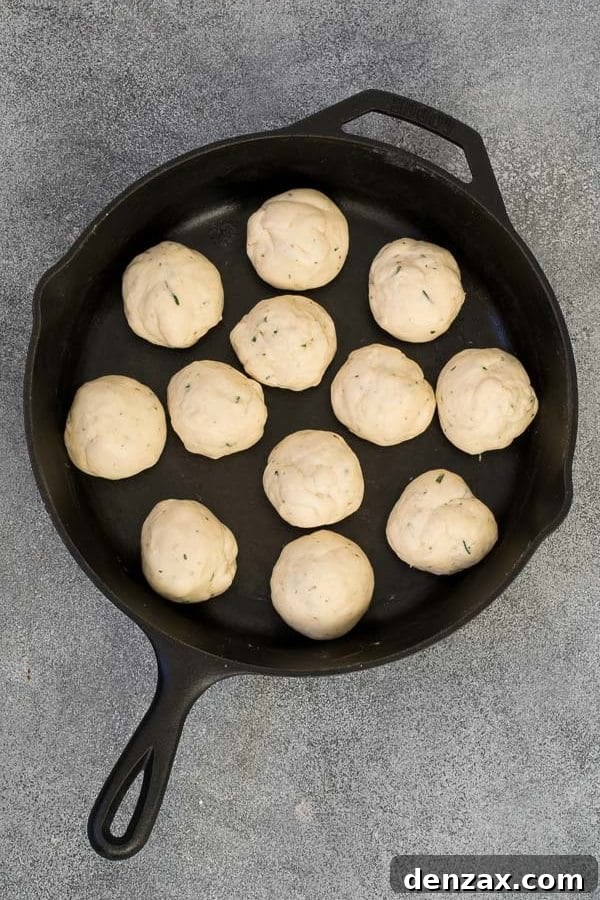
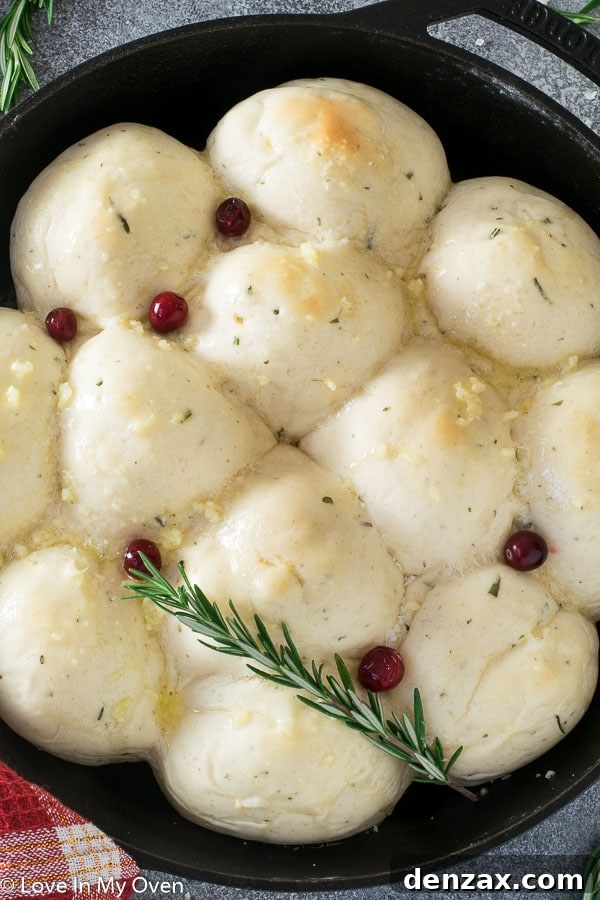
Once your dough is perfectly kneaded, it’s time to prepare it for baking. Lightly flour your hands to prevent sticking. Divide the dough into two equal halves – using a kitchen scale can help ensure even sizing and uniform rolls, but eyeballing it is perfectly fine for a home baker. Then, divide each of those halves into another half, and finally, split each of those four sections into three equal pieces. This precise method will give you 12 uniformly sized rolls, which not only look professional but also bake evenly. Gently roll each piece of dough between your palms to form smooth, round balls. Arrange them in your greased cast iron skillet or an 11 x 7-inch baking pan, leaving a small space (approximately 1-2 inches) between each roll. This allows them a bit of room to expand as they undergo a final short rise and bake. Cover the pan loosely with a clean dishcloth and let the rolls rest in a warm spot for a brief 10 minutes. This short resting period is essential for a final quick proof, which contributes significantly to their incredibly fluffy texture and helps them puff up nicely in the oven.
Baking to Golden Perfection and Garlic Butter Bliss
By now, your oven should be preheated to a hot 400°F (200°C). Carefully transfer the uncovered pan of shaped rolls to your preheated oven and bake for 12-14 minutes, or until their tops are beautifully golden brown and they sound hollow when tapped lightly. Keep a close eye on them, as oven temperatures can vary, and baking times may differ slightly. While your homemade dinner rolls are baking and filling your kitchen with an intoxicating aroma, prepare the irresistible garlic butter. Simply melt some unsalted butter in a small microwave-safe bowl or on the stovetop and stir in fresh, finely minced garlic. The moment the golden-brown rolls emerge from the oven, brush them generously with this fragrant garlic butter mixture. This not only adds an incredible depth of savory flavor but also gives them a soft, glistening crust. A final sprinkle of coarse sea salt can enhance the experience even further, providing a delightful textural contrast. Serve these garlic butter rolls immediately, while they are still warm and at their absolute peak of deliciousness. If not serving right away, you can keep them warm in a slightly cooled oven until it’s time to enjoy them.
Storage and Enjoyment: Keeping Your Homemade Dinner Rolls Fresh
How long do 30-minute dinner rolls stay fresh?
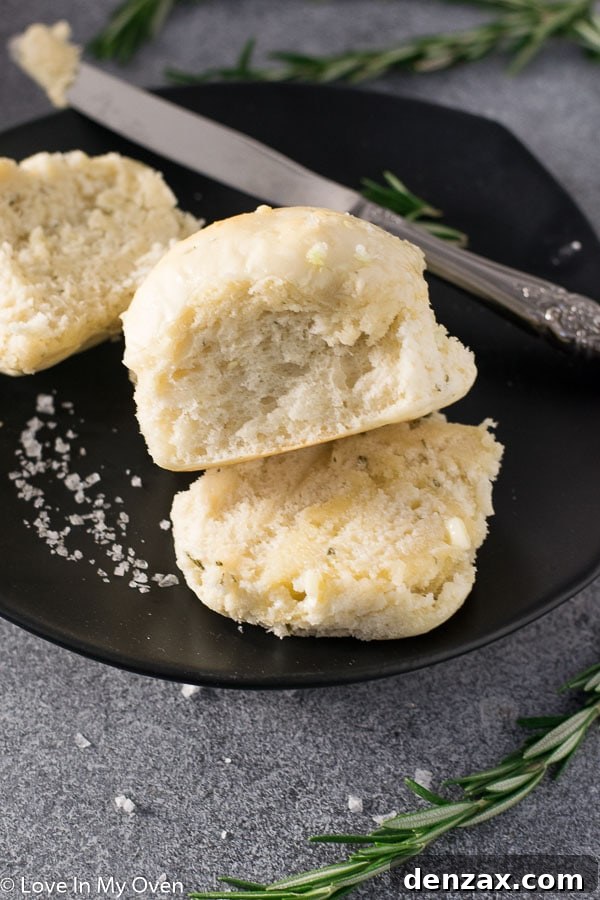
These delightful quick dinner rolls are undoubtedly at their best when served warm and fresh from the oven. The soft, tender interior and lightly crisp exterior are simply unmatched in that moment. However, if you find yourself with leftovers – a rare occurrence, I assure you, as they tend to disappear quickly – they can be stored. Place them in an airtight container on your kitchen counter for 1-2 days to maintain their softness. To revive their freshness and flavor, a quick reheat in the oven (at 300°F/150°C for 5-7 minutes) or microwave (for 10-15 seconds per roll) before serving will make them almost as good as new, bringing back that wonderful warmth and aroma.
For longer storage, these homemade dinner rolls freeze exceptionally well, making them a fantastic make-ahead option. Once they have completely cooled after baking, transfer them to a freezer-safe bag or an airtight container. They can be frozen for up to two months without significant loss of quality. When you’re ready to enjoy them, simply remove them from the freezer the day before, thaw them overnight in the refrigerator, and then reheat them gently in the oven until warmed through. This convenience makes it easy to always have delicious, homemade bread on hand for unexpected guests or busy meal preparations.
Don’t underestimate the versatility of leftover dinner rolls! Their soft, appealing texture and savory flavor make them perfect-sized sandwiches for lunch the next day, especially for kids. Imagine stuffing them with a bit of roast turkey from your holiday meal, sliced cheese, or your favorite deli meats for a quick, satisfying, and wholesome meal. These rolls can be transformed into mini sliders, breakfast sandwiches, or even brushed with a little cinnamon sugar and butter for a sweet treat. Their adaptability turns a humble leftover into another delicious culinary adventure, ensuring nothing goes to waste.
As I write this from sunny Maui, the traditional Thanksgiving vibes feel a world away – especially since we Canadians celebrated our Thanksgiving over a month ago! Yet, the warmth of family, the joy of sharing a meal, and the comfort of delicious food are universal sentiments that transcend geographical boundaries and specific holidays. If you, my cherished reader, are preparing to celebrate Thanksgiving, Christmas, or any upcoming holiday this week, I extend my warmest wishes. May your table be filled with laughter, love, and plenty of delicious food, including a batch of these incredibly easy and flavorful 30-minute dinner rolls. And please, enjoy an extra slice of dessert for me – it’s all part of the festive spirit!
Perfect Pairings: What to Serve with Your Delightful Dinner Rolls
These versatile and flavorful 30-minute dinner rolls are the quintessential accompaniment to a myriad of dishes. Their soft texture, savory notes, and ability to soak up delicious sauces make them an ideal companion for hearty meals, especially comforting soups and stews. They instantly elevate any main course, adding that much-loved homemade touch. Here are a few suggestions from the blog that would create a truly satisfying and memorable meal when paired with these incredible rolls:
- Creamy Roasted Tomato Basil Soup: The rich, tangy sweetness of tomato soup finds its perfect match in these savory, fluffy rolls, ideal for dipping and savoring every last drop.
- Hearty Crockpot Minestrone Soup: A classic, vegetable-packed minestrone is elevated by the presence of warm, fresh bread, perfect for soaking up all the delicious broth and chunky vegetables.
- Instant Pot Loaded Cauliflower Soup: This creamy, comforting, and hearty soup gets an added layer of texture and satisfaction when served alongside these garlic butter rolls, creating a truly comforting meal.
And for another delightful and unique option, consider trying them with this Golden Beet Soup from Crumb Top Baking – a vibrant and flavorful pairing that’s sure to impress!
Beyond Soup: Essential Holiday and Everyday Side Dishes
These quick dinner rolls aren’t just for soup; they are a stellar addition to any holiday table, special gathering, or even a simple weeknight dinner. They complement a wide array of main courses and other side dishes beautifully, acting as a versatile canvas for many flavors. Here are some other perfect holiday sides from the blog that would make your meal truly complete and unforgettable:
- Roasted Sweet Potatoes with Bacon: The sweet and savory notes of this popular side dish are perfectly balanced by the herbed dinner rolls, creating a satisfying contrast.
- Prosciutto Wrapped Asparagus: A sophisticated, elegant, and flavorful vegetable side that contrasts wonderfully with the simple goodness and comforting nature of homemade bread rolls.
Imagine these fluffy dinner rolls alongside a succulent roast chicken, a tender beef stew, a vibrant winter salad, or even a hearty pot roast. Their ability to soak up rich gravies and complement robust flavors makes them an indispensable part of any meal. They are truly the unsung heroes of the dinner table, providing that perfect soft, savory bite to accompany every savory spoonful, making every meal feel more special and complete.
Print Recipe

30 Minute Dinner Rolls: Quick, Fluffy, & Flavorful
5 Stars 4 Stars 3 Stars 2 Stars 1 Star
5 from 10 reviews
Author: Katherine | Love In My Oven
Total Time: 30 minutes
Yield: 12 rolls 1x
Description
Discover how to make the quickest, fluffiest, and most delicious dinner rolls in just 30 minutes! Infused with fresh herbs and brushed with a savory garlic butter, these homemade rolls are perfect for any holiday meal, weeknight dinner, or special occasion. A simple recipe for beginners and busy bakers alike, ensuring warm, irresistible bread every time.
Ingredients
Scale
- 1 cup + 2 tbsp very warm water (105-115°F / 40-46°C)
- 2 tbsp active dry yeast
- 1/3 cup olive oil
- 1/4 cup honey
- 1 large egg, lightly beaten
- 1 tbsp fresh rosemary, finely chopped*
- 2 tsp dried parsley
- 2 tsp garlic powder
- 1/2 tsp sea salt
- 3 cups all-purpose flour, plus more for dusting if needed
Garlic Butter Topping
- 3 tbsp unsalted butter, melted
- 2 cloves fresh garlic, minced
Instructions
- Prepare Baking Pan: Preheat your oven to 400°F (200°C). Generously grease a large cast iron skillet (approximately 10-12 inches) or an 11 x 7-inch baking pan.
- Activate Yeast: In the bowl of a stand mixer fitted with the paddle attachment, or in a large mixing bowl, pour in the very warm water (ensure it’s between 105-115°F / 40-46°C). Stir in the active dry yeast gently. Allow the mixture to rest undisturbed for 5 minutes, or until it becomes noticeably foamy and active. If no foam appears, your yeast may be inactive; discard the mixture and retry with fresh yeast.
- Combine Wet Ingredients & First Flour: Once the yeast is foamy, add the olive oil, honey, lightly beaten egg, fresh rosemary, dried parsley, garlic powder, and sea salt to the bowl. Mix on low speed for about 1 minute, until all ingredients are well combined.
- Add Remaining Flour & Knead: Switch to the dough hook attachment (if using a stand mixer) or continue with a sturdy wooden spoon. Add the remaining 3 cups of all-purpose flour. Mix on low speed until the flour is mostly incorporated, about 1 minute. Then, increase the mixer speed to medium-high and knead for 5 minutes. If kneading by hand, turn the dough onto a lightly floured surface and knead for 5-7 minutes, adding small amounts of flour (1 tablespoon at a time) if the dough is excessively sticky. The goal is a soft, smooth, elastic dough that is no longer sticky.
- Shape the Rolls: Lightly flour your hands. Divide the dough into two equal halves. Then, divide each of those halves into another half. Finally, divide each of those four sections into three equal pieces. You should now have 12 pieces of dough in total. Roll each piece between your palms to form a smooth, round ball. Place the shaped dough balls into your greased baking pan, leaving approximately 1-2 inches of space between each roll to allow for expansion.
- Short Proof & Bake: Cover the pan with a clean kitchen towel and let the rolls rest in a warm spot for a quick 10 minutes. This brief proofing period helps them become extra fluffy. After resting, transfer the uncovered pan to your preheated oven and bake for 12-14 minutes, or until the tops of the rolls are beautifully golden brown.
- Prepare & Apply Garlic Butter: While the rolls are baking, melt the unsalted butter in a small bowl. Stir in the minced fresh garlic until well combined. As soon as the golden brown rolls come out of the oven, use a pastry brush to generously brush the warm garlic butter mixture over the tops of each roll. For an extra touch of flavor, you can sprinkle them with a tiny bit more sea salt, if desired. Serve these aromatic and fluffy dinner rolls immediately for the best experience.
Storage Tips: Leftover rolls are best enjoyed fresh, but can be stored in an airtight container at room temperature for 1-2 days. Reheat gently before serving. For longer preservation, allow fully cooled rolls to freeze in a freezer-safe bag for up to 2 months. Thaw overnight in the fridge before reheating.
Notes
*Herb Substitution: If fresh rosemary is not available, you can substitute it with 2 teaspoons of dried rosemary. Other dried herbs like thyme or an Italian blend can also be used for a different flavor profile.
- Prep Time: 15 minutes
- Cook Time: 15 minutes
- Category: Side Dishes, Bread, Baking
- Method: Bake