
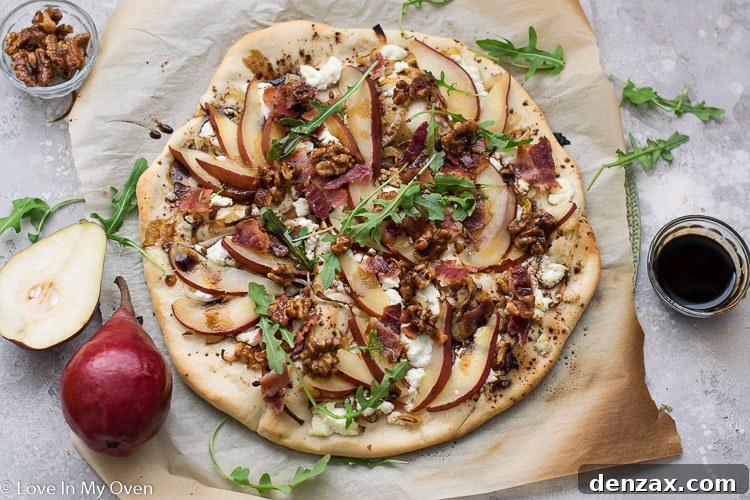
Indulge in a Gourmet Pear and Goat Cheese Pizza: A Sweet & Savory Delight
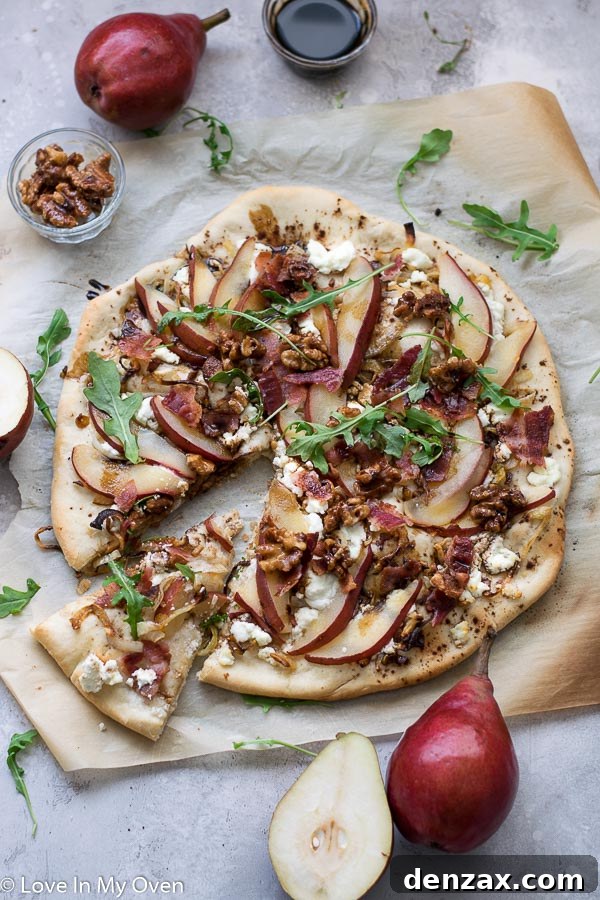
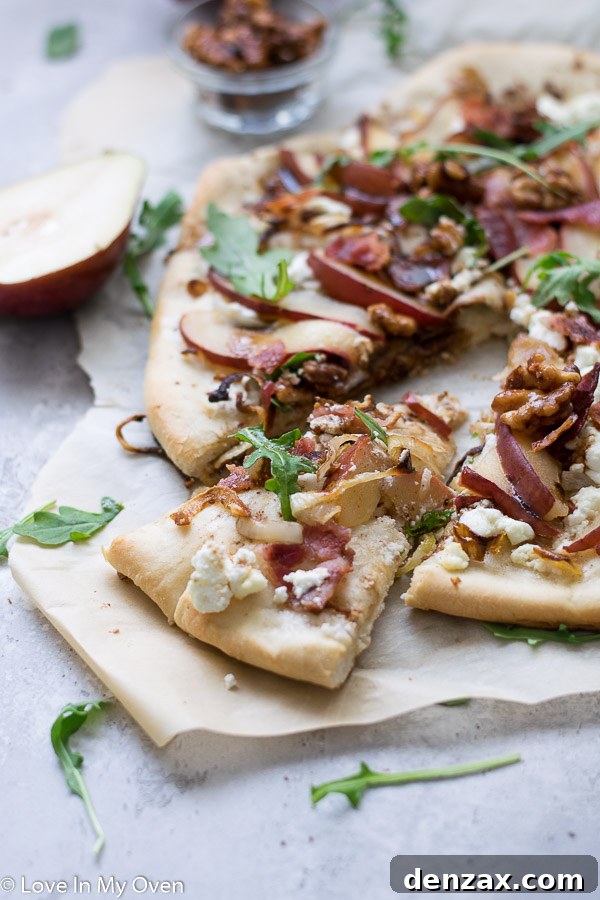
Transform your weekend with this exquisite Pear and Goat Cheese Pizza! It’s a symphony of flavors featuring succulent pears, tangy goat cheese, crispy bacon, sweet caramelized onions, and crunchy candied walnuts, all on a perfect homemade crust.
This post is proudly sponsored by USA Pears. We extend our sincere gratitude for supporting the brands that make this blog possible!
Why You’ll Love This Unique Pear and Goat Cheese Pizza
If you’re looking to elevate your pizza night or impress guests with a sophisticated yet incredibly easy-to-make dish, look no further than this Pear and Goat Cheese Pizza. This recipe isn’t just a meal; it’s an experience. The combination of creamy, tart goat cheese with the natural sweetness of ripe pears creates an unforgettable flavor profile that dances on your palate. Add to that the smoky depth of bacon, the rich sweetness of slow-cooked caramelized onions, and the delightful crunch of candied walnuts, and you have a culinary masterpiece.
I’ve truly fallen in love with pears this fall season! They’ve always been a favorite, but lately, I’ve found myself buying them in bulk. Not only are they at their peak of sweetness and juiciness right now, but they’re often on sale, making them an excellent choice for both everyday snacks and culinary adventures. Beyond their irresistible taste, pears are packed with dietary fiber, which is fantastic for digestion – and let’s just say a few of my kids could certainly use all the fiber they can get!
While we often enjoy pears simply as a ripe, refreshing snack, their versatility in cooking is truly remarkable. I’ve previously crafted a delightful pear galette, and this weekend, I’m contemplating a pear crisp, perhaps crowned with a drizzle of homemade salted caramel sauce. It’s the quintessential taste of autumn, wouldn’t you agree?
This exquisite recipe was developed in collaboration with USA Pears, just in time to celebrate October as National Pizza Month in the US! And what better way to honor this beloved food than by experimenting with fresh, seasonal ingredients? Pizza is a staple in our home, gracing our table at least once a week – usually homemade, though sometimes we opt for takeout. It’s one of those rare dishes my kids will always devour without complaint!
So, this month, I wholeheartedly encourage you to step outside your comfort zone and embrace the wonderful world of pears on your pizza. You’re in for a truly delightful surprise and a new favorite!
Choosing the Best Pears for Your Gourmet Pizza
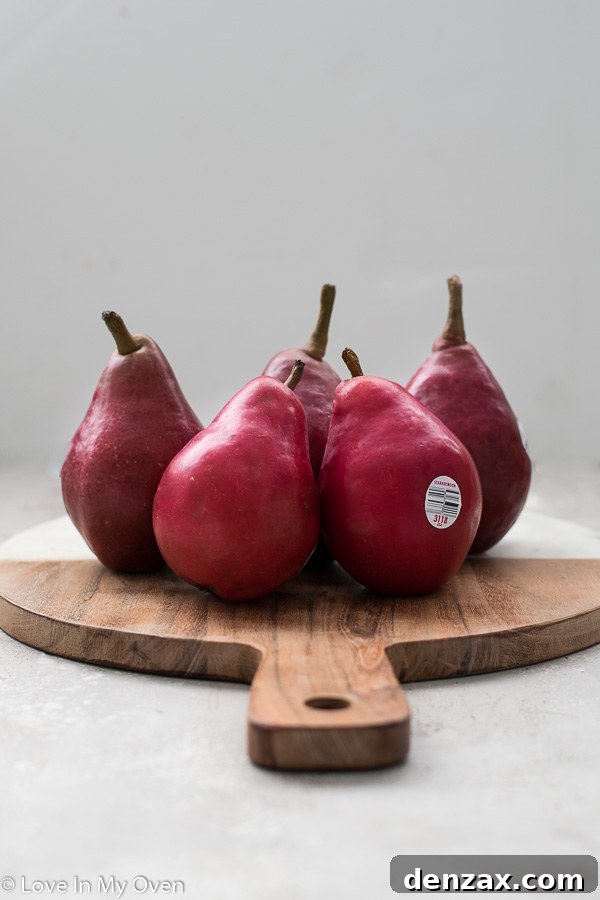
The beauty of this pear pizza is its adaptability when it comes to pear varieties. While I chose beautiful red pears for their vibrant color and perfect ripeness, you have many excellent options. Yellow Bartlett pears, known for their sweet flavor and juicy texture, or robust Bosc pears, with their firmer flesh that holds up exceptionally well during baking, would also be fantastic choices. Anjou pears are another great option, offering a subtle sweetness and smooth texture.
The key is to select a pear that is slightly soft to the touch but still quite firm. You want a pear that offers a pleasant bite after baking, not one that turns mushy or becomes too watery. Avoid overly ripe or bruised pears for the best texture. A single medium-sized pear is typically enough for one standard pizza, sliced thinly to ensure even cooking and optimal distribution of flavor across every bite.
Beyond the Obvious: Health Benefits of Pears
Pears aren’t just delicious; they’re nutritional powerhouses! Rich in dietary fiber, they aid digestion, promote gut health, and contribute to a feeling of fullness, which can be beneficial for weight management. They also contain essential vitamins and minerals, including a good amount of Vitamin C (for immune support), Vitamin K (important for bone health), and potassium (crucial for blood pressure regulation), along with powerful antioxidants. Incorporating pears into dishes like this gourmet pizza is a delicious and creative way to boost your daily nutrient intake.
The Harmonious Symphony of Flavors: Key Ingredients for Success
Beyond the star ingredient – the pear – this pizza boasts a collection of complementary flavors that create a truly gourmet experience. Here’s a detailed look at what you’ll need to create this magnificent pie, ensuring every element contributes to the perfect bite:
- Ripe Pear: One medium pear, ideally sliced into 1/4-inch thick pieces. Choose a variety like Bartlett, Bosc, or Anjou for a balanced flavor and texture.
- Crispy Bacon: Three slices of high-quality bacon, cooked until perfectly crisp and then crumbled. The smoky, salty crunch is essential for contrasting the sweetness of the fruit and onions.
- Sweet Caramelized Onions: One large onion, slowly cooked until deeply golden brown and incredibly sweet. This process takes patience but yields an unparalleled depth of flavor.
- Tangy Goat Cheese: Four ounces of crumbled goat cheese. Its creamy texture and characteristic tangy, earthy notes provide a crucial counterpoint to the sweet elements, preventing the pizza from being overly sugary.
- Fresh Arugula: A generous handful of fresh arugula, added after baking, brings a peppery freshness and a vibrant green color that brightens the entire dish.
- Candied Walnuts: About 1/4 cup of homemade candied walnuts. These add a fantastic sweet crunch, a rich nutty depth, and an extra layer of gourmet appeal.
- High-Quality Olive Oil: Essential for brushing the crust, helping it crisp up, and enhancing the overall flavors.
- Ground Cinnamon: A secret ingredient that adds a warm, subtly spicy, and aromatic note, perfectly complementing the pears and goat cheese in an unexpected way.
- Balsamic Reduction: A drizzle of rich, sweet, and tangy balsamic reduction to finish the pizza and elegantly tie all the complex flavors together with a glossy sheen.
The Foundation: Your Perfect Pizza Crust
A great pizza unequivocally starts with a great crust! While you can certainly opt for a good quality store-bought pizza crust or pre-baked flatbread for ultimate convenience, I highly recommend trying my homemade pizza dough recipe, which is detailed in the recipe card below. It requires just a few basic ingredients – warm water, yeast, honey, olive oil, salt, and all-purpose flour – and only 5-10 minutes of active preparation time, yielding a wonderfully chewy yet crisp foundation for your incredible toppings. The difference a fresh, homemade crust makes in terms of flavor and texture is truly transformative and well worth the minimal effort.
Mastering the Art of Silky Sweet Caramelized Onions
Caramelized onions are more than just an ingredient; they are a labor of love that adds an unparalleled depth of sweet and savory richness to this pizza. Their intense flavor, developed through slow cooking, is absolutely worth every minute of effort.
To achieve perfectly caramelized onions, begin by heating a tablespoon of butter (or olive oil if you prefer a dairy-free option) in a large, heavy-bottomed frying pan or skillet over medium heat. Once the butter has melted and is shimmering, add your thinly sliced onions. Stir them to ensure they are evenly coated in the fat. Immediately reduce the heat to low; this is the most critical step for true caramelization without burning. Cook the onions slowly for approximately 30-40 minutes, stirring occasionally every 5-7 minutes to prevent sticking and ensure even cooking. You’ll observe them gradually softening, turning translucent, and then slowly transitioning to a beautiful, deep golden-brown color. Their fragrance will evolve from pungent to incredibly sweet and inviting.
Once they reach a rich light-brown hue and have developed that signature caramelized aroma, add a small splash of vegetable stock or water (about 1-2 tablespoons). Use a wooden spoon or spatula to scrape up any flavorful brown bits (fond) stuck to the bottom of the pan; this deglazing step adds even more complex depth to the onions. Continue cooking for another minute or two until the liquid evaporates, allowing the flavors to concentrate. Remove from heat and allow the onions to cool completely before topping your pizza. This slow and gentle cooking process extracts and concentrates their natural sugars, transforming them into a remarkably delicious, melt-in-your-mouth topping.
Step-by-Step Guide: Crafting Your Exquisite Pear and Goat Cheese Pizza
Follow these detailed instructions carefully to create your own gourmet pizza masterpiece, ensuring every layer is perfect and every flavor shines through:
- Prepare Your Pizza Dough: If you are using a convenient store-bought or pre-baked crust, please skip this initial dough preparation and proceed directly to step 3. For homemade dough: In the bowl of a stand mixer fitted with the dough hook attachment, gently stir together the warm water and active dry yeast. Allow this mixture to rest for 5 minutes until it becomes foamy; if no foam appears, discard and restart with fresh yeast.
- Next, add the honey, olive oil, salt, and all of the all-purpose flour to the yeast mixture. Mix on medium-high speed until all ingredients are thoroughly combined and a rough dough forms. Then, increase the mixer speed to high and knead for 5 minutes. The dough should become smooth and elastic, pulling away cleanly from the sides of the bowl. If it feels too sticky, add a few extra tablespoons of flour, one at a time, until the desired consistency is reached. The dough is perfectly done when it’s soft and bounces back readily when poked with a finger. Transfer the dough to a lightly greased bowl, cover it with a clean dishcloth, and let it rise in a warm place for 1-2 hours, or until it has visibly doubled in size.
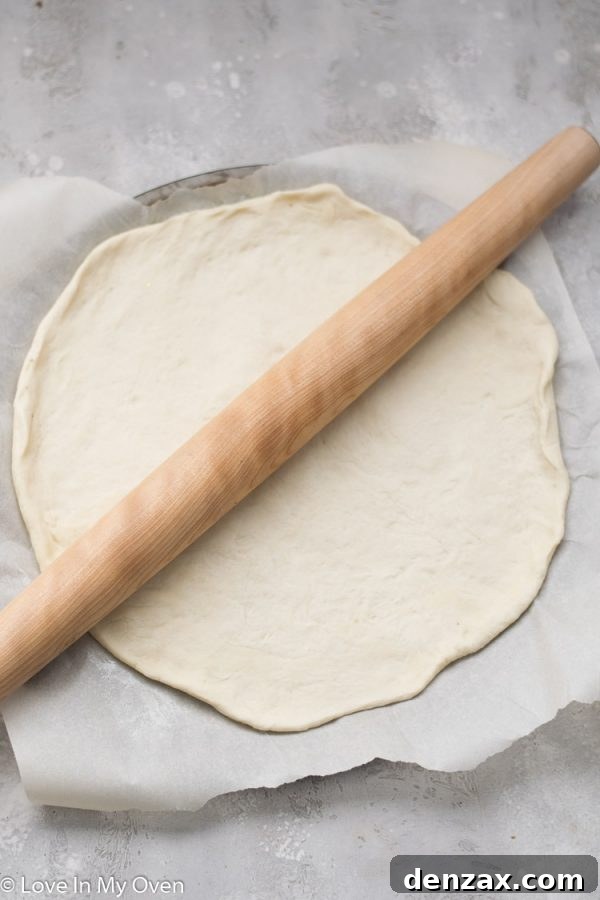
- Form and Pre-Bake Crust: Preheat your oven to 425°F (220°C). Once your dough has risen (or if using a prepared crust), gently punch it down to deflate it, then turn it out onto a lightly floured surface. Using a floured rolling pin, expertly roll the dough evenly into an 11-inch (approx. 28 cm) circle, aiming for an even thickness. Carefully transfer the rolled dough to a preheated pizza stone or a parchment-lined pizza pan. Place the pizza crust in the hot oven and pre-bake for 5-6 minutes, or just until it begins to puff up slightly and starts to set. This prevents a soggy crust. Remove the crust from the oven.
- Build the Flavorful Base: Immediately after removing the pre-baked crust, brush it evenly with 2 teaspoons of olive oil. Then, generously sprinkle 1/2 teaspoon of ground cinnamon across the entire surface.
- Next, evenly distribute the cooled caramelized onions over the cinnamon-dusted crust, followed by scattering the crumbled goat cheese. Finally, artfully arrange the thinly sliced pear pieces across the pizza, ensuring a good distribution for balanced flavor in every bite.
- Bake the Pizza to Perfection: Carefully transfer the fully assembled pizza back into the preheated oven. Bake for an additional 15 minutes, or until the pizza’s edges are beautifully golden brown and crisp, and the goat cheese is melted and bubbly.
- Final Assembly and Serve: Once baked, carefully remove the pizza from the oven. Immediately and generously top it with the crispy crumbled bacon bits, the sweet and crunchy candied walnuts, and a vibrant handful of fresh arugula. Finish by drizzling the luscious balsamic reduction evenly over the entire pizza. Slice into portions and serve immediately to experience this gourmet pizza at its absolute best!
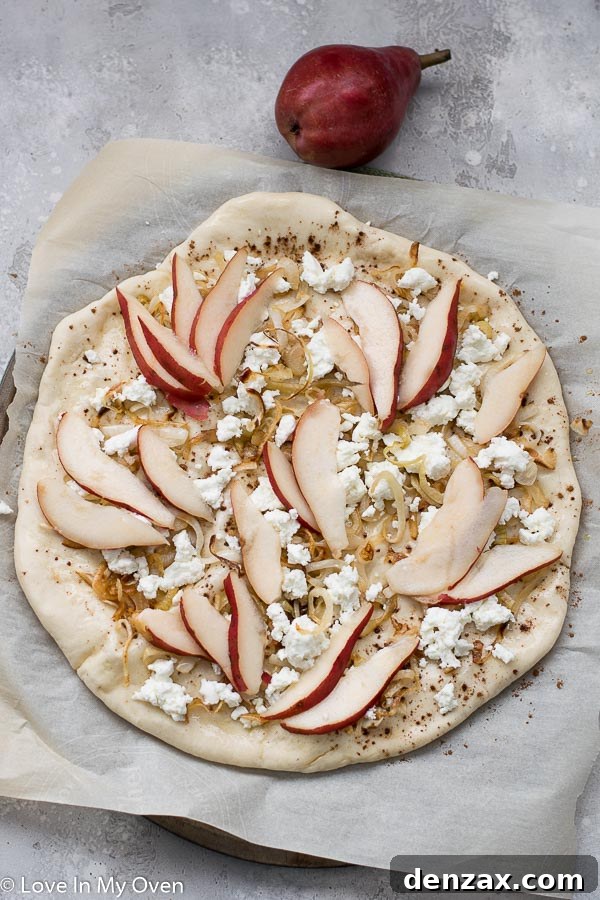
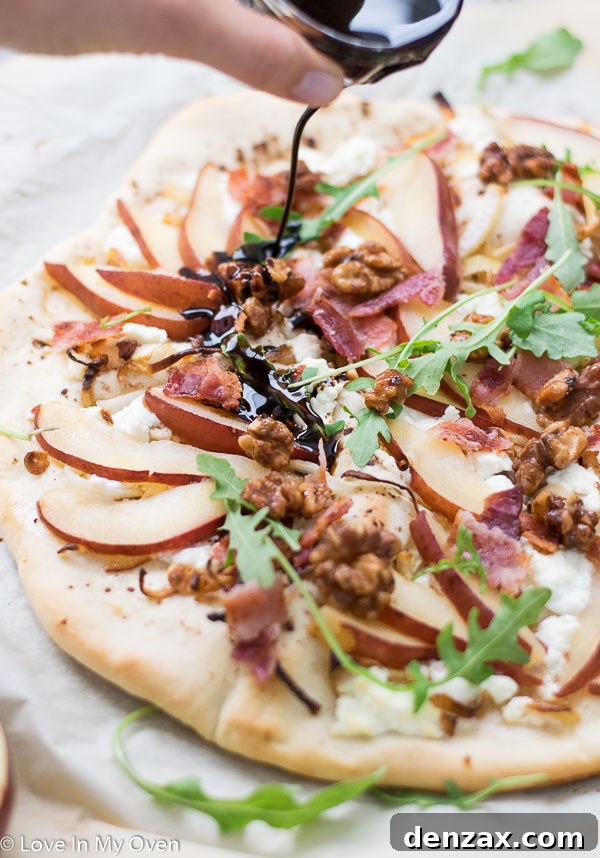
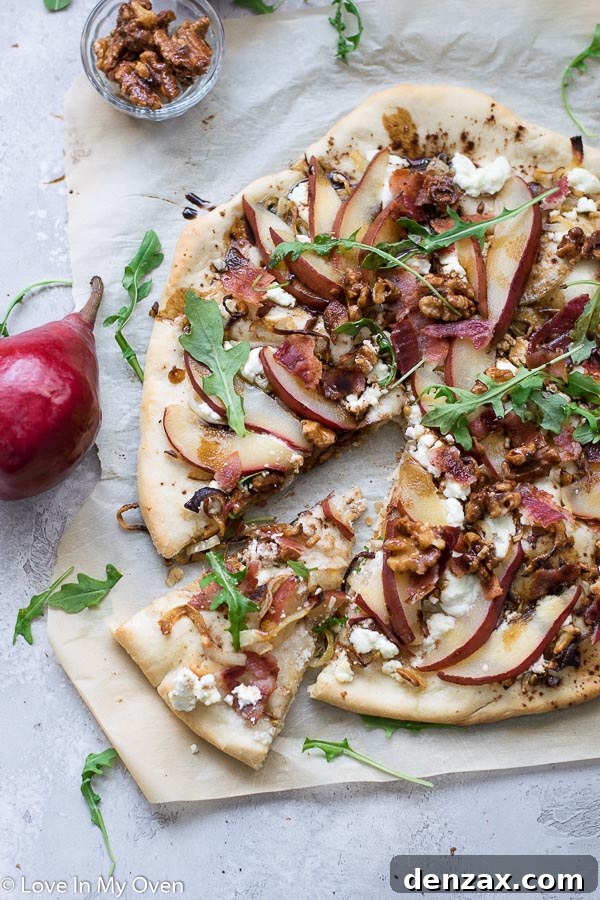
- Final Flourish and Immediate Serve: Once the pizza’s edges are beautifully browned and crisp, carefully remove it from the oven. Immediately and generously top with the crispy, crumbled bacon bits, the sweet and satisfying candied walnuts, and a vibrant handful of fresh arugula. Finally, drizzle the luscious, tangy balsamic reduction all over the pizza. Slice into generous portions and serve immediately to enjoy it at its absolute best, with all its flavors and textures perfectly melded!
Serving Suggestions and Reheating Tips for Optimal Enjoyment
This pear and goat cheese pizza is undeniably best served warm, allowing the creamy goat cheese to be soft, the pears tender, and all the flavors to meld beautifully. However, in a pinch, I can personally attest that it’s surprisingly delicious even when cold – making it perfect for a quick snack or a packed lunch the next day!
If you plan to reheat any leftovers, please be mindful that the fresh arugula might wilt significantly under heat. If you’re okay with this softer texture, go ahead and warm slices gently in a frying pan on the stovetop over medium-low heat with a lid on (to retain moisture and prevent drying), or a brief stint in the microwave. Alternatively, for the best texture, you can simply pick off the arugula before reheating and add fresh greens afterward if you prefer that crisp, peppery bite.
Consider elevating your dining experience by pairing this unique pizza with a light, crisp white wine, such as a Sauvignon Blanc, or a sparkling wine, which beautifully complements its rich and complex sweet and savory notes. A simple, fresh green salad with a delicate vinaigrette dressing would also make a perfect and refreshing accompaniment, balancing the richness of the pizza.
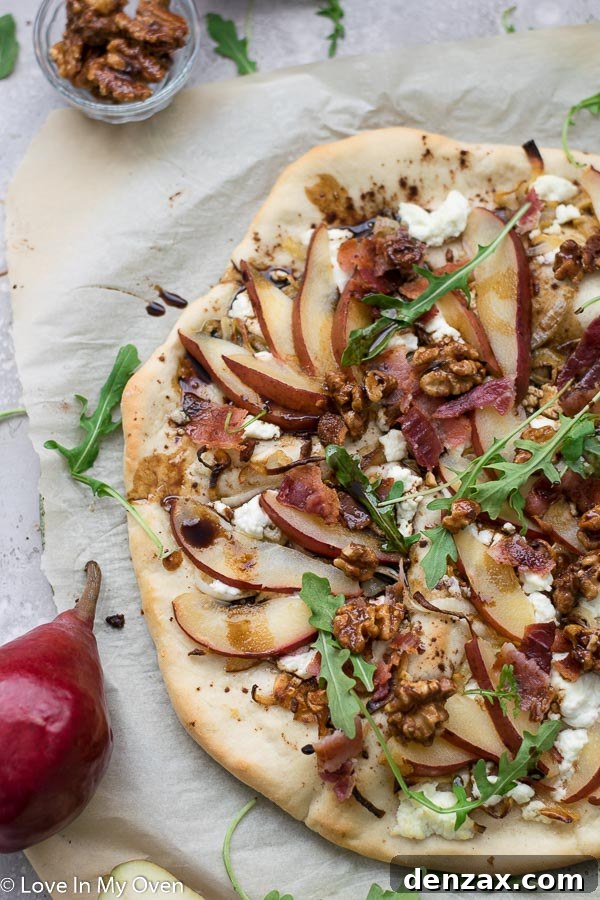
Don’t Miss Out on This Incredible Culinary Adventure!
I truly promise that if you give this Pear and Goat Cheese Pizza a try, you absolutely won’t regret it. It’s a delightful and surprisingly sophisticated twist on a classic, offering a unique sweet and savory meal that’s perfect for a cozy night in, a casual gathering, or even entertaining friends. Embrace the unexpected and treat your taste buds to this incredible combination – it might just become your new favorite pizza!
More Delicious Recipes to Explore from Our Kitchen
If you enjoyed crafting and savoring this unique pizza, be sure to explore some of my other favorite recipes from the blog. We have more exciting pizza recipes that push the boundaries of flavor, as well as creative and delicious pear-infused dishes:
- Chorizo and Caramelized Onion Skillet Pizza: A hearty and flavorful skillet pizza with a spicy kick.
- Nutella Pear French Toast Casserole: A decadent breakfast or brunch option marrying sweet pears with rich Nutella.
- Gluten-Free Zucchini Pizza: A lighter, fresh take on pizza perfect for those seeking a gluten-free option.
Recipe: Gourmet Pear and Goat Cheese Pizza
Author: Katherine | Love In My Oven
Average Rating: 4.8 from 5 reviews
Prep Time: 30 minutes
Cook Time: 30 minutes
Total Time: 1 hour
Yield: 1 pizza (serves 4-6)
Category: Pizza
Method: Oven Bake
Cuisine: Italian-Inspired / Fusion
Description
This Gourmet Pear and Goat Cheese Pizza is a truly scrumptious and unique culinary creation. It masterfully combines the natural sweetness of ripe pears with the tangy creaminess of goat cheese, perfectly complemented by crispy savory bacon, rich and sweet caramelized onions, and crunchy candied walnuts. Finished with fresh arugula and a balsamic drizzle, it offers an unforgettable sweet and savory experience that will delight your palate.
Ingredients
For the Homemade Pizza Crust:
- 2/3 cup warm water
- 1 1/8 tsp active dry yeast
- 2 tsp honey
- 1 tablespoon olive oil
- 1/4 tsp salt
- 1 3/4 cups all-purpose flour, plus more for surface/rolling
For the Pizza Toppings:
- 2 tsp olive oil (for crust)
- 1/2 tsp ground cinnamon
- 1 large onion, caramelized (refer to main post for detailed instructions)
- 4 oz goat cheese, crumbled
- 1 medium pear, sliced into 1/4” thick pieces
- 3 slices bacon, fried until crispy and then crumbled
- 1/4 cup candied walnuts
- Handful fresh arugula
- 2 tsp balsamic reduction (see note below for recipe)
Instructions
- Prepare the pizza dough: If opting for a store-bought or pre-baked crust, please skip this step and proceed to step 3. For homemade dough: In the bowl of a stand mixer fitted with the dough hook attachment, gently stir together the warm water and active dry yeast. Allow this mixture to rest for 5 minutes until it becomes foamy; if no foam appears, discard and restart with fresh yeast.
- Next, add the honey, olive oil, salt, and all of the all-purpose flour to the yeast mixture. Mix on medium-high speed until all ingredients are thoroughly combined and a rough dough forms. Then, increase the mixer speed to high and knead for 5 minutes. The dough should become smooth and elastic, pulling away cleanly from the sides of the bowl. If it feels too sticky, add a few extra tablespoons of flour, one at a time, until the desired consistency is reached. The dough is perfectly done when it’s soft and bounces back readily when poked with a finger. Transfer the dough to a lightly greased bowl, cover it with a clean dishcloth, and let it rise in a warm place for 1-2 hours, or until it has visibly doubled in size.
- Form and Pre-Bake Crust: Preheat your oven to 425°F (220°C). Once your dough has risen (or if using a prepared crust), gently punch it down to deflate it, then turn it out onto a lightly floured surface. Using a floured rolling pin, roll the dough evenly into an 11-inch (28 cm) circle. Carefully transfer the rolled dough to a preheated pizza stone or a parchment-lined pizza pan. Place the pizza crust in the hot oven and pre-bake for 5-6 minutes, or just until it begins to puff up slightly and starts to set. This prevents a soggy crust. Remove the crust from the oven.
- Build the Flavorful Base: Immediately after removing the pre-baked crust, brush it evenly with 2 teaspoons of olive oil. Then, generously sprinkle 1/2 teaspoon of ground cinnamon across the entire surface.
- Next, evenly distribute the cooled caramelized onions over the cinnamon-dusted crust, followed by scattering the crumbled goat cheese. Finally, artfully arrange the thinly sliced pear pieces across the pizza, ensuring a good distribution for balanced flavor in every bite.
- Bake the Pizza to Perfection: Carefully transfer the fully assembled pizza back into the preheated oven. Bake for an additional 15 minutes, or until the pizza’s edges are beautifully golden brown and crisp, and the goat cheese is melted and bubbly.
- Final Assembly and Serve: Once baked, carefully remove the pizza from the oven. Immediately and generously top it with the crispy crumbled bacon bits, the sweet and crunchy candied walnuts, and a vibrant handful of fresh arugula. Finish by drizzling the luscious balsamic reduction evenly over the entire pizza. Slice into portions and serve immediately to experience this gourmet pizza at its absolute best!
Notes
- *Caramelized Onions: For comprehensive, detailed instructions on how to properly caramelize onions to perfection, please refer to the dedicated “Mastering the Art of Silky Sweet Caramelized Onions” section higher up in the main post text.
- **Balsamic Reduction: To effortlessly create your own balsamic reduction, combine 1/4 cup of good quality balsamic vinegar and 1 teaspoon of honey in a small saucepan over medium heat. Bring the mixture to a gentle boil, then immediately reduce the heat to a low simmer. Allow it to simmer for approximately 10 minutes, stirring occasionally, or until the vinegar has noticeably reduced in volume and thickened to a syrup-like consistency. Remove from heat and use immediately.