
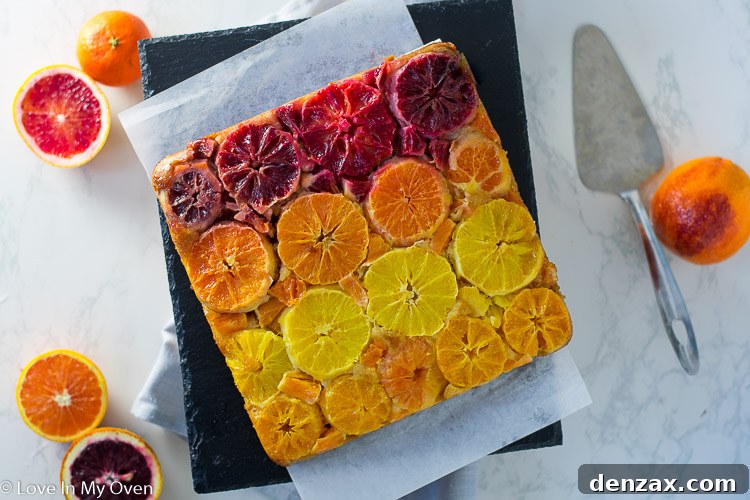
Impress your guests with this easy citrus cake! It’s an orange upside down cake using 3 different oranges for 3 different colors! Celebrate citrus season with a vibrant, flavorful citrus upside down cake that’s as beautiful as it is delicious.
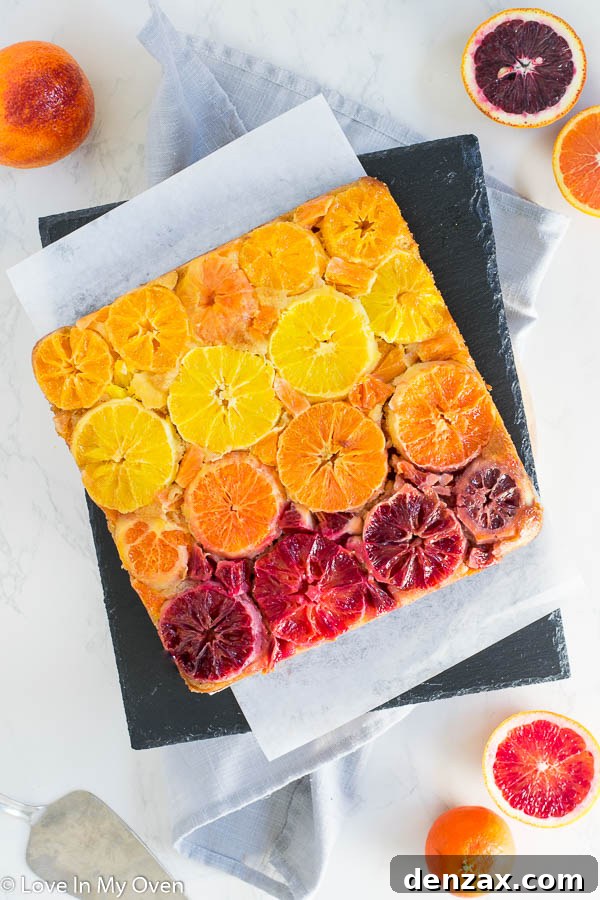
The Ultimate Triple Citrus Upside Down Cake: A Burst of Sunshine in Every Slice
As the vibrant hues of winter citrus begin to fade, it’s the perfect time to savor their bright, tangy flavors one last time. While many turn their attention to chocolates for Valentine’s Day, I’m here to remind you of the unparalleled joy that fresh oranges, grapefruits, and other round, juicy fruits bring to our kitchens. This glorious season might be drawing to a close, but with this spectacular triple citrus upside down cake, you can extend the celebration of nature’s bounty and infuse your home with an irresistible aroma.
For me, cake is more than just a dessert; it’s a celebration, a comfort, and a testament to the simple pleasures of life. While I’m not one for grand New Year’s resolutions, I made a personal commitment this year to indulge in more cake and chocolate – a delightful “backward resolution” perhaps, but one that brings immense joy! Baking and decorating cakes is a wonderfully therapeutic process, and the results are always worth sharing. This orange upside down cake, in particular, handles all its own decorating, presenting a stunning masterpiece straight from the pan. And oh, what a cake it is!
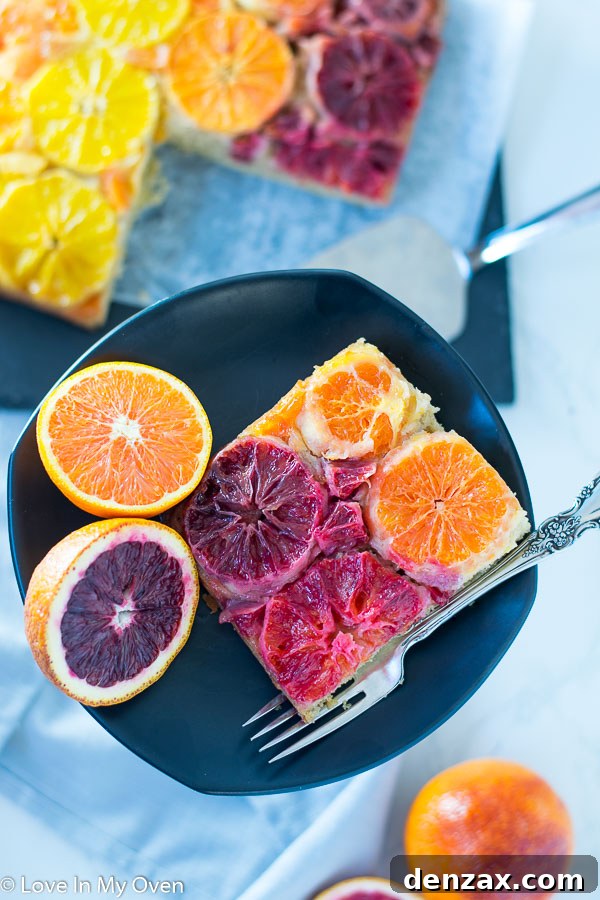
This cake promises a truly delightful experience. Each bite delivers a moist, slightly dense texture complemented by a delicate yet distinct citrus flavor. The star of the show, of course, is the array of vibrant orange slices, lovingly coated in a sweet, sticky, and utterly irresistible glaze. It’s a harmonious blend of textures and tastes that will leave your guests utterly captivated.
Why Choose a Citrus Upside Down Cake?
The beauty of an upside down cake lies in its simplicity and show-stopping presentation. The fruit, arranged beautifully at the bottom of the pan, becomes the cake’s exquisite topping once inverted. This method not only creates a stunning visual effect but also allows the fruit to caramelize gently in butter and sugar, infusing the cake with incredible moisture and a deeply concentrated flavor. It’s a dessert that looks sophisticated but is surprisingly easy to achieve, making it perfect for both seasoned bakers and eager beginners alike.
What Oranges Do You Use for This Citrus Upside Down Cake?
The wonderful thing about this recipe is its versatility and the opportunity to play with color and flavor. You can truly use all your favorite oranges, or a delightful combination to achieve a stunning visual mosaic. For this recipe, I highly recommend using a variety to create that captivating triple citrus effect, but even a single type of orange will yield a delicious result.
- Blood Oranges: Known for their dramatic, deep red flesh and distinct berry-like flavor, blood oranges add a beautiful contrast and a slightly tart note.
- Cara Cara Oranges: These offer a sweet, low-acid flavor with hints of cherry and rose, often displaying a beautiful pinkish-orange interior. They contribute both sweetness and a delicate hue.
- Navel Oranges: The classic choice, navel oranges provide that quintessential sweet and tangy orange flavor and a bright, familiar orange color.
- Mandarin Oranges (or Clementines): Smaller and often sweeter, mandarins are excellent for filling in smaller gaps or adding a milder sweetness. Their segments can also be arranged creatively.
Using a mix of these varieties not only creates a fun and eye-catching color scheme but also layers different nuances of citrus flavor, making each slice a unique experience. When selecting your oranges, look for fruits that are firm, heavy for their size, and have bright, unblemished skins. This indicates juiciness and freshness, which are key for a truly exceptional cake.

Do You Have to Use a Rectangular Pan for the Cake?
While the visual appeal of a square or rectangular cake can be striking, the beauty of this recipe is its adaptability. For this particular recipe, I opted for my standard 8″x8″ baking pan, which yields beautiful, evenly sized slices. However, you can absolutely use a round 9″ cake pan as well! The bake time will remain quite similar, but as with all baking, it’s crucial to trust your instincts and always check for readiness. The classic toothpick test—inserting a toothpick into the center of the cake—is your best friend. If it comes out clean, your cake is perfectly baked and ready for its grand reveal!
Regardless of whether you choose a round or square pan, a crucial step for a seamless inversion is proper pan preparation. Always begin by lining your chosen pan with a piece of parchment paper, ensuring the edges generously overhang the sides of the pan. This simple trick creates “handles” that will make lifting and flipping the cake much easier, significantly reducing the risk of it sticking or breaking apart. It’s a small effort that saves a lot of potential frustration!
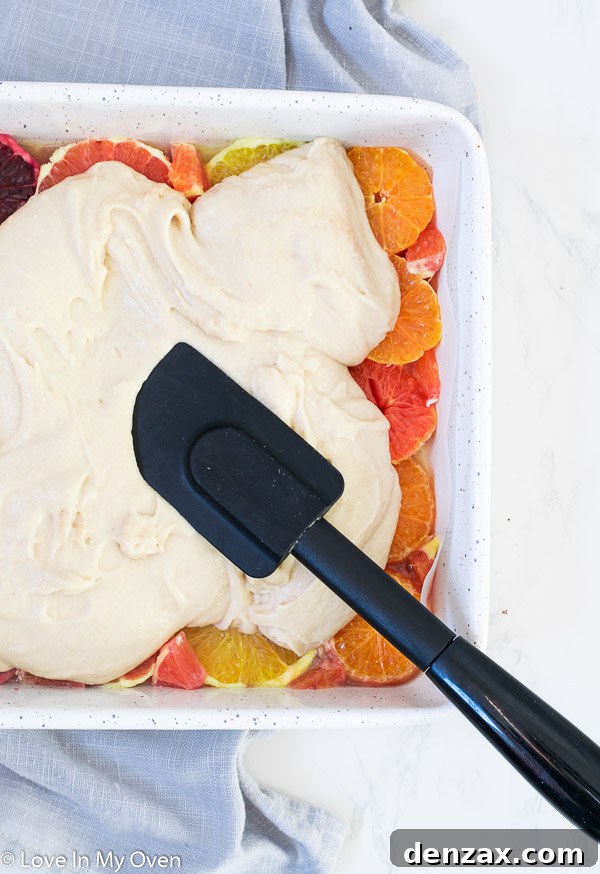
So, What If the Oranges Don’t Fit Perfectly in the Pan?
It’s highly unlikely that your orange slices will form a perfectly seamless mosaic when first arranged in the pan, and that’s perfectly normal! The beauty of this cake comes from its rustic charm. The trick to achieving a beautiful, continuous pattern is to embrace the imperfections and fill in any small gaps. After you’ve laid down your main slices, simply take smaller pieces of orange, or even half-slices, and carefully tuck them into any visible spaces between the larger rounds. Once the cake bakes, the batter expands around these pieces, and the caramelized fruit creates a magnificent, unified top layer that looks absolutely terrific. Don’t stress over perfection; aim for a delightful composition!

A Tip for Peeling and Cutting Oranges for Your Cake: Precision Makes Perfect
Achieving perfectly uniform orange slices is key to the visual appeal of this cake. After a few trial-and-error attempts, I’ve discovered a method that guarantees success every time. I can highly recommend that you slice the oranges into rounds before attempting to peel them. This technique ensures that the fruit remains firm and stable during the slicing process, allowing you to create beautifully even cuts. Aim for slices approximately 1/2″ thick for the best presentation and texture.
Once your orange is sliced into rounds, then proceed with peeling. To remove the peel efficiently and thoroughly, I like to use a small paring knife to make delicate cuts around the edge of each orange slice before gently separating the peel. This approach helps in preserving the integrity of the round. Crucially, try to remove as much of the white pith as possible. The pith, located directly beneath the peel, tends to have a bitter taste that can detract from the cake’s overall sweetness and delicate citrus flavor. A clean slice, free of pith, ensures a pure, delightful orange essence in every bite.
Can You Store the Cake at Room Temperature?
Yes, this delightful cake can be stored at room temperature, but only for a short period of 2-3 days. To maintain its freshness and deliciousness beyond that, especially if you anticipate it lasting longer (which is a big “if” for this cake!), I recommend transferring it to the refrigerator. Regardless of where you store it, always ensure the cake is kept in an airtight container. This prevents it from drying out and helps preserve its moist texture and vibrant flavor. While the cake can last 4-5 days in the fridge, it’s truly at its peak when enjoyed within the first few days.
Don’t let the opportunity slip by to infuse your life with a burst of color and flavor. This orange upside down cake is more than just a dessert; it’s a slice of sunshine, a celebration of simple pleasures, and an invitation to gather and enjoy. Bake it, share it, and let its radiant charm brighten your day!

More Citrusy Delights for You to Enjoy!
If you’ve fallen in love with the vibrant flavors of citrus, here are a few other refreshing recipes to try and keep the sunshine going:
- Winter Citrus Salad
- Sunny Citrus Tart
- Glazed Grapefruit Scones
- Cranberry Orange Smoothie

Orange Upside Down Cake
5 Stars 4 Stars 3 Stars 2 Stars 1 Star
5 from 9 reviews
Author: Katherine | Love In My Oven
Total Time: 1 hour
Yield: 5–6 servings 1x
Description
Impress your guests with this easy, vibrant citrus cake! It’s an orange upside down cake that uses 3 different types of oranges for a beautiful spectrum of colors and layered flavors. A perfect dessert to celebrate the citrus season or simply brighten any day.
Ingredients
Scale
Glaze
- 3 tbsp unsalted butter, melted
- 3 tbsp brown sugar
Cake
- 3–4 oranges*, sliced into 1/2” slices, peel removed
- 1 1/2 cups all-purpose flour
- 1/2 tsp baking powder
- 1/2 tsp baking soda
- 1/4 tsp salt
- 1/3 cup unsalted butter, softened
- 1/2 cup brown sugar, packed
- 1/4 cup granulated white sugar
- 1 large egg
- 1 tsp pure vanilla extract
- 1/2 cup milk**
- 1/4 cup orange juice
Instructions
- Preheat the oven to 350 F (175 C) and line an 8″x8″ standard baking pan with parchment paper, allowing the ends of the paper to overhang on the sides. In a small bowl, whisk together the melted butter with the brown sugar until well combined, and then pour this mixture evenly over the entire bottom of the prepared pan.
- Carefully place the peeled orange slices, side by side, into the bottom of the pan, directly on top of the butter and brown sugar glaze. Arrange them in an attractive pattern. Fill in all of the remaining gaps with small pieces of orange to ensure a full, vibrant fruit layer (refer to the blog post above for visual guidance and detailed directions on arranging).
- In a large mixing bowl, whisk together the all-purpose flour, baking powder, baking soda, and salt until thoroughly combined. Set this dry mixture aside. In the bowl of a stand mixer fitted with the paddle attachment, or using a handheld electric mixer, beat the softened unsalted butter with both the brown sugar and granulated white sugar on medium-high speed until the mixture is light and fluffy, usually about 1 minute. Add the large egg and pure vanilla extract, mixing again until just combined. Gradually add half of the dry ingredients to the wet mixture, and mix on low speed for about 30 seconds until mostly incorporated. Next, add the milk, followed by the remaining dry ingredients, mixing again on low speed for 15-20 seconds. Finally, pour in the orange juice and mix on low speed until all ingredients are fully incorporated and the batter is smooth. Pour the cake batter evenly on top of the oranges in the prepared pan, spreading it gently with a spatula to create an even layer. Place the pan in the preheated oven and bake for 40-45 minutes. Begin checking the cake after 40 minutes by inserting a toothpick into the center; if the toothpick comes out clean, the cake is done. If there is still wet batter on the stick, return it to the oven and bake for another 5 minutes, checking again. Once baked, remove the cake from the oven and allow it to cool in the pan for 10-15 minutes before carefully inverting the cake onto a serving platter or cake stand.***
- Allow the cake to cool completely before slicing and serving. Enjoy the delightful flavors!
The cake can be stored in an airtight container at room temperature for 2-3 days. For longer freshness, store it in the refrigerator for up to 4-5 days. Freezing the prepared cake is not recommended as it may affect the texture of the fruit and glaze.
Notes
*Use whatever oranges you like; the amount you need will vary on the size of the orange, but you’ll typically need 3-4 medium to large oranges. I used a mixture of blood oranges, cara cara, medium navel, and mandarin for a beautiful color spectrum. See the above blog post for detailed tips on slicing and peeling the oranges.
**You can use any type of milk you prefer for this recipe, including dairy milk (such as whole milk or 2%) or non-dairy alternatives like almond milk or coconut milk. Each will contribute slightly different nuances to the cake’s flavor and texture.
***If the top of the cake (which becomes the bottom when baked) is uneven or rounded, you can use a serrated knife to carefully level out the cake a bit before inverting it. This will help ensure your cake sits flat and looks polished on your serving plate.
- Prep Time: 20 minutes
- Cook Time: 40 minutes
- Category: cakes
- Method: baking