
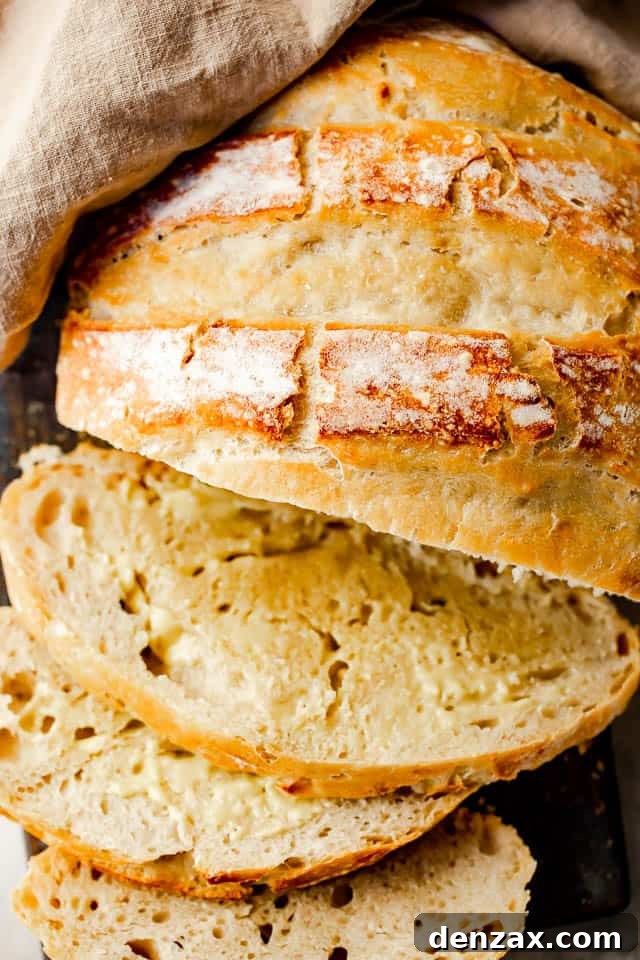
Unlock the secret to bakery-quality bread right in your own kitchen, without the fuss! Our No-Knead Dutch Oven Bread recipe is a dream come true for busy home bakers and culinary enthusiasts alike. Imagine a warm, fragrant artisan loaf emerging from your oven, boasting an irresistibly crispy, crackly crust and a tender, chewy interior, all achieved with minimal effort. This isn’t just a recipe; it’s a revelation that promises the easiest and most satisfying bread-making experience you’ll ever have.
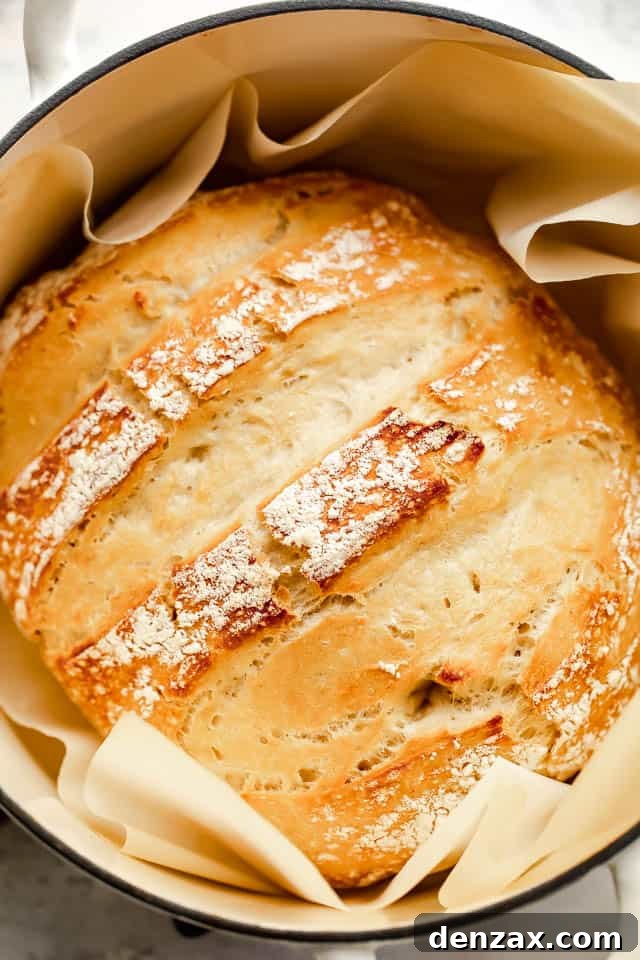
Experience the Easiest Homemade Bread Recipe Ever
Do you adore the idea of fresh, homemade bread but find yourself deterred by the time-consuming process of traditional baking? We understand completely. The endless cycles of kneading, rising, punching down, and rising again often demand more “me-time” and flexibility than modern life allows. This is where our no-knead method shines, transforming what was once a multi-hour commitment into a remarkably simple, hands-off endeavor perfect for today’s busy foodies.
The beauty of no-knead bread lies in its ingenious technique: a high-hydration dough combined with a long, slow fermentation. This allows time, rather than intensive manual labor, to develop the gluten structure, resulting in a robust, flavorful loaf with that signature artisan texture. The process is incredibly forgiving – if you start the dough in the morning and life gets in the way, don’t fret! It happily waits, patiently developing flavor, for 8 to 12 hours, or even longer, adapting seamlessly to your schedule.
When you’re ready to bake, the steps are equally straightforward: a quick shape into a rustic round, then a gentle transfer into a preheated Dutch oven. The result is consistently spectacular, producing a golden-brown masterpiece that tastes like it came from a gourmet bakery. This recipe is designed to empower anyone, regardless of baking experience, to create truly delicious bread. We highly encourage you to give it a try!
What is a Dutch Oven & Why It Is Essential for Artisan Bread?
A Dutch oven is far more than just a pot; it’s a versatile cooking vessel, typically made from heavy cast iron, often coated in durable enamel for ease of cleaning and maintenance. Its distinguishing feature is a tightly fitting, heavy lid that creates a sealed environment, trapping steam inside during cooking. While indispensable for stews, soups, and braises, the Dutch oven truly transforms the art of bread baking, acting as a mini-oven within your oven.
The magic happens when you preheat the Dutch oven along with your conventional oven. This super-heated vessel provides an intense, even heat that immediately begins to set the bread’s crust when the dough is added. More importantly, the trapped steam continuously circulates around the loaf. This humid environment is crucial for achieving that coveted oven spring, allowing the dough to expand beautifully before the crust fully hardens. As the bread bakes, the steam gradually escapes, allowing the crust to crisp up to perfection – a thick, delightfully crackly exterior that yields to a soft, airy interior. This unique combination of high initial heat and controlled steam is what makes Dutch oven baking unparalleled for producing a wonderfully crunchy, artisanal loaf that’s simply impossible to replicate with a standard baking sheet.
Simple Ingredients for the Perfect No-Knead Bread
One of the most appealing aspects of making no-knead Dutch oven bread is its reliance on just a handful of basic pantry staples. You don’t need fancy ingredients or complex additions to create a hearty, delicious loaf that will impress everyone. This minimalist approach truly makes it one of the easiest and most accessible bread recipes around!
- All-Purpose Flour: You’ll need approximately 3 cups of your favorite all-purpose flour. While all-purpose flour works beautifully for a tender crumb, bread flour can be used for an even chewier texture, thanks to its higher protein content. We generally don’t recommend gluten-free flour for this specific recipe, as gluten-free breads typically require additional binders and specific techniques to achieve a similar structure and rise.
- Active Dry Yeast: A single teaspoon of active dry yeast is the magical leavening agent that gives our bread its wonderful rise and airy texture. While not strictly necessary to “proof” this yeast (given the long rise time), ensuring it’s active by mixing it with a little warm water and sugar until foamy can offer peace of mind, especially if your yeast has been sitting in the pantry for a while.
- Salt: Don’t underestimate the power of salt! One teaspoon of salt is absolutely essential. Beyond just flavoring the bread, salt plays a crucial role in regulating yeast activity and strengthening the gluten network, contributing to the overall structure and texture of your loaf. A tasteless loaf of bread is a missed opportunity, so be sure to include it!
- Room Temperature Water: The dough for no-knead bread is intentionally soft and shaggy, requiring about 1 ½ cups of room temperature water (ideally around 75˚F or 24˚C). The exact temperature is important: water that is too cold will slow down the yeast significantly, while water that is too hot can kill it. This high hydration level is key to developing gluten without kneading, creating a moist and open crumb.
How to Make the Best No-Knead Dutch Oven Bread: Step-by-Step
Preparing this incredibly simple dough takes mere minutes of active time, making it an ideal choice for even the busiest schedules. Once the initial mixing is done, the magic truly begins as the dough rests, developing its complex flavors and robust structure over several hours – you can even leave it overnight without a worry!
Crafting the Easy No-Knead Dough
The initial stage of making this bread couldn’t be simpler. It’s essentially a “dump and stir” method!
- Combine Dry Ingredients: In a generously sized mixing bowl, combine the all-purpose flour, active dry yeast, and salt. Use a whisk to thoroughly incorporate these dry ingredients, ensuring an even distribution of yeast and salt throughout the flour.
- Add Water and Mix: Pour the room temperature water into the bowl with the dry mixture. Using a sturdy wooden spoon or, for even better results, a specialized dough whisk mixer, stir until all ingredients are just combined and the dough has a distinctly “shaggy” appearance. It will be very sticky and loose, not smooth. If the dough seems excessively wet or runny, add flour, a tablespoon at a time, up to an additional half cup, until it forms a very soft, pliable dough that isn’t a liquid batter.
The Long, Slow Rise: Flavor Development
Unlike traditional bread recipes that demand multiple short rises and interventions, no-knead bread thrives on a single, extended fermentation period. This hands-off approach makes it a perfect fit for busy lifestyles, as you don’t need to constantly monitor or “babysit” the dough. It’s as convenient as any overnight recipe.
To facilitate the rise, loosely cover your bowl with plastic wrap, creating a snug seal. Place the covered bowl in a cool, draft-free spot at room temperature for a minimum of 8 hours, or until the dough has noticeably doubled in size and appears bubbly. The long fermentation not only develops the gluten structure but also allows for a profound depth of flavor to emerge, giving your bread that signature artisanal taste. For ultimate convenience, you can also use a pre-made batch of my easy No-Knead Dough, which can be refrigerated overnight. If using refrigerated dough, simply remove about 2 pounds and allow it to come to room temperature for about 30-60 minutes before proceeding to the next step.
Baking Your Perfect Crusty Loaf
Working with no-knead dough can feel a bit unusual at first due to its softness and stickiness, but remember, this is a very forgiving recipe! Perfection isn’t the goal here; rustic charm is. Don’t stress about exact shaping.
- Prepare for Baking: Preheat your oven to a scorching 450°F (232°C). Crucially, place your empty Dutch oven with its lid on the center rack and allow it to heat up for at least 30 minutes. This step is vital for creating that initial burst of steam and a crispy crust.
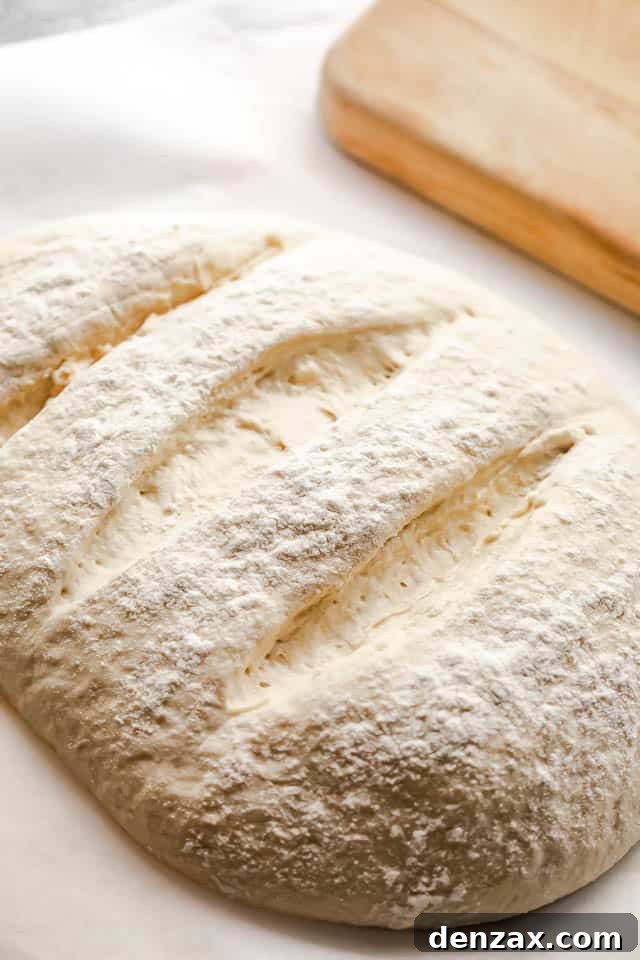
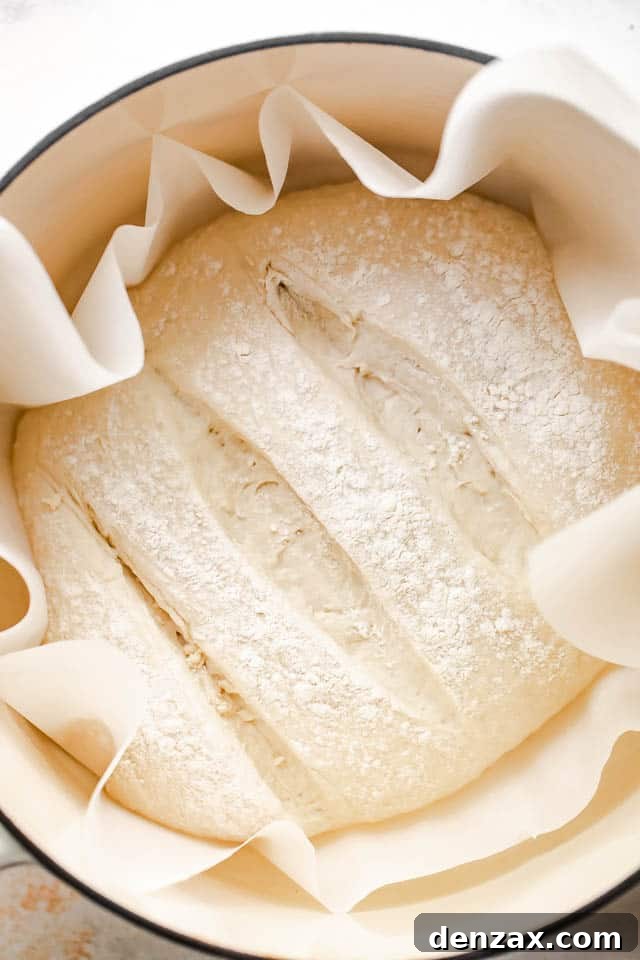
- Shape the Dough: While the Dutch oven preheats, lightly flour your hands and sprinkle a small amount of flour onto the risen dough. Gently, and with minimal handling, shape the dough into a round loaf as best you can. The goal is a rustic shape, not a perfectly smooth ball. A metal bench scraper can be a helpful tool here to guide the sticky dough. Transfer your roughly shaped loaf onto a large piece of parchment paper.
- Score the Dough & Carefully Place in Pot: Using a very sharp knife or a bread lame, make a few shallow slashes (about ¼-inch deep) across the top of the loaf. These “scores” allow the bread to expand predictably in the oven. With oven mitts on, carefully remove the intensely hot Dutch oven from the oven and set it on a heat-safe surface. Remove its lid. Holding onto the ends of the parchment paper, gently lift the bread and lower it carefully into the hot Dutch oven.
- First Bake (Covered): Immediately cover the Dutch oven with its hot lid and return it to the oven. Bake for 30 minutes. This initial covered period traps steam, which helps the bread achieve maximum rise and a soft interior.
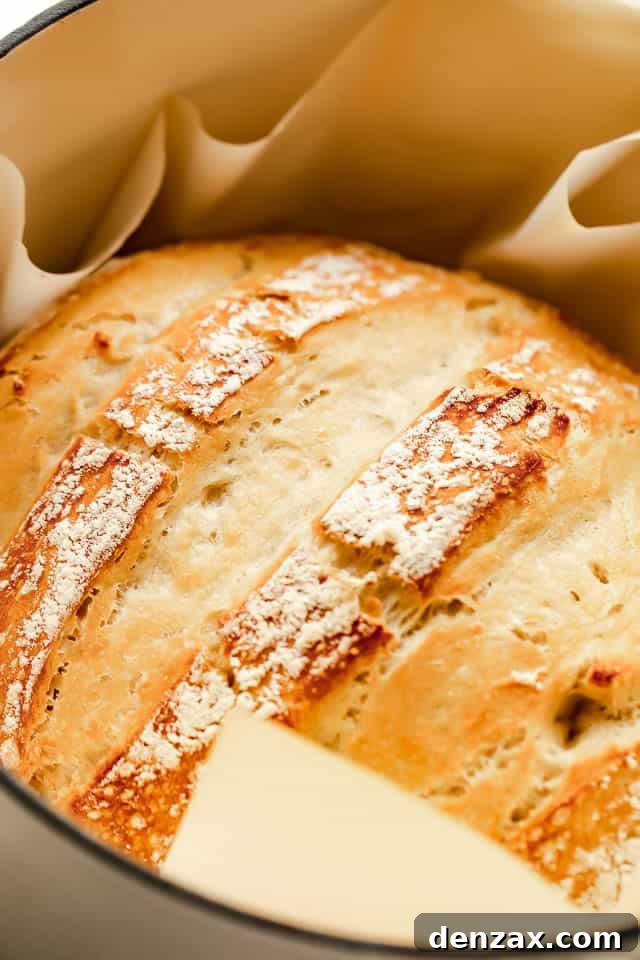
- Second Bake (Uncovered) & Cool: After 30 minutes, carefully remove the lid from the Dutch oven and continue to bake for another 15 minutes, or until the crust is a deep golden brown and sounds hollow when tapped. Once baked, remove the finished loaf from the Dutch oven using the parchment paper and transfer it to a wire rack to cool completely. Resist the urge to slice it immediately!
- Slice and Serve: Once fully cooled, slice into generous portions and serve. Enjoy the fruits of your effortless labor!
Pro Tips for Your Best Dutch Oven Bread
While this recipe is incredibly straightforward, a few expert tips can elevate your no-knead Dutch oven bread from great to absolutely extraordinary. Keep these suggestions in mind for consistently perfect results:
- Embrace Your Bench Scraper: No-knead dough is notoriously soft, sticky, and can feel like “melted bubble gum” to handle. Don’t be afraid to work with it! A bench scraper is an invaluable tool for gently lifting, folding, and shaping the dough without it adhering to your hands or work surface. It makes managing the sticky texture much easier.
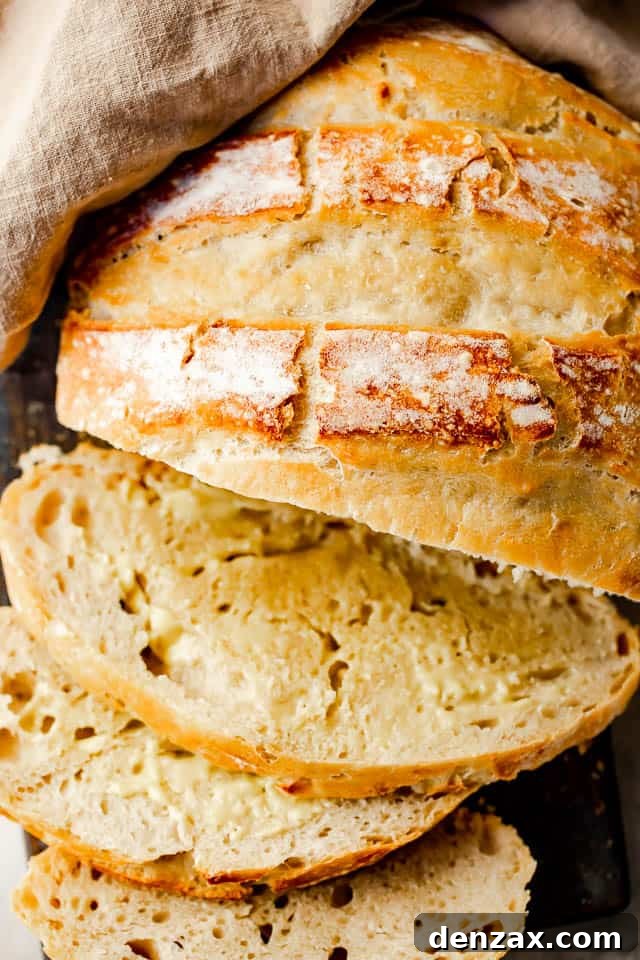
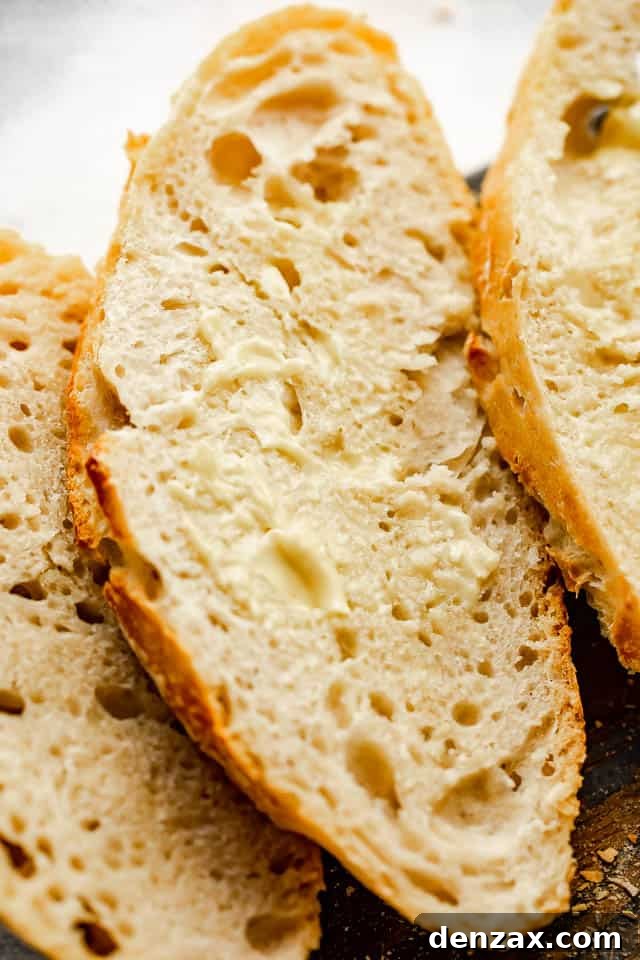
- Patience is Key: Cool Before Slicing: This is perhaps the most crucial tip! Resist the temptation to cut into your freshly baked loaf until it has cooled completely on a wire rack, usually for at least 1-2 hours. Slicing warm bread causes the internal steam to escape rapidly, resulting in a gummy texture and uneven slices. Allowing it to cool lets the starches set, giving you a perfect crumb and clean cuts.
- Transform into a Sandwich Loaf: For a more versatile shape, turn the dough out onto a floured piece of parchment paper. Gently flatten it into a rectangle. Use the parchment paper to help you fold the dough into thirds, similar to folding a letter. Carefully transfer this shaped dough into a well-greased loaf pan and bake as directed (though you might reduce the initial covered bake time slightly, keep an eye on it). This yields a perfect sandwich-ready loaf!
- Experiment with Add-ins: Once you’ve mastered the basic recipe, feel free to get creative! Incorporate a handful of seeds (like sesame, poppy, or sunflower) into the dough, or mix in some dried herbs (rosemary, thyme, or oregano) for an aromatic twist. A sprinkle of cheese or olives can also elevate your loaf to new savory heights.
- Bake on the Grill for Summer Fun: Don’t let a hot kitchen stop you from enjoying fresh bread! This recipe adapts beautifully to outdoor grilling. Preheat your grill to a consistent 400˚F – 500˚F (200˚C – 260˚C). Place your Dutch oven on the grill grates with the lid closed to heat up. Once hot, carefully add the dough, close the lid, reduce the grill heat slightly, and “bake” until golden brown, following the same covered/uncovered timing.
Delicious Serving Suggestions for Your Homemade Bread
A beautiful, crusty loaf of homemade bread is a versatile culinary canvas, ready to complement an array of dishes. Its hearty flavor and satisfying texture make it an excellent accompaniment to countless meals. Here are some inspiring ideas to get you started:
- Classic with Soup: You already know it! Fresh bread and soup are a match made in heaven. The sturdy crust is perfect for dipping and soaking up flavorful broths. It’s particularly delightful served alongside a rich and comforting bowl of my Italian Sausage Butternut Squash Soup, creating a truly wholesome meal.
- Hearty with Beef Tips: While often paired with egg noodles or rice, Beef Tips in Mushroom Gravy truly sing when served with slices of crusty, homemade bread. Toasting the bread lightly can add an extra layer of texture. Add a simple green salad, and you have a wonderfully comforting and complete dinner.
- Complement to One-Pot Meals: Many one-pot wonders, like my easy Smoked Sausage with Potatoes and Green Beans, are often saucy or have a delicious liquid component. Freshly baked bread is the ideal companion, perfect for mopping up every last drop and adding a delightful textural contrast that makes the meal even more filling and satisfying.
- Breakfast or Brunch Delight: Slice your bread thick, toast it, and spread with butter and your favorite jam or honey. Or, for a savory twist, top with avocado and a poached egg.
- Garlic Bread Supreme: Transform leftover slices into incredible garlic bread! Brush with melted butter, minced garlic, and fresh parsley, then toast until golden.
How to Store Homemade Dutch Oven Bread for Lasting Freshness
Proper storage is essential to maintain the delicious crust and soft interior of your homemade no-knead bread. Unlike store-bought loaves often laden with preservatives, homemade bread has a shorter shelf life but offers superior flavor. The key is to allow the bread to “breathe” slightly while still protecting it from excessive air exposure.
- Many experienced bakers recommend storing homemade bread in a simple paper bag. This allows enough air circulation to preserve the crust’s crispness without drying out the interior too quickly.
- Alternatively, a dedicated linen bread bag offers excellent breathability and keeps the crust relatively firm.
- For those who prefer a more traditional aesthetic, a ceramic bread box can provide an ideal environment, balancing humidity and airflow.
- Regardless of your chosen method, always store your no-knead bread at room temperature. It’s best enjoyed within two days of baking for optimal freshness. Avoid refrigerating bread, as this can accelerate staling.
Can You Freeze Homemade Bread for Future Enjoyment?
Absolutely! Freezing is an excellent way to extend the life of your homemade no-knead bread, allowing you to enjoy fresh-tasting slices whenever the craving strikes, even weeks or months later.
- To properly freeze homemade bread, ensure it has cooled completely after baking. This prevents condensation from forming inside the packaging, which can lead to ice crystals and a soggy texture.
- For best results, wrap the entire loaf or individual slices (if you prefer single servings) very tightly. Use two layers of plastic wrap, or a layer of plastic wrap followed by a layer of aluminum foil. This double layer helps to prevent freezer burn and keeps the bread fresh.
- Label the wrapped bread with the date, then transfer it to the freezer. Homemade bread can be safely frozen for up to six months.
- To thaw, simply remove the bread from the freezer and let it come to room temperature on your countertop. For an extra touch of freshness, you can briefly reheat the thawed loaf in a warm oven (around 350°F/175°C) for 10-15 minutes, or toast individual slices.
No Knead Dutch Oven Bread
Katerina | Easy Weeknight Recipes
5 minutes
30 minutes
8 hours
8 hours
40 minutes
16
Ingredients
-
3
cups
all-purpose flour
-
1
teaspoon
active dry yeast
-
1
teaspoon
salt -
1 ½
cups
room temperature water,,
about 75˚F
Instructions
-
In a large mixing bowl, combine flour, yeast, and salt; whisk until well incorporated.
-
Using a wooden spoon or a dough whisk mixer, stir in the water; continue to stir until combined and the dough is shaggy.
If the dough is too wet, add a little more flour, a couple tablespoons at a time, up to ½ cup more flour, until it reaches a very soft but not runny consistency.
-
Cover the bowl with plastic wrap and let the dough rise in a cool spot for 8 hours, or until it has doubled in size.
-
Preheat your oven to 450˚F (232°C).
-
Place your Dutch oven and its lid on the center rack of the oven and heat it for 30 minutes. This is crucial for a crisp crust.
-
In the meantime, turn the risen dough out onto a lightly floured surface.
-
Flour your hands and sprinkle a little bit of flour on top of the dough; gently shape the dough into a round loaf. A metal scraper can assist in handling the sticky dough.
-
Transfer the shaped loaf to a large piece of parchment paper.
-
Using a sharp knife or bread lame, make a few shallow slashes (about ¼-inch deep) across the top of the loaf.
-
With oven mitts on, carefully remove the intensely hot Dutch oven from the oven. Remove the lid. Exercise extreme caution – the pot will be very hot.
-
Holding onto the ends of the parchment paper, carefully lift the bread and gently lower it into the hot Dutch oven.
-
Cover the Dutch oven with its lid and bake for 30 minutes.
-
Remove the lid and continue to bake for 15 more minutes, or until the top is beautifully golden brown and the crust is crisp.
-
Carefully remove the bread loaf from the Dutch oven and transfer it to a wire rack to let it cool completely.
-
Once fully cooled, slice and serve your incredible homemade bread.
Equipment
-
Dutch Oven
Notes
Nutrition
Serving:
1
slice
|
Calories:
88
kcal
|
Carbohydrates:
18
g
|
Protein:
3
g
|
Fat:
1
g
|
Saturated Fat:
1
g
|
Sodium:
147
mg
|
Potassium:
32
mg
|
Fiber:
1
g
|
Sugar:
1
g
|
Vitamin C:
1
mg
|
Calcium:
4
mg
|
Iron:
1
mg
Nutritional info is an estimate and provided as courtesy. Values may vary according to the ingredients and tools used. Please use your preferred nutritional calculator for more detailed info.
Did you make a recipe? Leave a rating
More Delicious Bread Recipes to Try
If you’ve fallen in love with the joy of homemade bread, we have more delightful recipes for you to explore. These hearty and flavorful options are sure to become new favorites in your baking repertoire!
- Spinach and Feta No-Yeast Bread
- Cheesy Garlic Pull-Apart Bread
- Easy Homemade Flatbread Recipe