

Discover how to effortlessly create these adorable and delicious cream cheese spiderweb cookies, perfect for adding a touch of spooky fun to your Halloween celebrations!

*Please note* this post contains affiliate links that may earn me a small commission, at no extra cost to you.
Spooktacularly Easy Cream Cheese Spiderweb Cookies for Halloween
As the leaves begin to turn and the air grows crisp, there’s an undeniable buzz in anticipation of Halloween. It’s a time for spooky decor, creative costumes, and, of course, delightfully themed treats! If you’re looking for an impressive yet incredibly easy Halloween baking project, these cream cheese spiderweb cookies are an absolute must-try. They combine the rich, tender texture of a classic cream cheese cookie with a fun, eerie design that’s surprisingly simple to achieve.
Often, holiday baking can feel overwhelming, sneaking up on us faster than a ghost in the night. Perhaps you, like me, find yourself looking at the calendar, realizing Halloween is just around the corner, and panic sets in over what to bake. Fret not! These spiderweb cookies are the perfect solution for both seasoned bakers and last-minute enthusiasts. They require minimal fuss but deliver maximum festive impact and incredible flavor. Forget complicated techniques; with a few basic ingredients and a simple decorating trick, you’ll have a batch of these charmingly creepy cookies ready to delight everyone.

Why Choose Cream Cheese Cookies for Your Halloween Treat?
When it comes to holiday cookies, many people reach for traditional sugar cookie recipes. While sugar cookies are certainly a staple and fun to decorate, they can sometimes lack that melt-in-your-mouth tenderness. That’s where the magic of cream cheese comes in! Incorporating full-fat cream cheese into your cookie dough transforms a good cookie into an extraordinary one.
These cream cheese cookies boast an unparalleled softness and a delightful chewiness that traditional sugar cookies often can’t match. The cream cheese adds a subtle tang and richness, creating a more complex flavor profile that perfectly complements the sweetness of the royal icing. This unique texture also helps the cookies maintain their shape beautifully during baking, ensuring your meticulously cut shapes and intricate spiderweb designs hold up flawlessly. If you’ve never experienced the joy of a cream cheese cookie, prepare to be absolutely charmed by their delicate crumb and luxurious taste – they truly are a treat!
Crafting the Perfect Cream Cheese Cookie Dough
Creating the base for these sensational spiderweb cookies is a straightforward process, even for beginners. The secret to their tender texture lies in the careful blending of a few key ingredients, starting with room-temperature butter and cream cheese. This is a crucial step that ensures a smooth, uniform dough without lumps, leading to perfectly baked cookies.
Ingredients for Irresistible Cookies:
You’ll need a simple lineup of pantry staples: softened unsalted butter, full-fat cream cheese (also at room temperature for optimal blending), granulated sugar, a large egg, and a touch of vanilla and almond extracts for that irresistible aroma and flavor. The dry ingredients include all-purpose flour, baking powder for a gentle lift, and a pinch of salt to balance the sweetness.
Step-by-Step Dough Preparation:
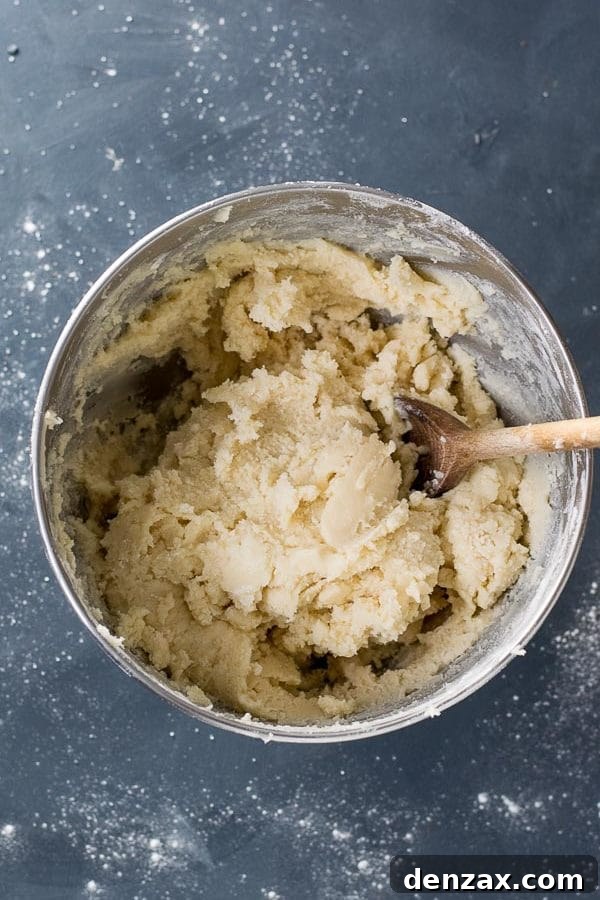
- Creaming the Wet Ingredients: In the bowl of your stand mixer (or using a handheld electric mixer), combine the room-temperature butter and cream cheese. Beat them on high until the mixture is light, fluffy, and perfectly smooth, usually about two minutes. This aeration is key to a tender cookie.
- Adding Sugar and Flavor: Gradually add the granulated sugar to the creamed butter and cream cheese, beating for another minute until fully incorporated and light. Then, with the mixer on low, carefully add the egg, followed by the vanilla and almond extracts. Continue to beat until everything is just combined. Overmixing at this stage can lead to tough cookies, so be gentle!
- Incorporating Dry Ingredients: In a separate bowl, whisk together your flour, baking powder, and salt. This ensures even distribution of the leavening agent. Slowly add the dry ingredients to the wet mixture in two batches, mixing on low speed until just incorporated. As soon as you no longer see streaks of flour, stop mixing. Overworking the dough develops gluten, which can make your cookies chewy rather than tender.
The Essential Chill: Why and How
Once your dough is mixed, a crucial step for perfect cut-out cookies is chilling. Chilling the dough for at least an hour (and up to three days) allows the butter to firm up, preventing the cookies from spreading too much in the oven and helping them maintain their intricate shapes. It also allows the flavors to meld and the flour to fully hydrate, resulting in a superior texture.
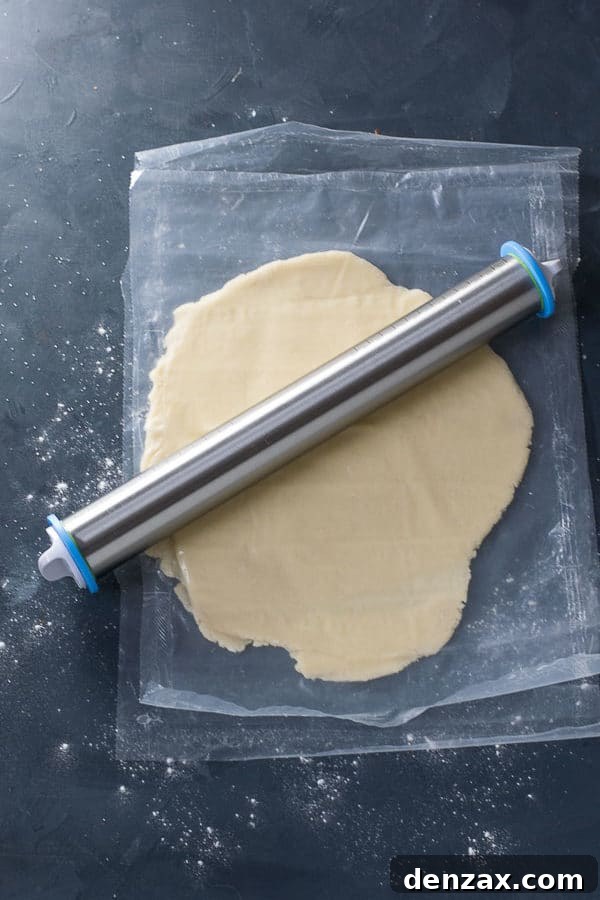
For convenience, I highly recommend rolling out your dough before chilling. Divide the dough into two portions, place each between two sheets of parchment paper, and roll to an even 1/4-inch thickness. This method saves time later and makes cutting out cookies incredibly easy. Simply stack the rolled-out dough sheets (still between parchment) in the fridge to chill. This clever trick means no more wrestling with cold, stiff dough!
Pro Tip: Invest in an adjustable rolling pin! It’s a game-changer for achieving consistent thickness every time. I found this fantastic one on Amazon, and it’s made a huge difference in my cookie baking. You simply swap out the rings on the ends for your desired measurement, ensuring uniform cookies that bake evenly.
Baking Your Cream Cheese Cookies to Perfection
Once your dough is perfectly chilled and ready, it’s time for the exciting part – cutting and baking! For our spiderweb cookies, a simple round cookie cutter is all you need. Don’t be afraid to get creative with other Halloween shapes too; I even made some adorable pumpkin cookies with the same dough!
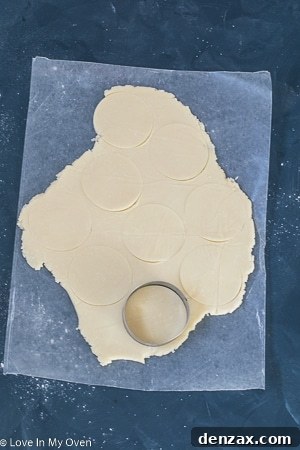
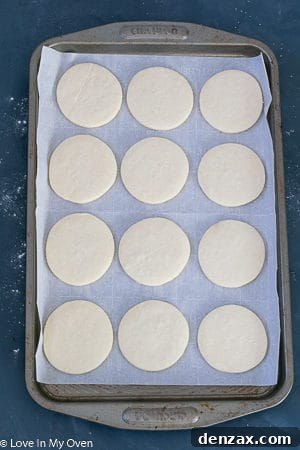
Preheat your oven to 350°F (175°C) and line two large baking sheets with parchment paper. Working quickly to keep the dough cold, remove a sheet of rolled-out dough from the fridge and cut out your shapes. Place the unbaked cookies about 1 inch apart on the prepared baking sheets. If your dough starts to become soft and difficult to handle, pop it back into the fridge for 15-20 minutes to firm up again. This little break is well worth it, as properly chilled dough is key to preventing spread and maintaining those crisp edges.
These cookies, rolled to 1/4-inch thickness, bake beautifully in just 9-10 minutes. The trick is to remove them from the oven when their edges are just beginning to turn a faint golden brown, but the centers still look slightly under-baked. They will continue to set and firm up on the hot baking sheet for a minute or two after removal. This slight under-baking technique is the secret to achieving wonderfully soft and tender cream cheese cookies every single time. Once out of the oven, let them cool on the baking sheet for about 10 minutes before transferring them to a wire rack to cool completely. Patience is a virtue here, as completely cooled cookies are essential before you move on to the fun of decorating!
Mastering Royal Icing for Stunning Spiderwebs
Once your delectable cream cheese cookies are completely cool, it’s time to bring them to life with vibrant royal icing! Royal icing is the perfect choice for cookie decorating as it dries hard and smooth, creating a beautiful, polished finish that holds intricate designs flawlessly. While some recipes call for meringue powder, I’ve found great success with a classic recipe using raw egg whites, powdered sugar, and a touch of cream of tartar. If you’re concerned about using raw egg whites, pasteurized egg whites (available in cartons at most grocery stores) are a fantastic, salmonella-free alternative.
Achieving the Right Icing Consistency:
The key to successful royal icing designs, especially for the spiderweb effect, is achieving the correct consistency. For outlining and creating the initial white flood layer, you’ll want a medium-runny consistency – thin enough to flow smoothly and fill the cookie surface, but thick enough to stay within your piped outline. For the black “web” details, a slightly thicker consistency works best to maintain defined lines. You can easily adjust the consistency by adding a tiny bit more powdered sugar to thicken it, or a few drops of water to thin it out. Always test on a scrap piece of parchment paper (or a “test cookie”) before committing to your decorated cookies!
Coloring Your Icing:
For vibrant, true-to-color icing, I enthusiastically recommend using gel food coloring. Unlike liquid food coloring, gel colors are highly concentrated, meaning you need only a tiny amount to achieve intense hues without significantly altering the icing’s consistency. I personally love and use Wilton’s gel food colorings for their quality and wide range of shades. Divide your royal icing into two portions: one white for the base, and the other colored black for the web details.
Storing Royal Icing:
Royal icing can be prepared in advance. Store any unused icing in an airtight container in the refrigerator. A thin film of plastic wrap pressed directly onto the surface of the icing will prevent it from hardening. When you’re ready to use it again, you might need to add a few drops of water and stir gently to bring it back to the desired consistency.

Creating the Enchanting Spiderweb Design
The spiderweb design might look like the work of a professional decorator, but I promise, it’s incredibly easy and relies on a simple technique known as “wet-on-wet” icing. You’ll be amazed at how quickly you can create this impressive effect!
Step-by-Step Spiderweb Magic:
- Base Layer: Begin by completely flooding the surface of a cooled cookie with white royal icing. You can use a piping bag with a small round tip or a squeeze bottle for this. Ensure the white icing is smooth and fully covers the cookie.
- Piping the Black Details: While the white icing is still wet and unset (this is key!), immediately pipe a small black dot directly in the center of the cookie. Then, working outwards from the center, pipe three to four concentric black circles around the central dot, leaving about a 1/2-inch gap between each circle.
- Dragging the Web: Without delay, pick up a clean toothpick or a thin skewer. Starting from the central black dot, gently drag the toothpick outwards through the black circles towards the outer edge of the cookie. Repeat this dragging motion at regular intervals around the cookie, creating radial lines. As you drag, the wet black icing will pull into the wet white icing, forming those beautiful, intricate web lines.
- Optional Sprinkles: If you wish to add some festive sprinkles, do so immediately after completing the web design, while the icing is still wet, to ensure they adhere.




Once the icing has completely set and dried (which can take several hours, or even overnight, depending on humidity), your beautiful spiderweb cookies are ready to be served or stored. For an extra touch of whimsy, you can even add a small dollop of black icing, cover it with sprinkles, and give it tiny piped legs to create an instant spider sitting on its web!
Versatility Beyond Halloween: Other Festive Ideas
While these cookies are undeniably perfect for Halloween with their spooky spiderweb design, the underlying cream cheese cookie recipe is incredibly versatile. It makes a fantastic base for Christmas cookies, Valentine’s Day treats, or any celebration where you want a tender, flavorful cut-out cookie. Simply swap the spiderweb design for festive snowflakes, colorful hearts, or intricate floral patterns with different colored royal icing. The possibilities are truly endless!
For instance, after making a batch of spiderweb cookies for a Halloween party, I easily repurposed the same dough to create charming pumpkin-shaped cookies for a preschool celebration. Decorating pumpkins with icing is far less messy – and arguably more delicious – than carving real ones! These cream cheese cookies consistently deliver a delightful canvas for all your creative decorating whims, making them a year-round favorite.
Happy Halloween, and happy baking!


More Spooky & Sweet Treats You’ll Love:
If you’re still in the mood for more Halloween baking, be sure to check out these other fun ideas:
- Spooky & Fun Halloween Cake Pops
And for more delicious cookie inspiration, explore these delightful recipes:
- Soft & Chewy Pumpkin Cake Cookies
- Irresistible Browned Butter Reese’s Pieces Cookies
- Elegant Vanilla Bean Cookie Pops
Print Recipe

Spiderweb Cookies
5 Stars 4 Stars 3 Stars 2 Stars 1 Star
5 from 8 reviews
Author: Katherine | Love In My Oven
Total Time: 1 hour
Yield: 2 dozen cookies 1x
Description
These easy cream cheese cookies are made a little extra fun by turning them into spiderweb cookies! They’re easy Halloween cookies that are sure to delight!
Ingredients
Scale
Cookies
- 1 cup unsalted butter, room temperature
- 2 oz full-fat cream cheese, room temperature*
- 1 cup granulated sugar
- 1 egg, room temperature
- 1 tsp pure vanilla extract
- 1/2 tsp almond extract
- 3 cups all-purpose flour
- 1 1/2 tsp baking powder
- 1/2 tsp salt
Royal Icing
- 3 egg whites
- 2 1/2 cups powdered sugar**
- 1/2 tsp cream of tartar
Instructions
- Prepare the cookie dough. In the bowl of a stand mixer fitted with the paddle attachment, or using a handheld electric mixer, combine together the butter and cream cheese on high, until smooth, about 2 minutes. Add the sugar and beat for an additional minute. With the mixer running on low, add the egg, followed by the extracts, and beat for an additional minute.
- In a seperate mixing bowl, whisk together the flour, baking powder and salt. Add the dry ingredients to the wet, adding half first and mixing on slow, then adding the other half. Mix until just incorporated.
- If you will not be baking the cookies the same day, divide the dough into two and shape into discs, wrapping tightly in plastic wrap and storing in the fridge. Cookie dough can be kept in the fridge for 1 hour to 3 days. If you will be baking the cookie later that day, divide the dough into two and place one half on top of a large sheet of parchment paper. Place another piece of parchment paper on top, and roll out the dough to a 1/4″ thickness. Repeat with the second half of dough, with additional parchment paper. Place the rolled out dough in the fridge to chill, for at least 1 hour but no more than 4 hours.
- Bake the cookies. Preheat the oven to 350 F and line two large baking sheets with parchment paper. Working quickly, remove the dough from the fridge and roll out to 1/4″ thickness, or, if you are using the pre-rolled dough, cut your cookies using a cookie cutter and place the unbaked cookies on the prepared baking sheets, about 1″ apart.*** Roll the excess dough and repeat.
- Bake the cookies for 9-10 minutes. Remove them from the oven when the outsides are just beginning to brown, but the tops look slightly under-baked. They will continue to bake for an additional minute or two on the hot cookie sheet. Allow the cookies to cool for 10 minutes on the pan before removing them to a wire rack to cool completely.
- Prepare the icing. In the bowl of a stand mixer fitted with the paddle attachment, or using a handheld mixer, beat together the egg whites, powdered sugar and cream of tartar. Add a touch more powdered sugar to thicken up the icing, or a few teaspoons of water to thin it out. See notes below. Add gel coloring to the mixing bowl, or remove icing to separate bowls and add the color then, using a whisk to incorporate it. If you aren’t using the icing right away, be sure to keep it carefully covered to avoid it hardening!
- Ice the cookies using the spiderweb pattern as shown in the blog post above, or however way you’d like to ice them. Allow the icing to set before storing the cookies.
Cookies will keep in an airtight container, at room temperature, for 4-5 days. You can also store them in the freezer, in an airtight container, for up to 2 months.
Notes
*You can use light cream cheese too, but be sure not to use the spreadable kind from a tub.
**You may have to add more or less powdered sugar, to achieve the desired consistency. You want it to dribble from the spoon fairly easily. Try some on a test cookie before removing all of the icing to your piping bag/squeeze bottle. You can also use a bit of water to thin the consistency.
***If the cookie dough is beginning to soften while you’re rolling and cutting, place the dough back in the fridge for about 20 minutes to firm up again.
- Prep Time: 40 minutes
- Cook Time: 20 minutes