
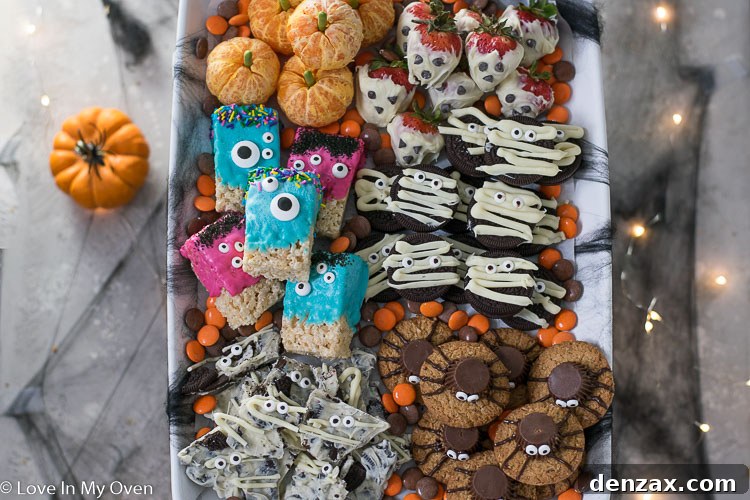
Make things a little spookier this Halloween with these incredibly easy, 3-ingredient Halloween treats designed for making with kids! Perfect for school parties or any festive gathering, these recipes are so simple even the littlest helpers can get involved in the fun.
Looking for more Halloween inspiration? Don’t miss out on these fantastic recipes from our blog: our delightful no-churn Halloween ice cream, rich and decadent Halloween fudge, and adorable Halloween cake pops!
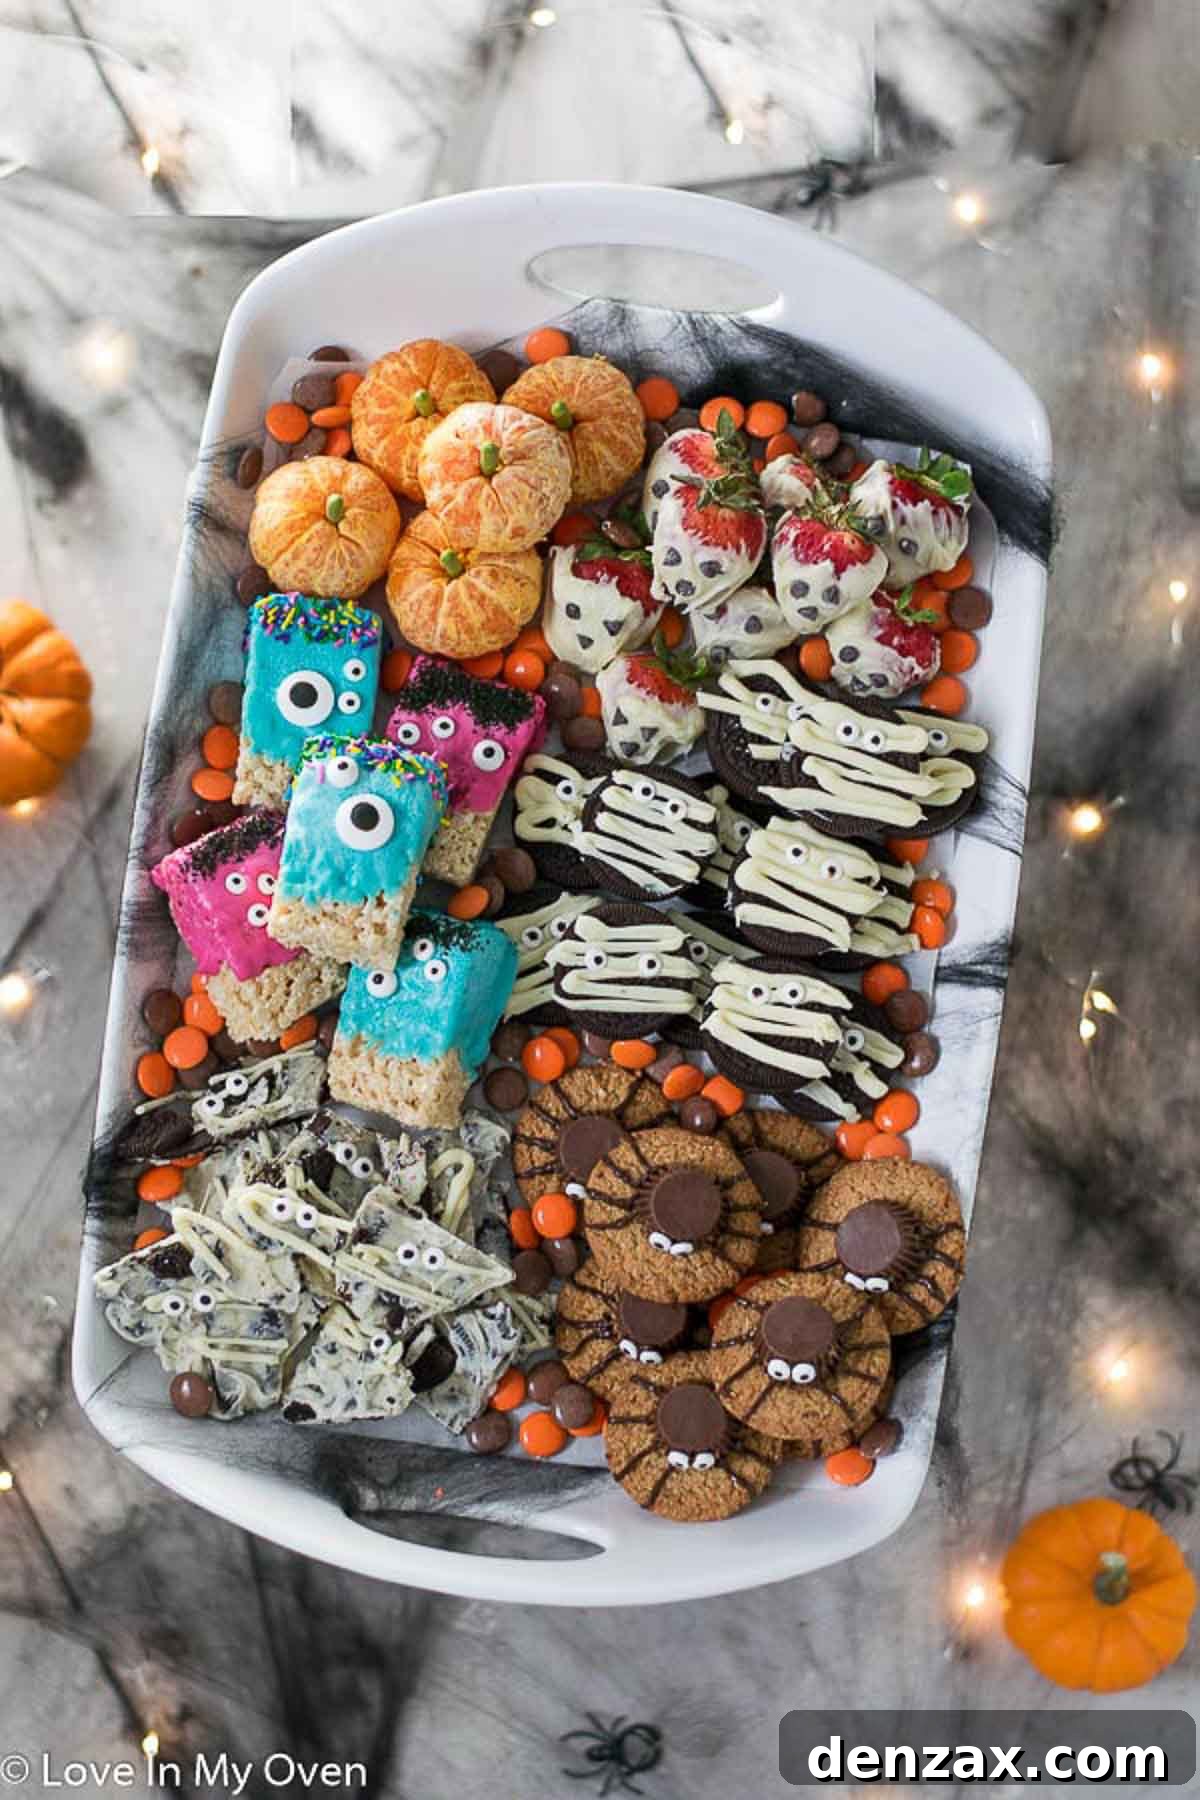
Simple & Spooky: 3-Ingredient Halloween Treats Kids Will Love Making & Eating!
Halloween has always held a special place in my heart, and I make no secret of my affection for this wonderfully whimsical holiday! From the crisp autumn air to the creative costumes, it’s a time filled with joy and nostalgia. I have such fond memories of trick-or-treating during my childhood and even into my teenage years, as well as the cozy family traditions of carving pumpkins and crafting spooky decorations. I vividly recall making little ghost figures for our tree using old rags stuffed with tissue and newspaper – simple, yet so effective. Now, as a mother myself, I truly appreciate the dedication and effort my parents poured into these activities. Every single one of those cherished memories required time and love, and I know these precious years with my own children will fly by. It’s a reminder to savor every moment, especially when it comes to creating delightful easy Halloween treats for kids that bring smiles and laughter.
One of my absolute favorite activities to share with my little munchkins is crafting charming and spooky Halloween treats. The collection of recipes you’ll find here is specifically designed to be kid-friendly Halloween recipes, with most steps simple enough for young hands. While some of the more intricate finishing touches, like delicately placing spider legs, might be best handled by an adult, every single treat offers ample opportunity for children to actively participate. The sheer joy on their faces as they transform simple ingredients into edible monsters and ghosts is truly priceless. These 3-ingredient Halloween treats are not only delicious but also fantastic for developing fine motor skills and encouraging creativity in a fun, festive setting.
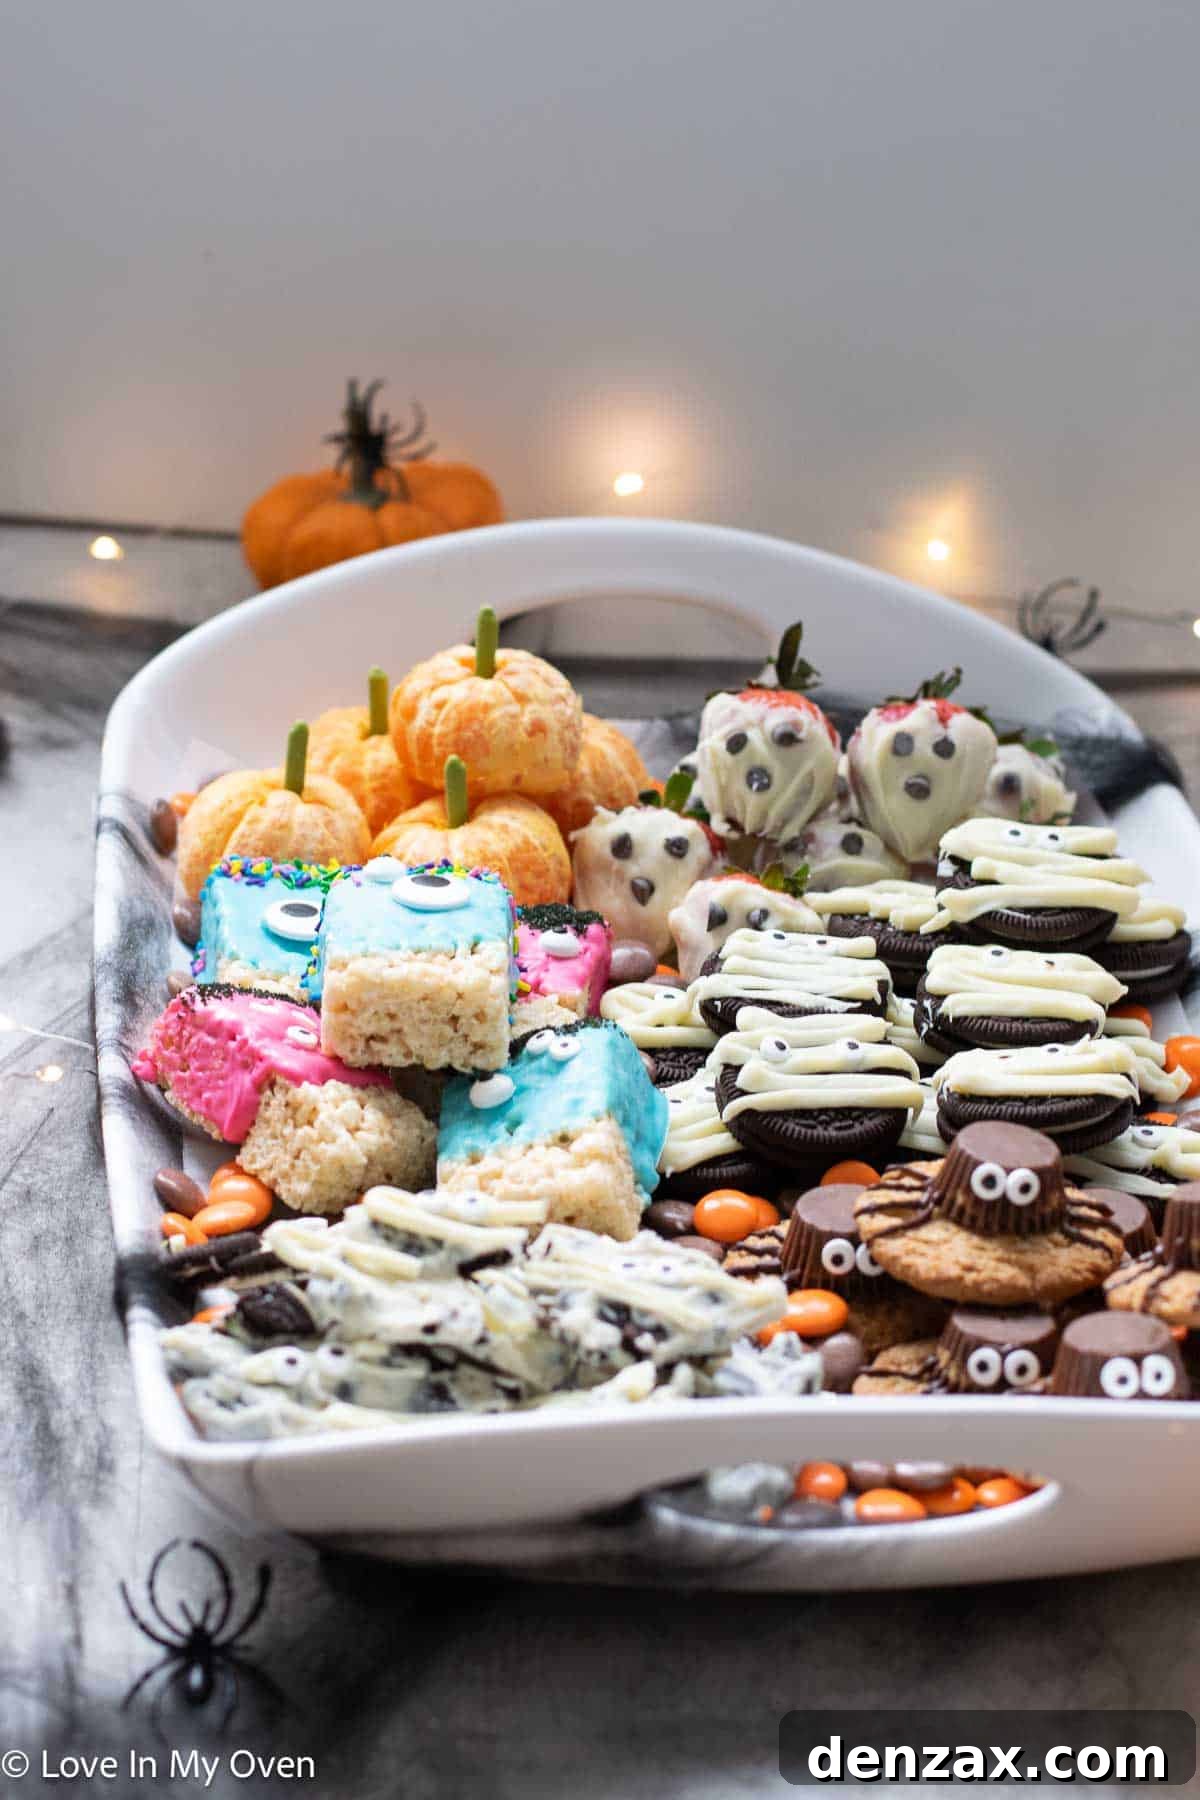
To beautifully showcase all our spooky creations, I used this elegant platter from Williams Sonoma Canada. Its generous size and lightweight design make it perfect for serving, and cleanup is a breeze – truly a fantastic find for any holiday spread!
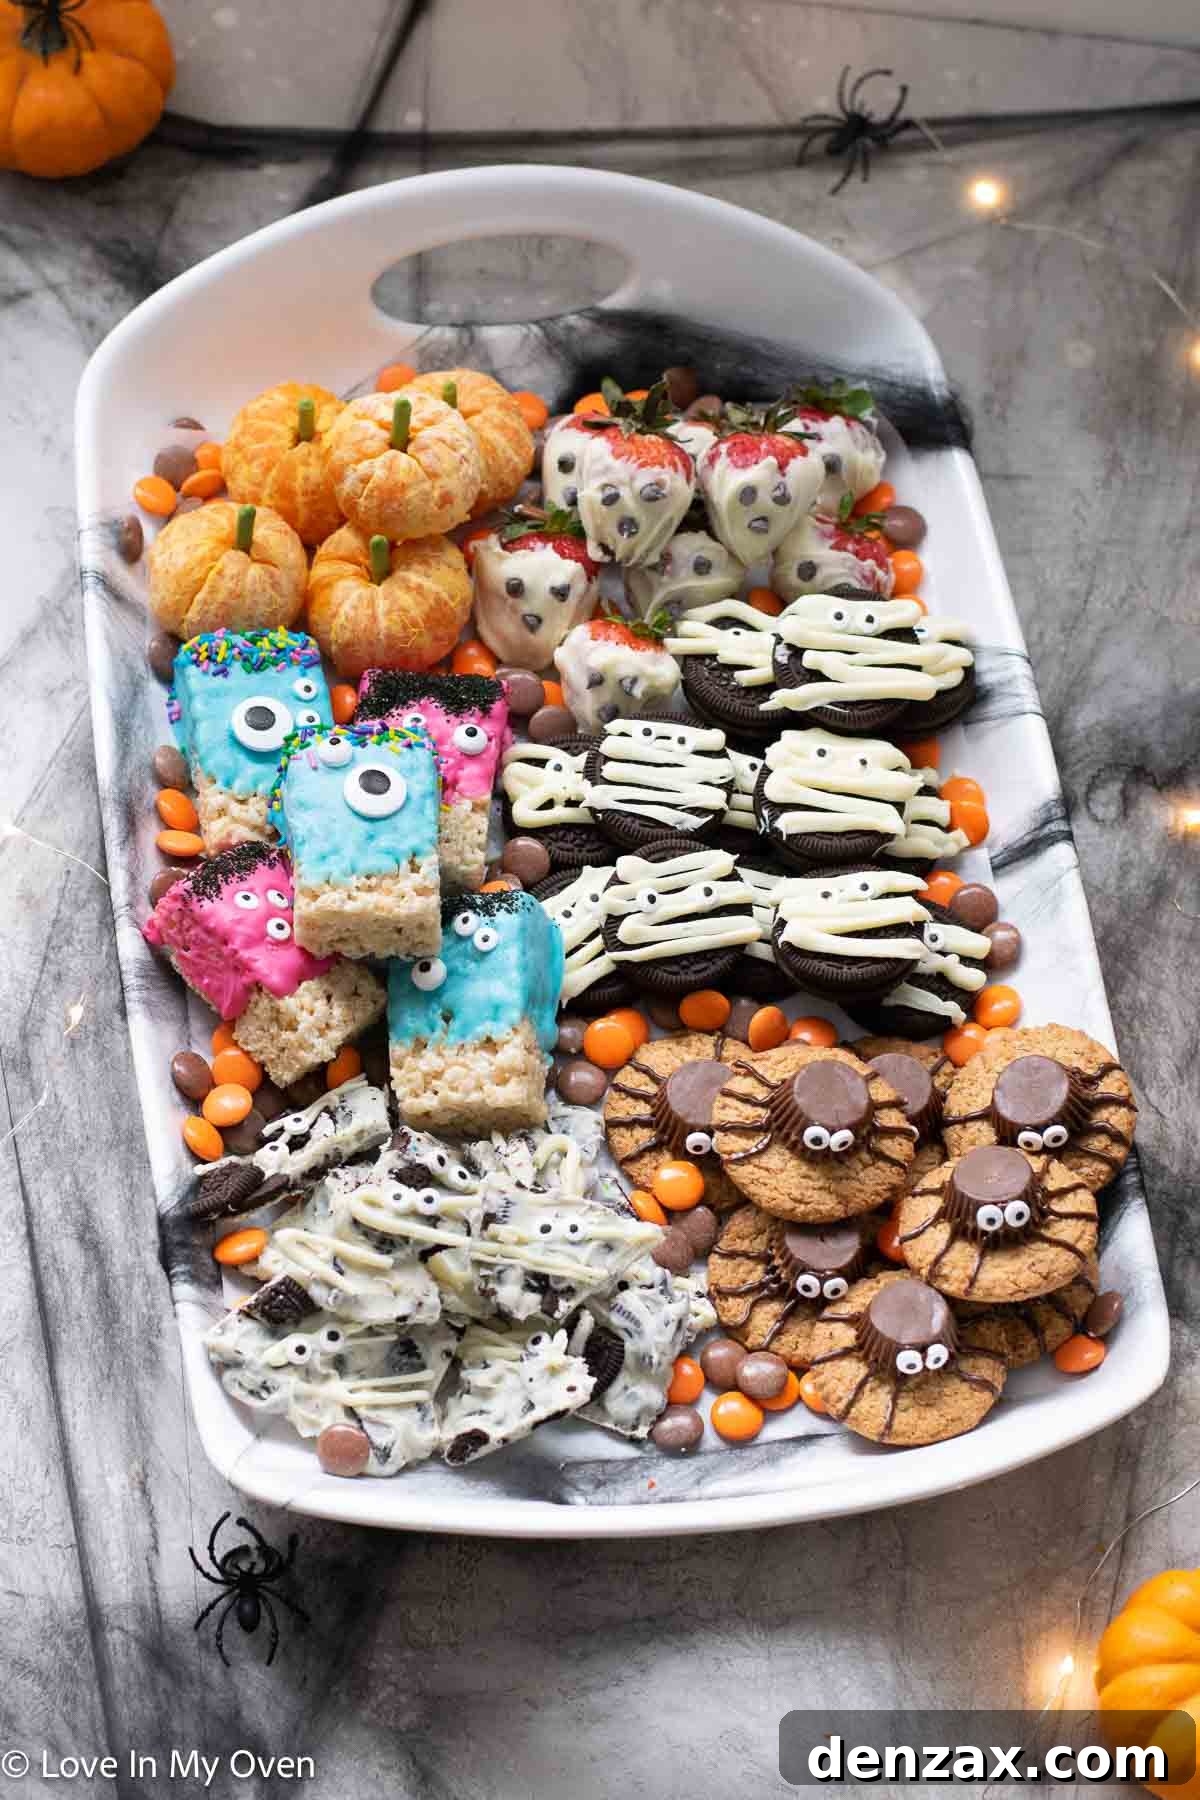
This post is structured to present each treat individually, complete with its own recipe. This way, if you’re looking to whip up just one particular spooky snack, you can easily navigate to it below. Each of these Halloween party food ideas takes only a few minutes to prepare, making them ideal for busy parents and eager children alike. And the best part? Every single one requires just three ingredients or even fewer! Get ready for some happy Halloweening!
Spooky Peanut Butter Spider Cookies
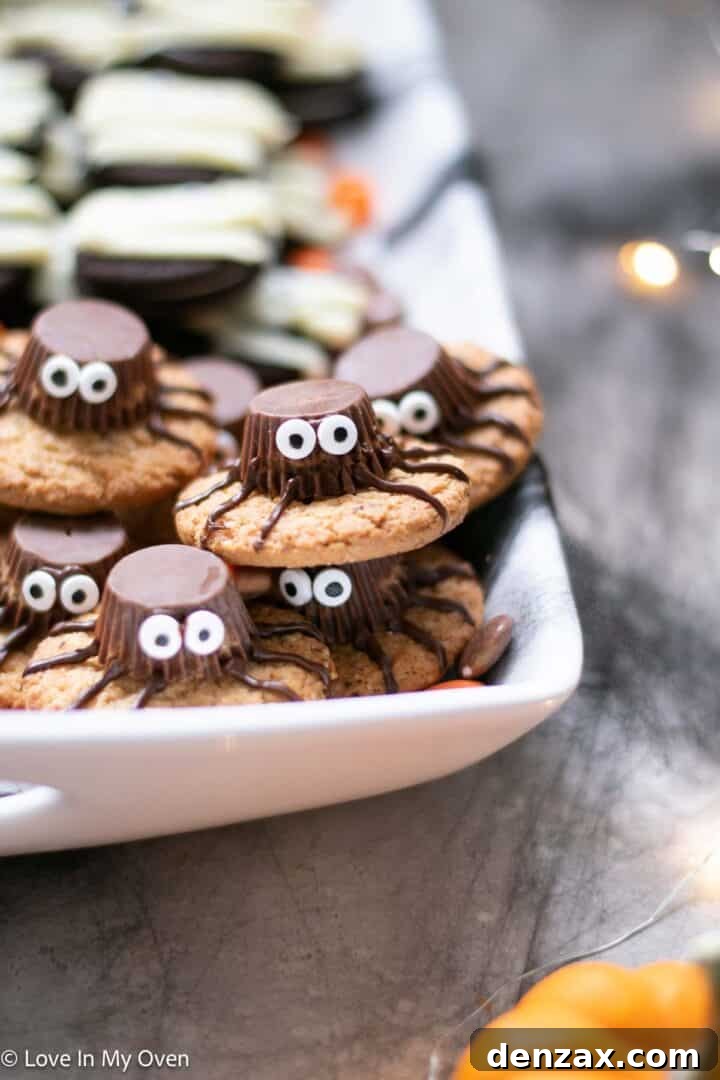
These adorable and slightly creepy spider cookies are hands-down my favorite from this selection of Halloween treats, primarily because I’m an enormous fan of the classic Reese’s peanut butter and chocolate combination. If you share my love for this iconic duo, you are going to absolutely adore these cookies!
Making these easy Halloween desserts is a fantastic way to involve kids in the kitchen. They can help unwrap the mini Reese’s cups, carefully place them onto the cookies, and even assist with drawing the chocolate legs (with a bit of guidance, of course!). The simplicity of these spider cookies means less stress for you and more fun for everyone involved. They’re perfect for a quick snack, a themed lunchbox surprise, or a standout addition to your Halloween party platter.

Peanut Butter Spider Cookies
No reviews
- Author: Katherine | Love In My Oven
- Total Time: 10 minutes
- Yield: 12 cookies
Description
These cute little spider cookies are crafted from a delicious peanut butter oatmeal cookie base, topped with a mini Reese’s peanut butter cup, and finished with delicate chocolate drizzles to form the legs. A perfect spooky snack!
Ingredients
- 12 peanut butter cookies (store-bought or homemade)
- 12 mini Reese’s peanut butter cups
- 1/4 cup semi-sweet chocolate, melted
- Optional: 24 mini candy eyeballs
Instructions
- Melt the semi-sweet chocolate using a double boiler or in the microwave. If using the microwave, heat in 30-second intervals, stirring thoroughly after each, until the chocolate is completely smooth and melted. Carefully transfer the melted chocolate into a piping bag or a Ziploc bag with a very tiny corner snipped off.
- Place a small dot of melted chocolate in the center of each peanut butter cookie. Gently press a mini Reese’s peanut butter cup onto this chocolate dot. Using your piping bag, carefully draw eight “legs” radiating from the Reese’s cup on each cookie, four on each side, to create the spider effect. Repeat this process for all remaining cookies.
- For an extra spooky touch, use a tiny dab of melted chocolate as “glue” on the front of each Reese’s peanut butter cup and attach two mini candy eyeballs, pressing them gently to secure.
Storage Tips: These delightful cookies will stay fresh at room temperature for 5-6 days when stored in an airtight container. For longer enjoyment, they can be frozen for up to 2 months.
Notes
*Recipe adapted from Chelsea’s Messy Apron.
- Prep Time: 10 minutes
- Category: cookies
Creepy-Crawly Mummy Cookies and Cream Bark
If your taste buds sing for all things cookies and cream, then prepare to fall head over heels for this white chocolate bark. It’s not just incredibly easy to make, it’s also unbelievably delicious! This bark takes the classic cookies and cream flavor to a whole new level of Halloween fun. Just imagine the rich creaminess of white chocolate perfectly blended with chunks of your favorite chocolate sandwich cookies, all transformed into an edible mummy masterpiece. The addition of those cute, whimsical candy eyeballs gives it that unmistakable spooky effect that kids adore. This is one of those Halloween party food ideas that looks impressive but requires minimal effort, making it ideal for busy families who still want to create memorable holiday treats.
Children will love helping with this recipe, from crushing the Oreo cookies (a great stress-reliever!) to placing the candy eyeballs. It’s a fantastic hands-on activity that results in a truly satisfying Halloween treat. The contrast between the smooth white chocolate and the crunchy cookie bits creates an appealing texture that keeps everyone coming back for more. Plus, the mummy design is both fun and easy to achieve, even for novice decorators. This bark is a must-try for any Halloween celebration!
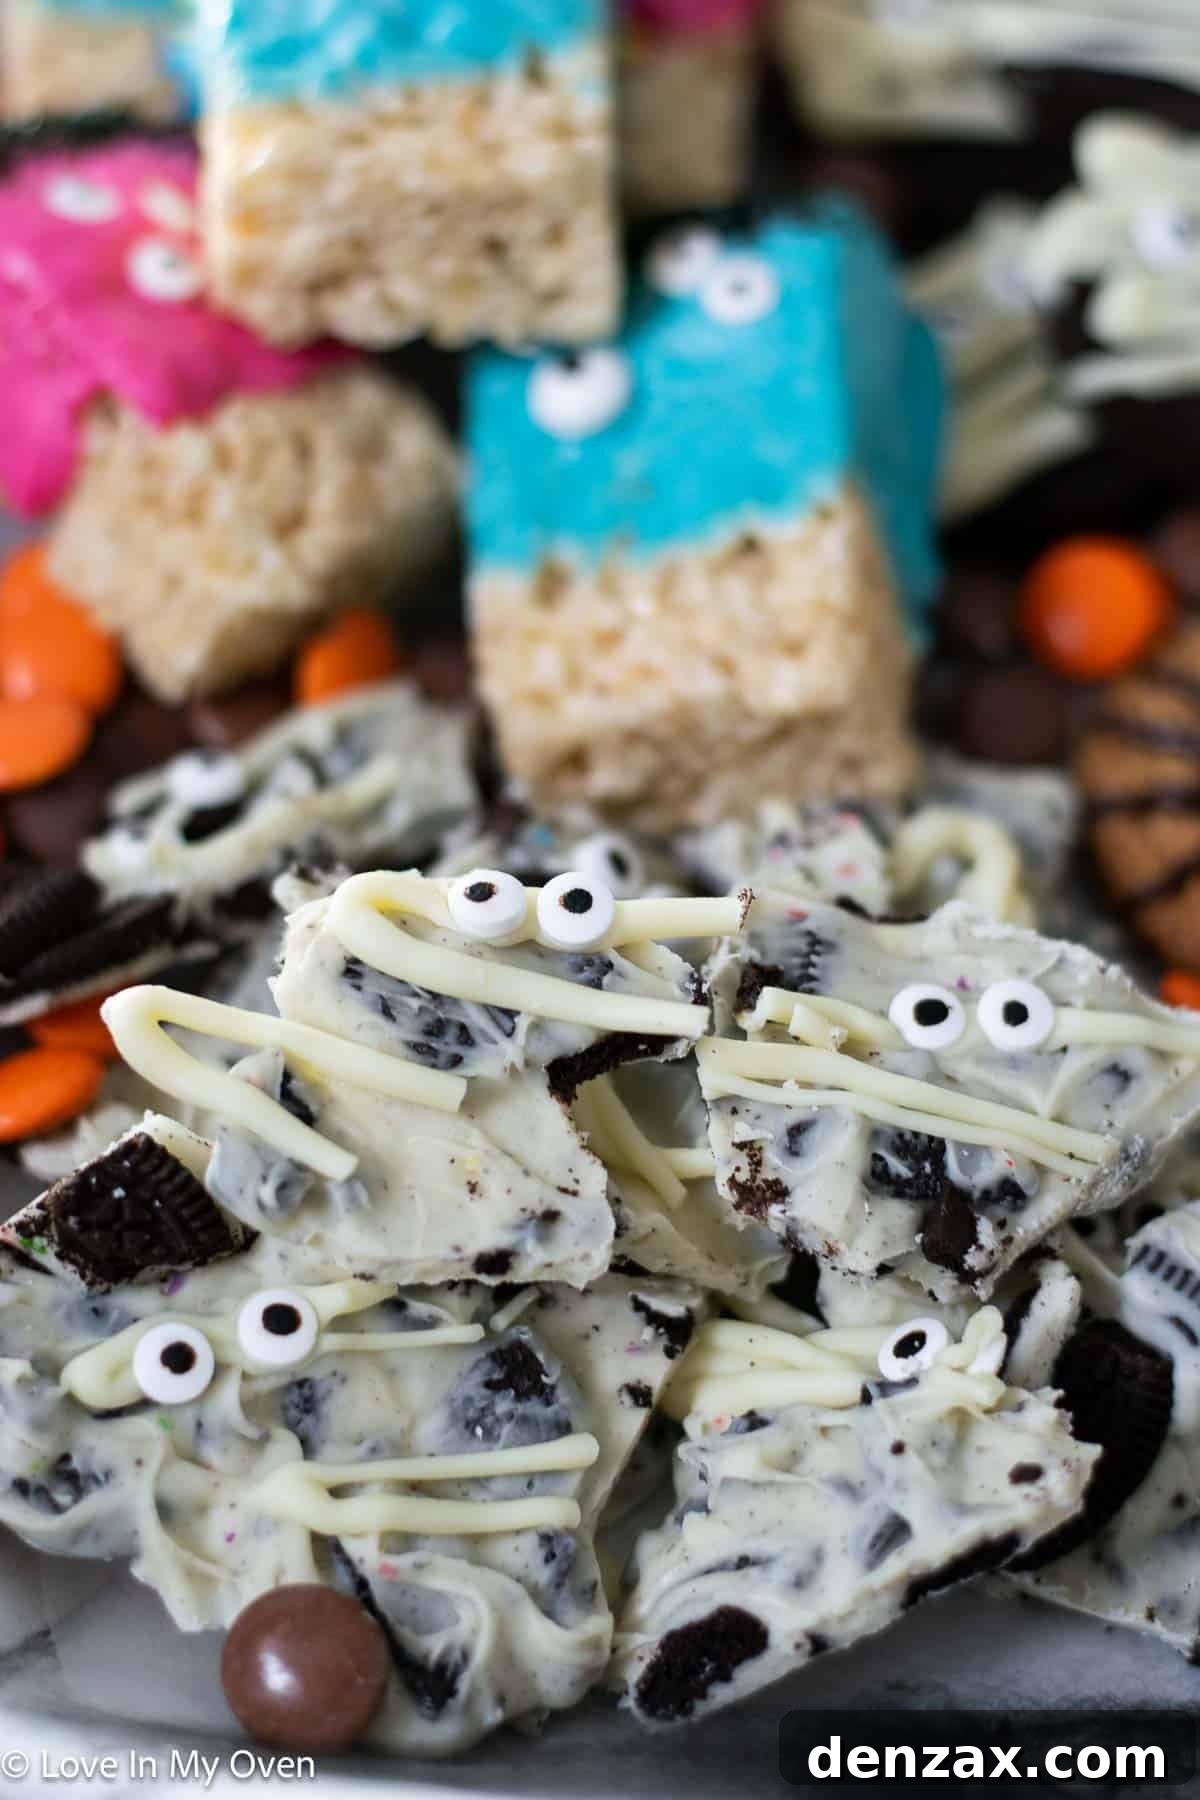
Mummy Cookies and Cream Bark
No reviews
- Author: Katherine | Love In My Oven
- Total Time: 10 minutes
- Yield: 20 pieces
Description
You might just call your mummy after making this delicious and easy cookies and cream mummy bark! Made with only 3 ingredients and requiring just 5 minutes of active preparation time, you’ll love this spooky treat.
Ingredients
- 2 cups white chocolate chips or wafers
- 8 Oreo cookies, finely chopped
- 1/4 cup mini candy eyeballs
Instructions
- Chop the Oreo cookies into small pieces and set them aside. Line a baking sheet with aluminum foil or parchment paper. In a microwave-safe bowl (or using a double boiler), melt the white chocolate chips. Microwave in 30-second increments at 70% power, stirring well after each interval until the chocolate is smooth and creamy. Reserve about 1/4 cup of the melted white chocolate by transferring it to a Ziploc bag or piping bag. Stir the chopped Oreo cookies into the remaining melted chocolate.
- Pour the cookie-infused chocolate mixture onto the prepared baking sheet. Use the back of a spoon or a spatula to spread the chocolate out into a thin, even layer. Place the baking sheet in the refrigerator for about 5 minutes to allow the chocolate to slightly harden. Remove from the fridge, then take your reserved white chocolate (in the Ziploc or piping bag) and drizzle it all over the bark in a crisscross pattern to create “mummy” lines. Immediately place sets of candy eyeballs onto the drizzled chocolate, pressing them gently to secure. Return the bark to the refrigerator for another 10 minutes, or until fully hardened. Once firm, remove and break the bark into pieces, making sure to keep the eyeball sets intact on individual pieces.
Storage Tips: This chocolate bark should be stored in an airtight container in the refrigerator for 4-5 days to maintain its freshness and texture.
- Prep Time: 10 minutes
- Category: candy
- Method: microwave
Naturally Sweet Easy Orange Pumpkins
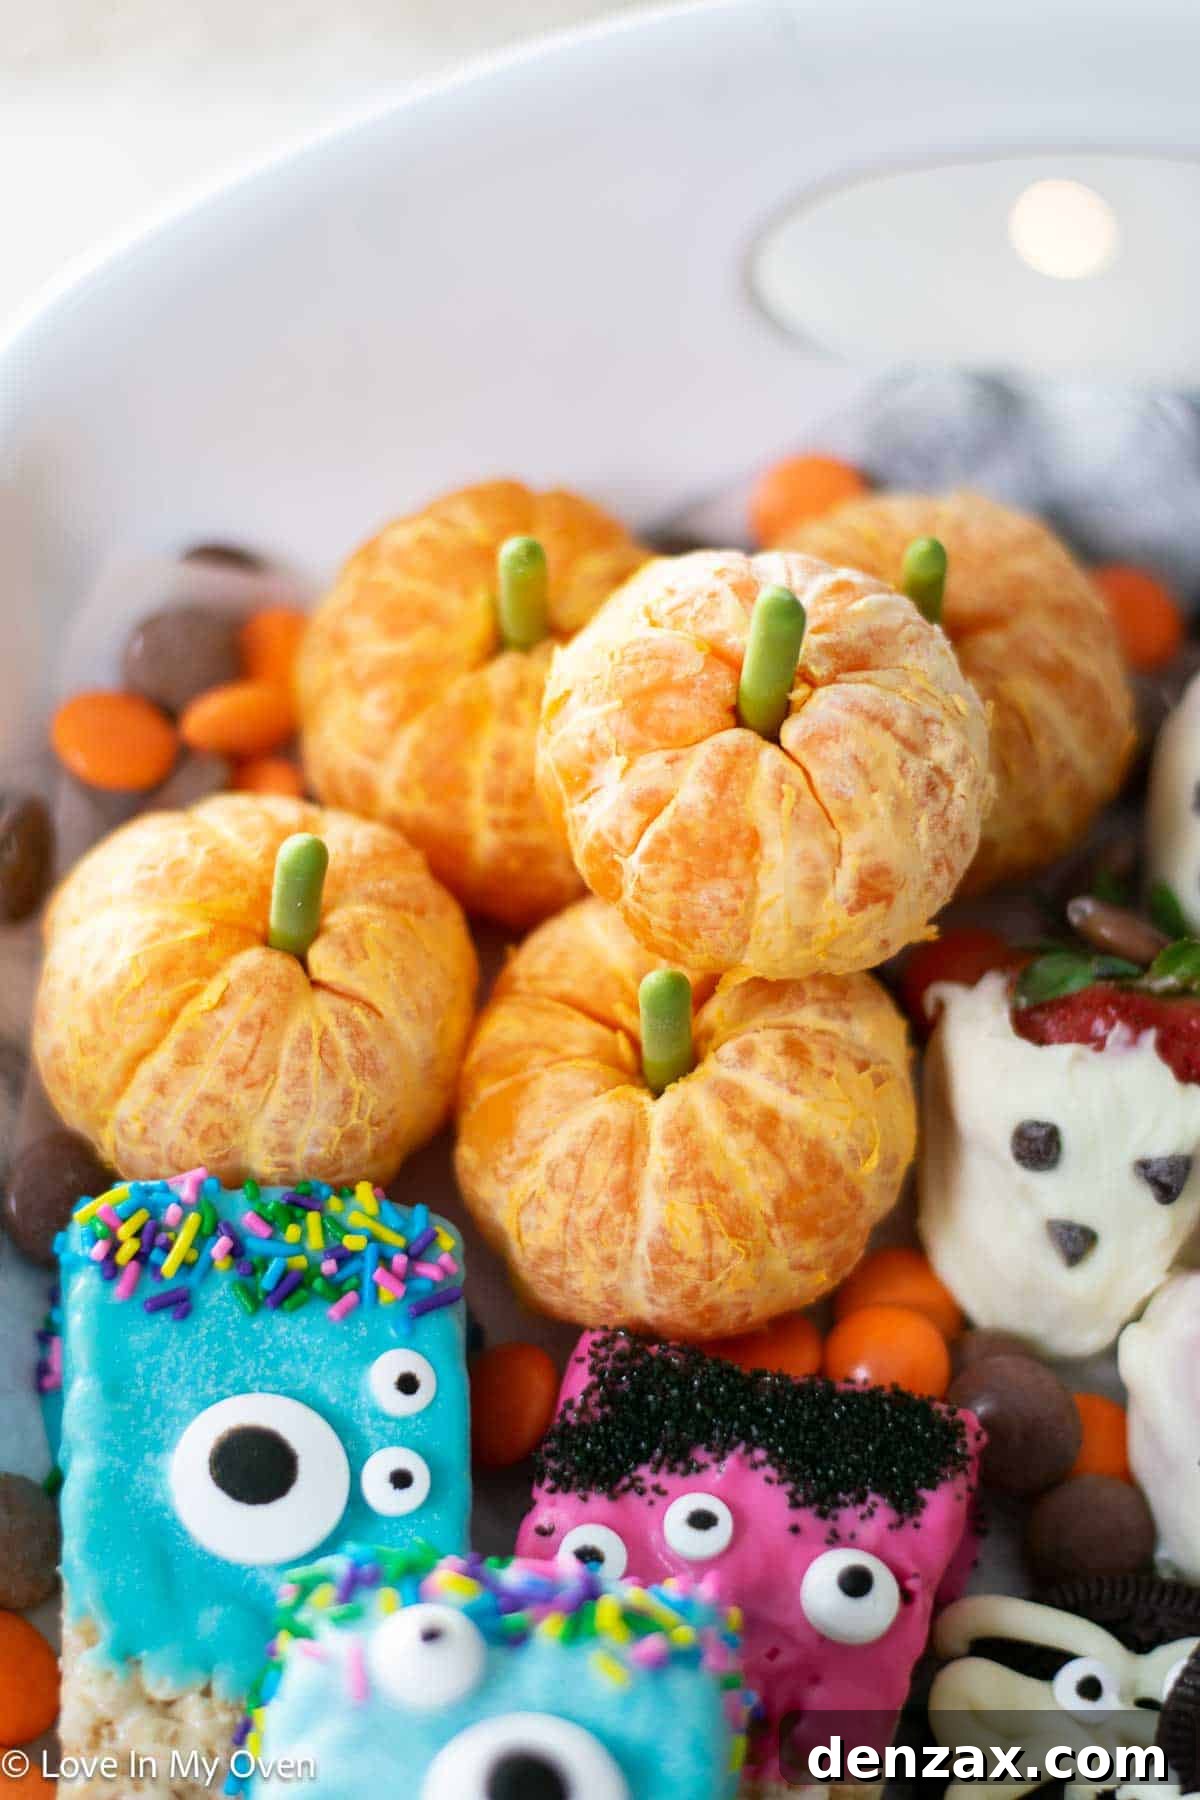
These incredibly simple orange pumpkins barely even require a recipe card – they are THAT easy and a wonderfully healthy alternative for Halloween snacks! All you need are sweet, juicy mandarin oranges and something green to serve as the “stem.” For mine, I used the tip of a matcha-flavored Poky stick, which offers a lovely earthy green color and a subtle flavor. However, feel free to get creative with your “stems”! A green Tic-Tac candy would work perfectly, or even a green Mike & Ike candy for a burst of fruity flavor. Anything of a similar shape and vibrant green color will do the trick to transform these everyday oranges into adorable little pumpkins. The process is unbelievably straightforward: simply take a mandarin orange, peel it carefully, and then gently insert your chosen “stem” into the top. Voila! Instant, edible Halloween decorations that are both nutritious and festive.
These healthy Halloween treats are a fantastic option for school lunches or as a light snack during a Halloween party. They add a pop of natural color and freshness to an otherwise candy-filled holiday. While these peeled oranges can comfortably be left at room temperature for about 5-6 hours, especially when packed in a lunchbox, it’s best to consume them within that timeframe. After that, without their protective peel, they will begin to dry out and lose their juicy appeal. For optimal freshness, prepare them closer to serving time or store them in an airtight container in the refrigerator if making them a bit in advance. These orange pumpkins are a guilt-free way to enjoy the spirit of Halloween!
Vibrant Rice Krispie Monsters: Fun & Creative Halloween Snacks
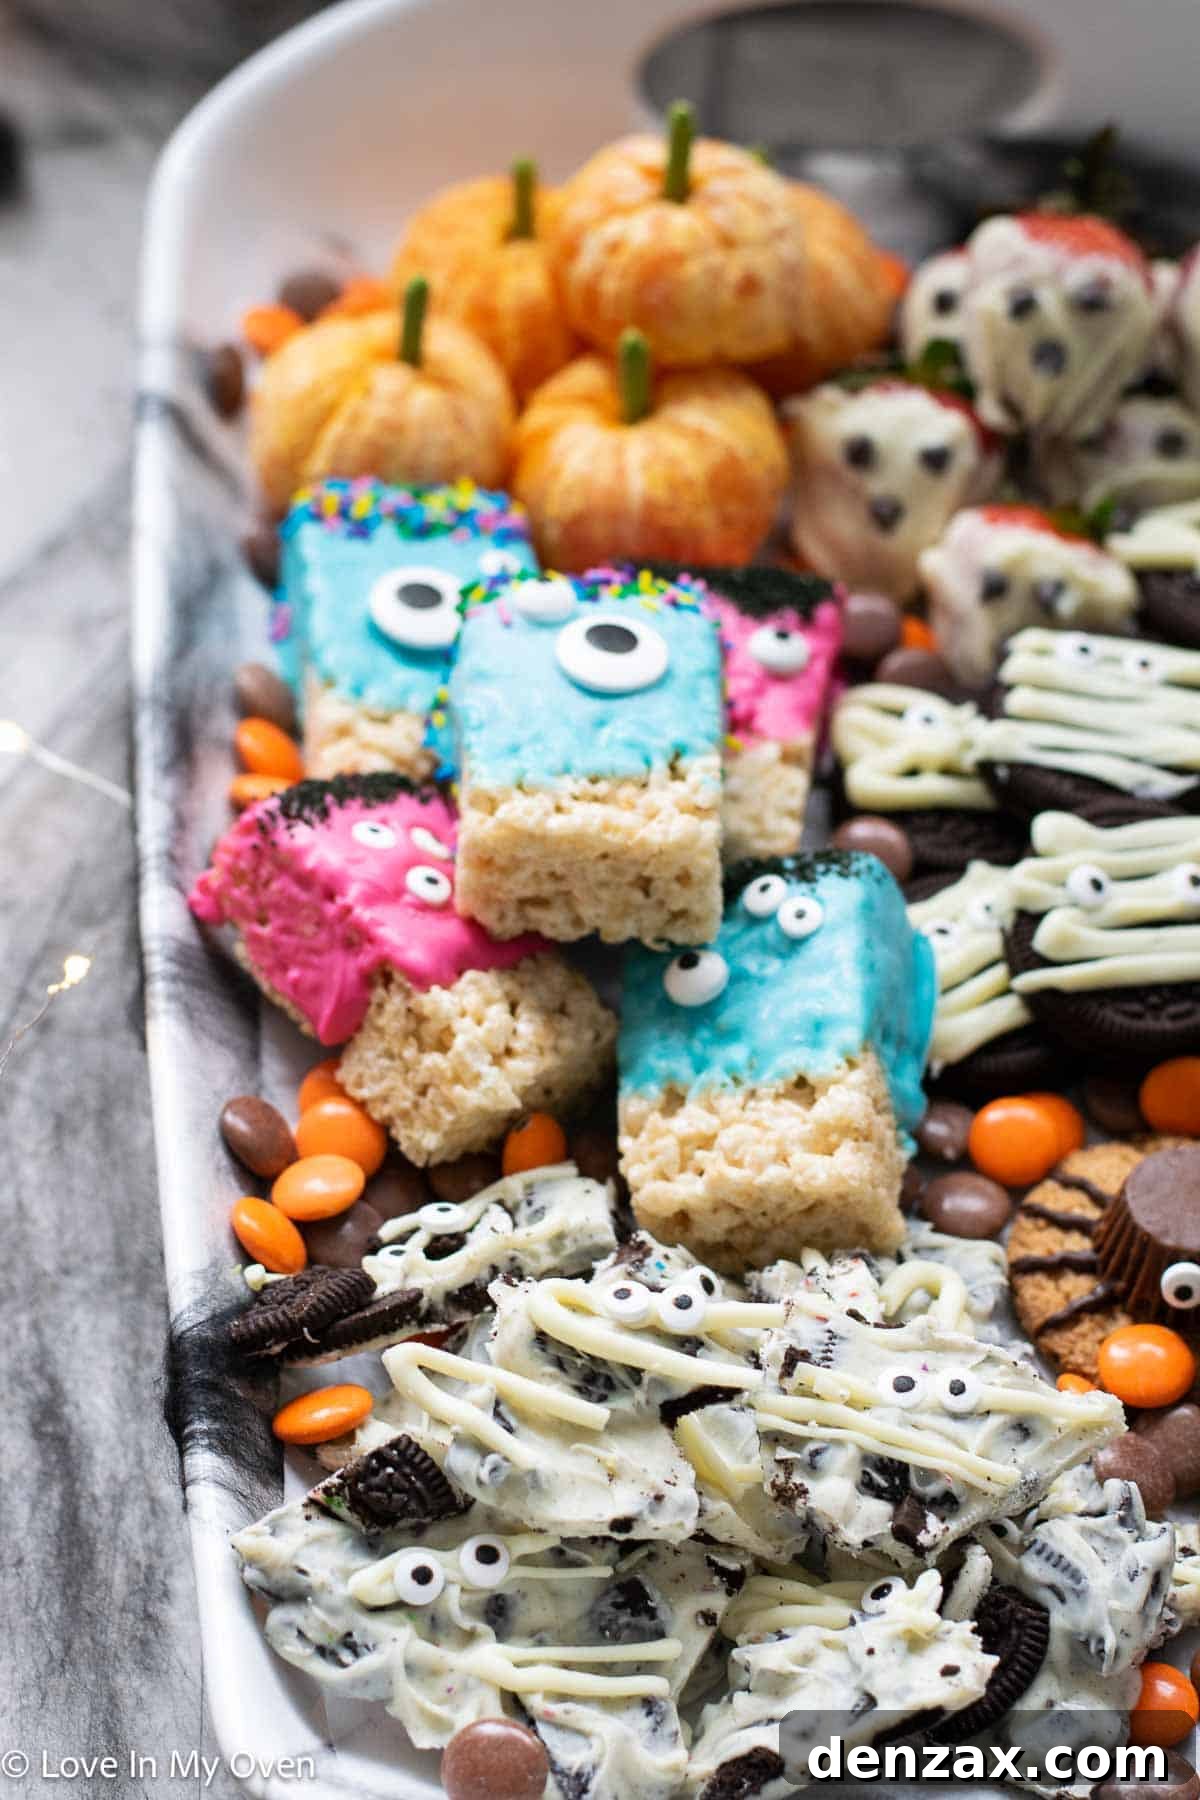
Among all the easy Halloween treats to make with kids, this particular recipe for Rice Krispie Monsters might just be the most enjoyable! My own children absolutely adored creating these, and I’m confident yours will too. The beauty of this recipe lies in its flexibility and simplicity. If you have a beloved homemade Rice Krispie square recipe, feel free to use it as your base. Alternatively, to make things even quicker and easier, simply grab a box of store-bought Rice Krispie squares – they work just as wonderfully and save you valuable time.
The real fun begins with the decoration! You can use any color of candy melt imaginable, allowing for endless possibilities in creating unique and vibrant monsters. From ghastly greens to eerie purples and fiery oranges, let your imagination run wild. The same goes for sprinkles – choose any color, shape, or mix to give your monsters personality. This open-ended creativity makes it a perfect activity for kids of all ages, allowing them to express themselves and create their very own edible Halloween characters. These delightful Rice Krispie Monsters also make a terrific and much-loved treat to pack into school lunches, bringing a little spooky cheer to their midday meal. They’re soft, chewy, and irresistibly festive, guaranteeing smiles and satisfied bellies!
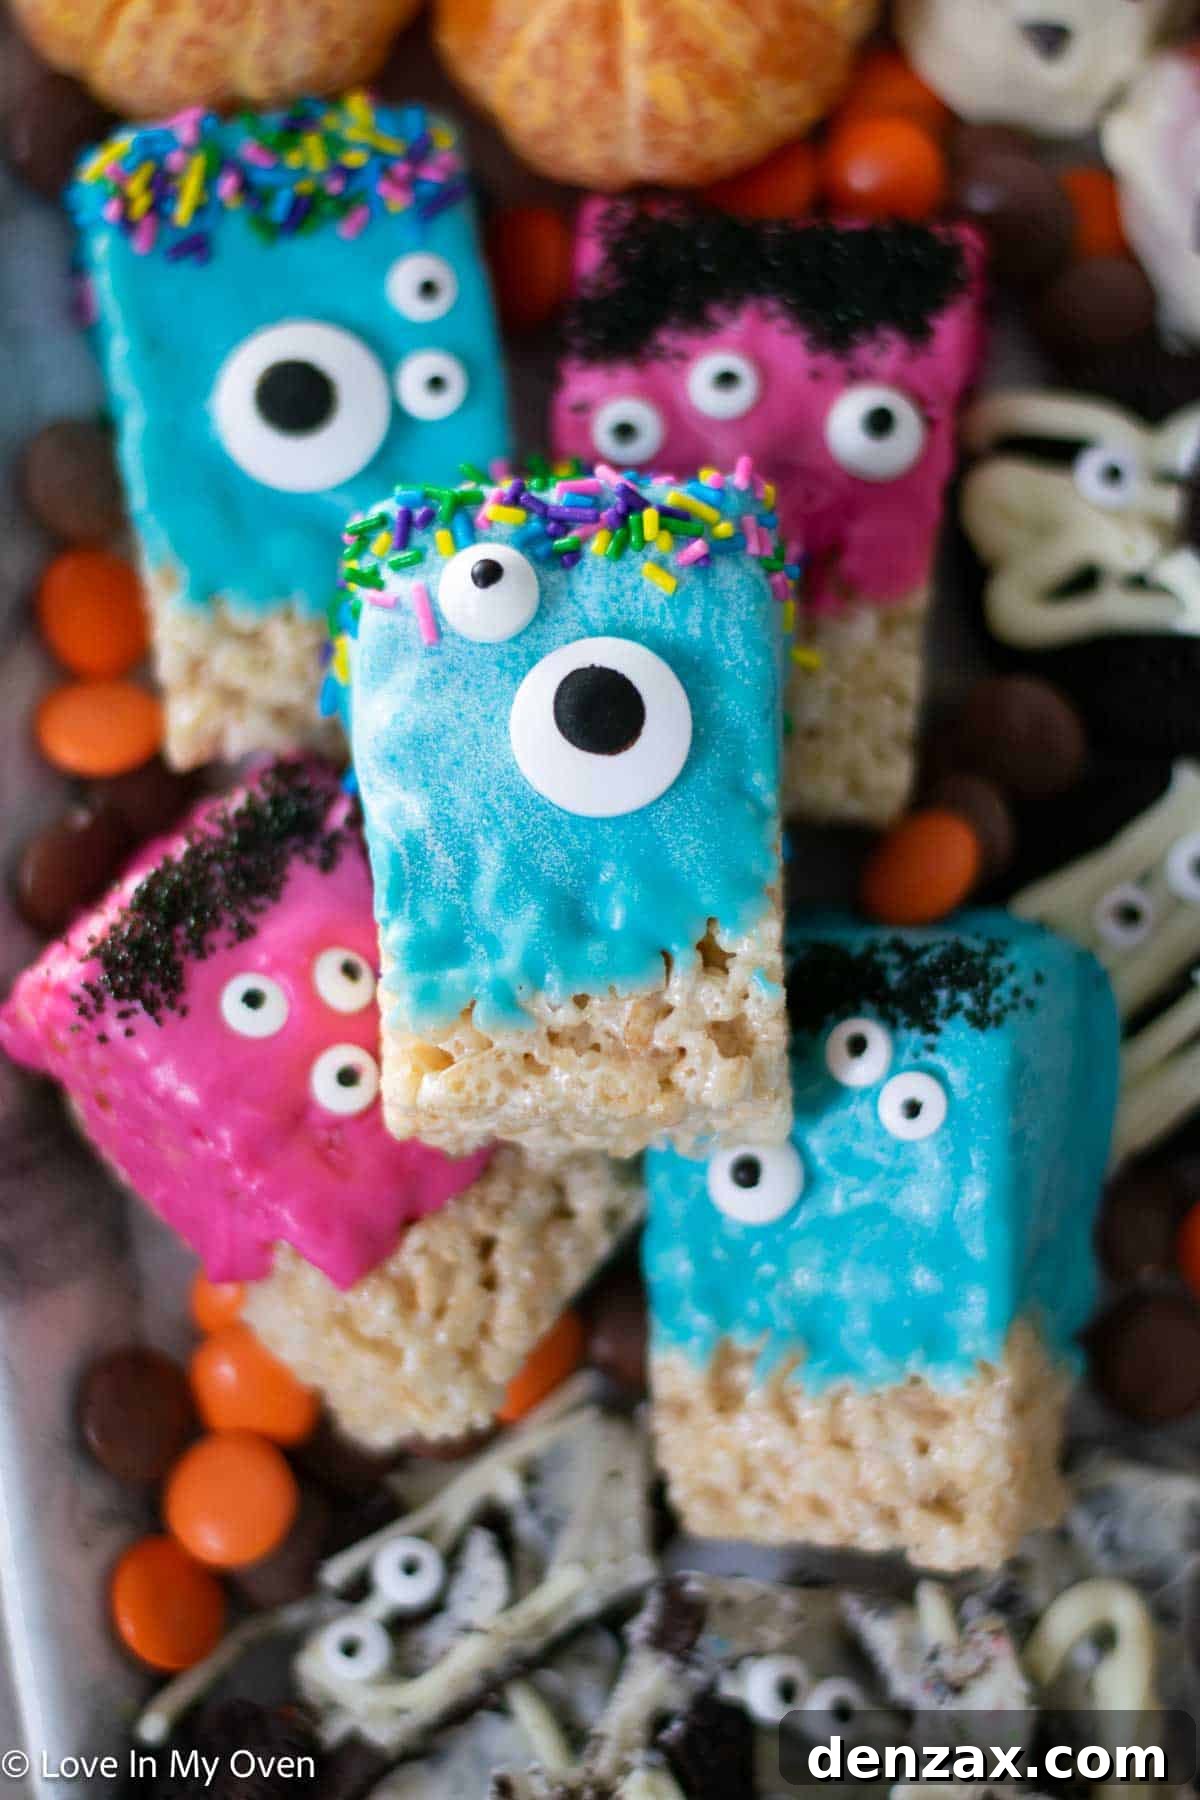

Monster Halloween Rice Krispie Squares
No reviews
- Author: Katherine | Love In My Oven
- Total Time: 10 minutes
- Yield: 8 bars
Description
These super cute little monsters are not only easy to make, they’re delicious! You only need 2 ingredients for these adorable Halloween treats!
Ingredients
- 6 oz candy melts (in any color)
- 8 Rice Krispie squares (homemade or store-bought)
- 1/4 cup assorted candy eyeballs
- Optional: sprinkles for decorating
Instructions
- Line a baking sheet with parchment paper and set aside. In a microwave-safe bowl, melt the candy melts. Microwave in 30-second increments at 70% power, stirring thoroughly after each interval until the candy melts are completely smooth.
- Holding one end of a Rice Krispie square, dip it into the melted chocolate until approximately 3/4 of the square is covered. Hold it up briefly to allow any excess chocolate to drip off. Place the dipped square onto the prepared baking sheet. Immediately press various candy eyeballs into the melted chocolate, creating your monster’s face. If using sprinkles, scatter them over the wet chocolate right away. Repeat this process with the remaining squares. Once all squares are dipped and decorated, place the baking sheet in the refrigerator for about 10 minutes, or until the chocolate is fully hardened.
Storage Tips: These monster squares remain perfectly fine at room temperature for 4-5 days when stored in an airtight container, making them ideal for lunchboxes or party favors.
Notes
*Recipe adapted from Chelsea’s Messy Apron.
- Prep Time: 10 minutes
- Category: snacks
- Method: microwave
Boo-tiful Strawberry Ghosts: A Fresh & Fruity Halloween Delight
Prepare for a symphony of deliciousness and delightful simplicity with these 3-ingredient strawberry ghosts! They are super easy to make and even more delectable to eat. If you’ve never experienced the joy of a white chocolate-covered strawberry, now is the perfect time to indulge. The combination of sweet, fresh strawberries and rich, creamy white chocolate is an absolute dream for your taste buds. This is a wonderfully lighter option among Halloween party food ideas, offering a refreshing counterpoint to richer desserts.
Transforming these treats into spooky little ghosts is where the magic happens and where kids can really shine! Simply add a few mini chocolate chips to create adorable or eerie ghost faces, and just like that, you’ve conjured another perfect Halloween treat that will charm both children and adults alike. The natural shape of the strawberry lends itself perfectly to the ghost silhouette, making this a truly effortless design. These kid-friendly Halloween recipes are quick enough to make a batch on a whim, or prepare them ahead for a party. The visual appeal combined with the delightful taste makes them an instant hit!
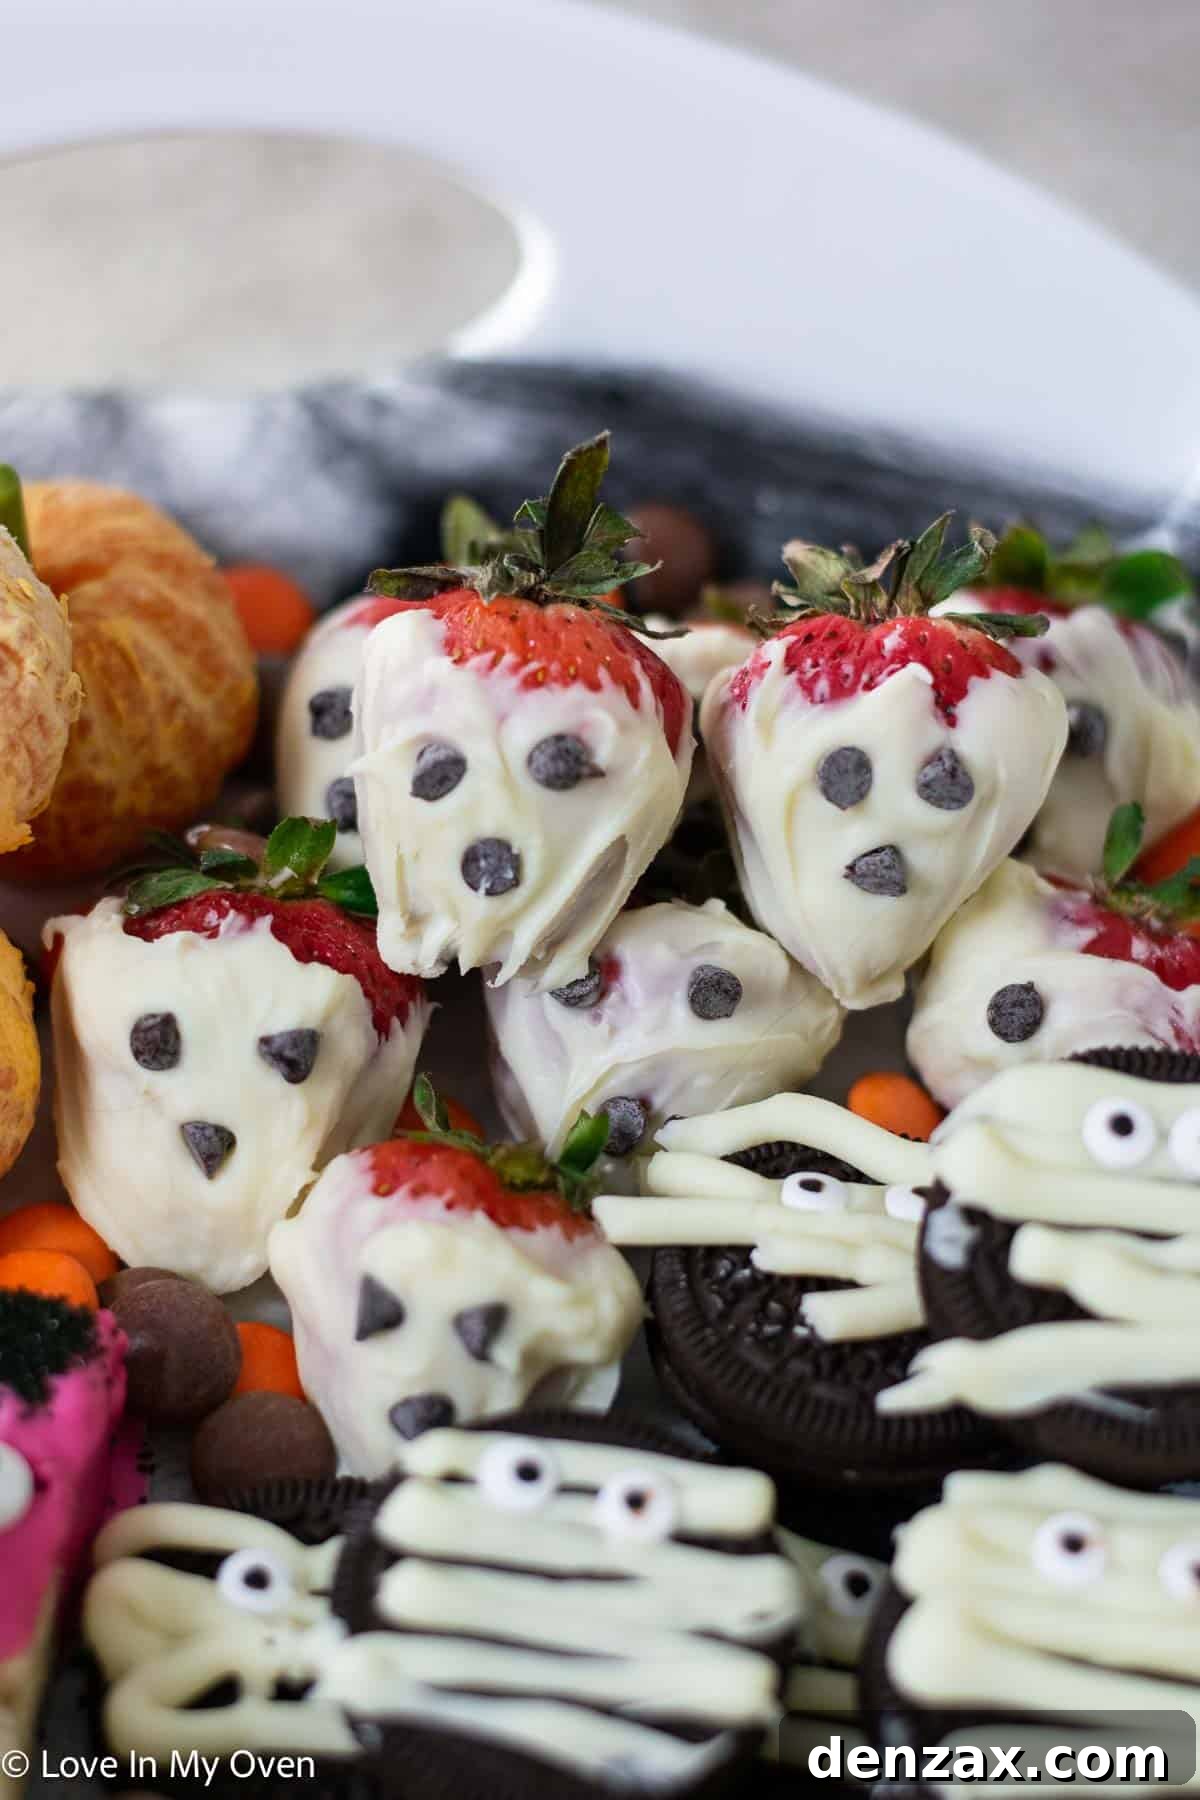

Strawberry Ghosts
No reviews
- Author: Katherine | Love In My Oven
- Total Time: 10 minutes
- Yield: 12 strawberries
Description
These cute little strawberry ghosts are super easy and incredibly delicious! The combination of white chocolate and fresh strawberry is a perfect match for a festive Halloween treat.
Ingredients
- 12 fresh strawberries
- 4 oz white chocolate chips or wafers
- 36 mini chocolate chips (for eyes and mouth)
Instructions
- Gently clean the strawberries and thoroughly pat them dry with a paper towel. It’s important they are completely dry to ensure the chocolate adheres well. Allow the strawberries to come to room temperature for about 1 hour. Meanwhile, line a baking sheet with parchment paper and set it aside.
- In a microwave-safe bowl or using a double boiler, melt the white chocolate. If microwaving, heat in 30-second increments at 70% power, stirring between each interval until the chocolate is perfectly smooth. Holding each strawberry by its green leaves (stem end), dip it into the melted white chocolate, swirling gently to cover most of the berry while leaving a slight “tail” at the bottom for a ghost-like shape. Allow any excess chocolate to drip off. Carefully place the dipped strawberry onto the parchment paper. While the chocolate is still wet, immediately add two mini chocolate chips for the eyes and one for a mouth to create the ghost face. Repeat with all remaining strawberries. Place the baking sheet with the decorated strawberries into the refrigerator until the white chocolate has fully hardened, which typically takes about 5 minutes.
Storage Tips: Strawberry ghosts will be fine at room temperature for a few hours. However, for best quality and to extend their freshness, any leftovers should be refrigerated in an airtight container for 2-3 days.
- Prep Time: 10 minutes
- Category: snacks
- Method: microwave
Classic Oreo Mummy Cookies: Easy Halloween Fun
Here’s another fantastic mummy-themed treat that is sure to be a crowd-pleaser! These Oreo Mummy Cookies are not only incredibly cute but also delightfully easy to prepare, making them an instant favorite for any Halloween gathering. My kiddos, like many, have an unwavering love for Oreos, so simply adding a touch of white chocolate transforms these beloved cookies into something truly special – it’s like the “icing” on the… well, cookie! This recipe is yet another brilliant way to utilize those charming little candy eyeballs, bringing your spooky creations to life with minimal effort. They are one of the best Halloween party food ideas, guaranteed to disappear quickly!
The beauty of these easy Halloween treats for school is how versatile and engaging they are for children. From unwrapping the cookies to drizzling the white chocolate (older kids can manage this with a piping bag, while younger ones might enjoy spreading it with a small spoon), and finally, carefully placing the candy eyeballs, there’s a role for every age group. These cookies are not only perfect for a Halloween party but also make a delightful surprise in lunchboxes, adding a festive touch to an ordinary school day. Their quick preparation time means you can easily whip up a batch on a weeknight, or even make them with friends during a Halloween playdate. Get ready for some sweet, spooky fun!
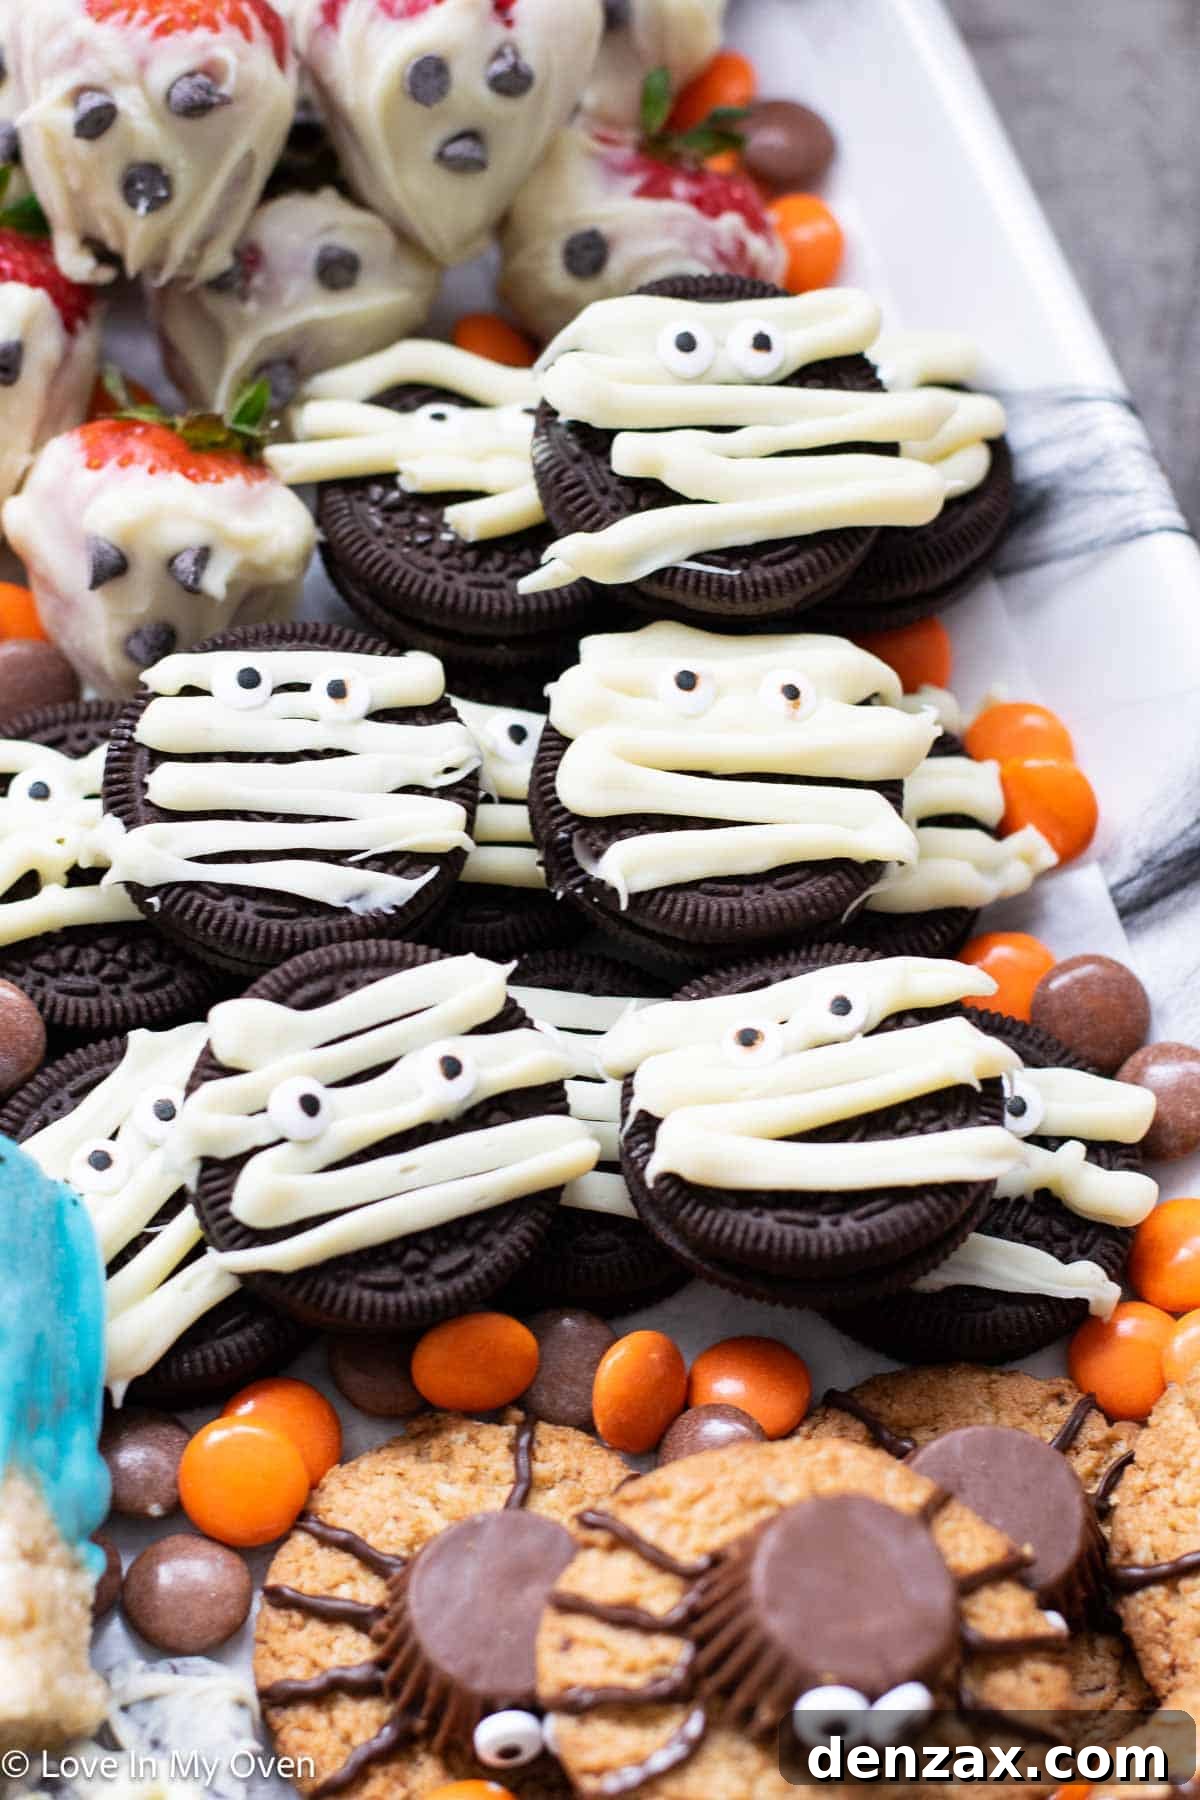

Oreo Mummy Cookies
No reviews
- Author: Katherine | Love In My Oven
- Total Time: 10 minutes
- Yield: 10 cookies
Description
These super cute little Oreo mummy cookies are a great lunchbox treat and an even better party treat for Halloween!
Ingredients
- 10 Oreo cookies or other chocolate sandwich cookies
- 4 oz white chocolate chips or wafers
- 2 tbsp candy eyeballs (mini size recommended)
Instructions
- Line a baking sheet with parchment paper. Arrange the Oreo cookies side by side on the prepared baking sheet. In a microwave-safe bowl or using a double boiler, melt the white chocolate. If microwaving, heat in 30-second increments at 70% power, stirring thoroughly after each interval until the chocolate is smooth and creamy.
- Carefully scrape the melted white chocolate into a Ziploc bag or a piping bag. Snip off a tiny tip from the corner of the bag. Drizzle the chocolate back and forth across each cookie in a crisscross pattern, ensuring they are mostly covered to create the mummy effect. Immediately after drizzling each cookie, place two mini candy eyeballs onto the wet chocolate to form the mummy’s face. Repeat for all cookies. Place the baking sheet with the decorated cookies into the refrigerator until the chocolate is completely hardened.
Storage Tips: These delicious cookies can be kept at room temperature for 1-2 weeks in an airtight container, making them ideal for long-lasting Halloween fun.
- Prep Time: 10 minutes
- Category: cookies
- Method: microwave
Why These 3-Ingredient Halloween Treats Are Perfect for Kids
How excited are you to dive into these easy Halloween treats to make with kids? The beauty of these recipes lies in their sheer simplicity and speed. Each one can be whipped up in no time at all, which means you have the flexibility to create an impressive and fun treat platter like this one for your big Halloween celebration, or simply make them throughout the week to surprise your kiddos with a special spooky treat in their lunchboxes. The joy of creating these snacks together, followed by the satisfaction of eating them, creates lasting memories and strengthens family bonds.
We’ve been happily snacking on these delightful Halloween snacks for the past couple of weeks, and they’ve been an absolute hit! The minimal ingredient list not only makes them budget-friendly but also reduces the stress of shopping for complex items. Plus, the quick assembly time means less waiting and more immediate gratification, which is perfect for impatient little chefs. These recipes encourage creativity, develop fine motor skills, and most importantly, they fill your home with the delicious aromas and happy sounds of a festive kitchen. From the charming peanut butter spider cookies to the fresh strawberry ghosts, each treat offers a unique flavor and fun design that embodies the spirit of Halloween.
Whether you’re hosting a big Halloween bash, looking for easy Halloween desserts for a classroom party, or just want to make a cozy afternoon snack with your children, these 3-ingredient recipes are your perfect solution. They prove that you don’t need complicated steps or an extensive pantry to create something truly magical and memorable for the holiday. So gather your little monsters, pick your favorite recipe (or make them all!), and get ready to create some deliciously spooky magic this Halloween!
Enjoy every bite, and happy Halloween!
More Spooky & Sweet Treats for Your Halloween Celebration:
Beyond these super simple 3-ingredient wonders, here are a few other fantastic Halloween treats from our archives that are sure to add more fun to your festive week:
- Delicious Spiderweb Cookies: Intricately designed yet surprisingly easy, these cookies are a web of flavor!
- Festive Halloween Cake Pops: Bite-sized delights that are both adorable and tasty, perfect for any party.
- Creamy Tiger Tail No-Churn Ice Cream: A unique and flavorful ice cream that’s a breeze to make, no ice cream maker required.
We hope these ideas spark your Halloween spirit and help you create a memorable and delicious holiday season with your family and friends. Happy baking and spooky celebrating!