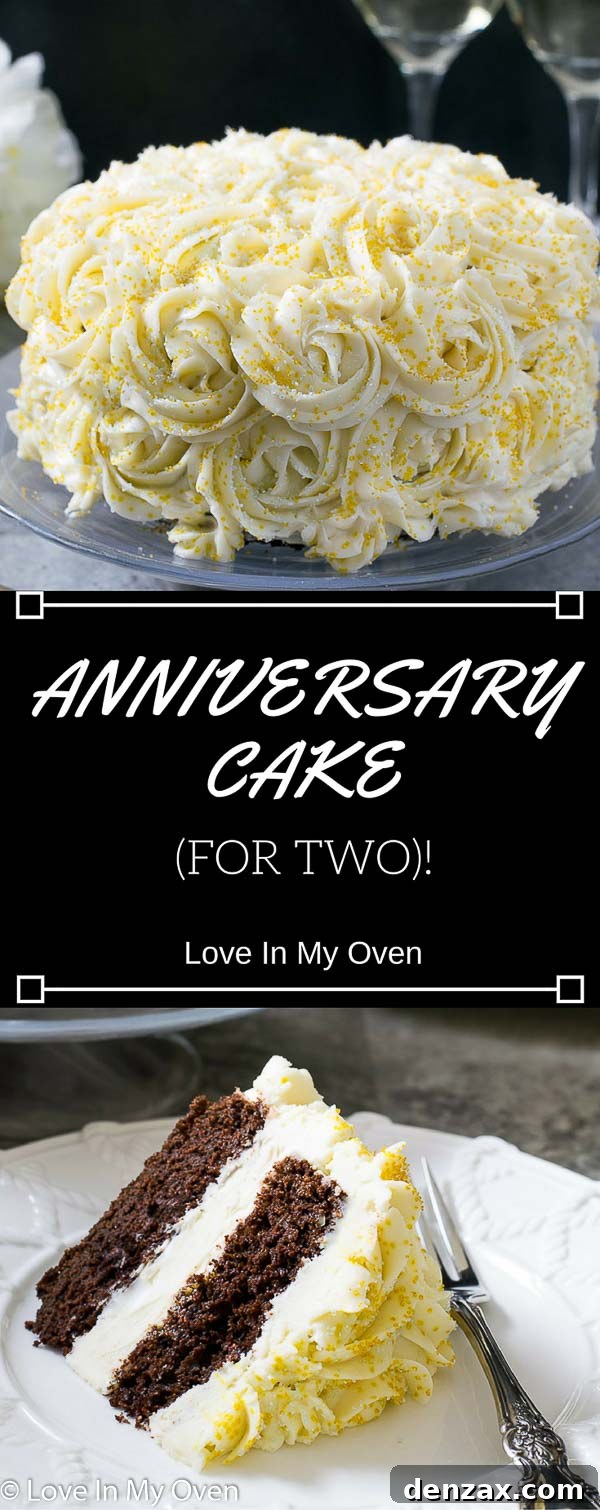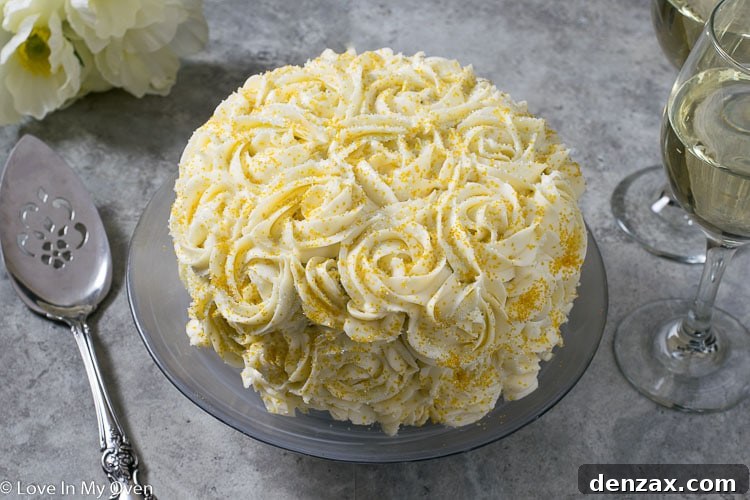
The perfect small chocolate cake recipe to celebrate! This mini chocolate cake for two is a 6-inch chocolate cake recipe, ideally sized for an anniversary or any intimate celebration.
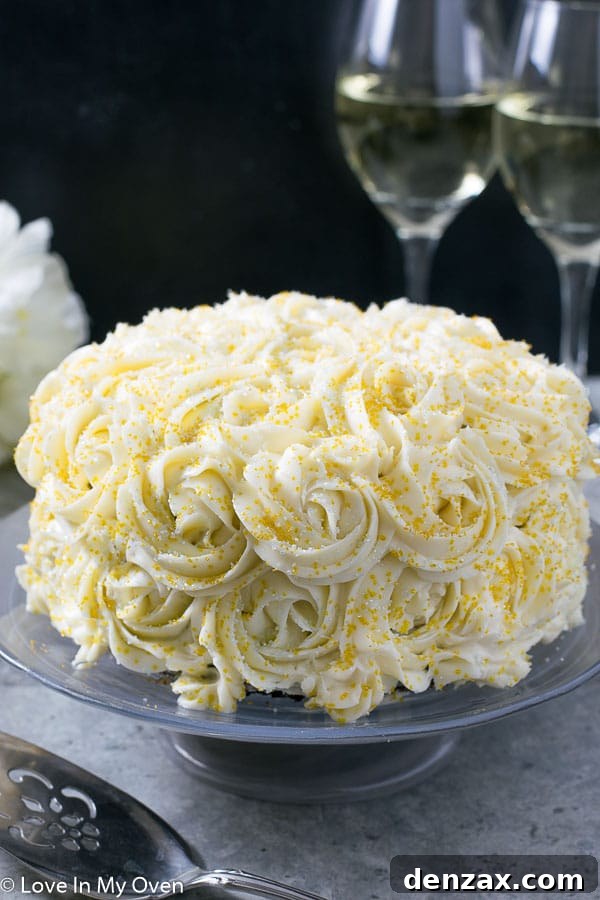
Today marks a truly special milestone, not our wedding anniversary (that’s still a few months away!), but a different kind of celebration: my blog’s first birthday, my “blogiversary!” It feels like just yesterday I tentatively launched this little corner of the internet, with a humble collection of four or five recipes. Now, a year later, I’m incredibly proud to say that this space has blossomed into a vibrant culinary hub featuring over 100 delicious creations.
This past year has been an exhilarating journey of growth, learning, and immense joy. From mastering the nuances of food photography to delving deep into the art of recipe development, every moment has been a delightful adventure. Sharing my passion for baking and cooking with all of you has been a dream come true, and I’m deeply grateful for the community we’ve built together. While I plan to share a more detailed reflection on this journey later this week, for now, there’s only one appropriate way to celebrate such a sweet occasion: with cake!
Despite having over a hundred recipes on the site, I find it a little surprising that my cake collection is still quite modest. I have an undeniable love for cake – it’s often the centerpiece of any celebration, big or small. In fact, my most popular recipe to date is the healthy smash cake I crafted for my son Wally’s first birthday. That very experience ignited my appreciation for smaller, more manageable cake sizes, leading me to use the same versatile 6-inch cake pan for today’s recipe. This size is truly a game-changer; it allows us to enjoy the delight of a freshly baked cake for family milestones without the commitment of consuming a large dessert for an entire week. It’s about indulging thoughtfully, savoring every bite without overdoing it.
Therefore, if you’re seeking a wonderfully intimate way to celebrate an anniversary, a special date night, or simply to treat yourself and a loved one, this mini chocolate cake, generously crowned with a luscious, pipeable cream cheese frosting, is absolutely perfect. It’s an ideal choice for creating a memorable, homemade dessert that feels both luxurious and personal. The joy of presenting such a beautifully decorated cake, knowing it was made with love, truly elevates any occasion.
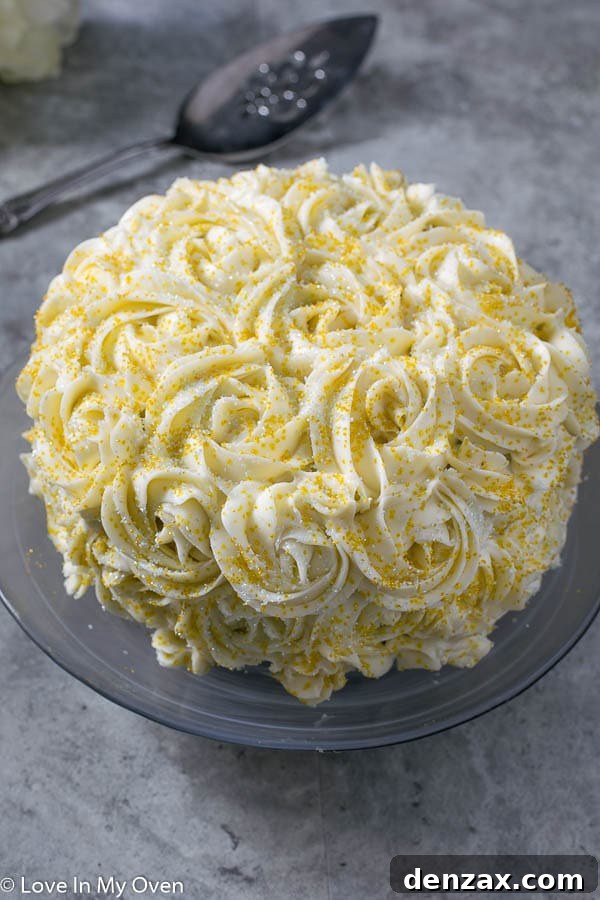
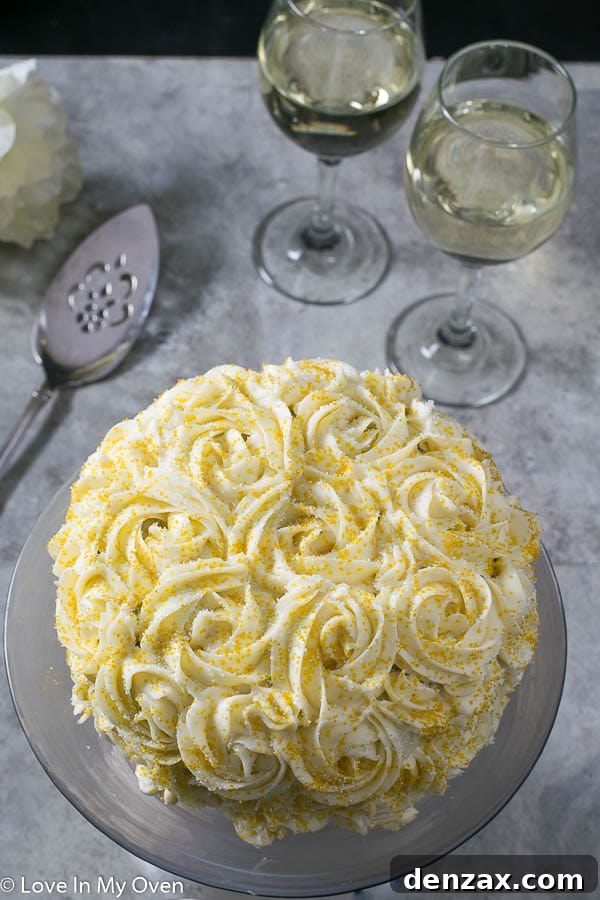
Crafting the Perfect Pipeable Cream Cheese Frosting
There’s something uniquely irresistible about cream cheese frosting; for me, it’s often the only frosting I ever truly crave. Its tangy sweetness perfectly complements so many desserts, from the classic fluffy carrot cake, like my own orange carrot cake, to unexpected pairings. While not always the first choice for chocolate cake, the combination is surprisingly delightful! The subtle tang of the cream cheese provides a fantastic counterpoint to the deep, rich notes of chocolate, creating a beautifully balanced flavor profile that will leave you wanting more.
However, the beauty of traditional cream cheese frosting often comes with a challenge: its inherently soft texture makes it notoriously difficult to pipe into intricate designs. A standard recipe tends to be too thin and prone to losing its shape, making delicate rosettes or sharp borders nearly impossible to achieve. To overcome this, and to create a cream cheese frosting that is robust enough for beautiful piping while still retaining its exquisite flavor, I’ve made a few strategic adjustments to the classic ratio.
The key lies in carefully balancing the fat content. I increased the proportion of butter to cream cheese, as butter provides the essential structure and stability needed for piping. Furthermore, I exclusively used full-fat cream cheese. While I often opt for lighter versions in other recipes, light cream cheese contains a higher water content, which can destabilize the frosting and make it too runny for decorative work. Full-fat cream cheese ensures a richer, thicker consistency that holds its shape beautifully. The result is a frosting that is wonderfully pipeable, allowing you to create stunning decorations, yet still bursts with that beloved tangy, creamy flavor.
Mastering the Art of Piping Rosettes for Your Cake
Speaking of piping, this particular cake marked my very first attempt at creating a rose-themed cake, and I couldn’t be happier with the outcome! I owe immense gratitude to this fantastic tutorial from I Am Baker, which truly demystified the process. It’s almost unbelievable, but I managed to decorate this cake while simultaneously navigating the delightful chaos of my toddler tugging at my pant leg and my three-year-old ceaselessly pleading for “just a little bit of frosting.” If that’s not a testament to multi-tasking and the surprisingly approachable nature of this technique, I don’t know what is!
Despite their elegant appearance, piping rosettes is significantly easier than it looks, even for novice bakers. The trick is to have a sturdy, pipeable frosting (which we’ve just discussed how to achieve!) and the right piping tip, typically an open star tip (like a Wilton 1M or 2D). The basic motion involves starting in the center and swirling outwards to create the “petals.” With a little practice, you’ll be creating impressive floral designs in no time. I highly recommend watching the linked tutorial above; visual guidance makes all the difference when learning piping techniques. Don’t be intimidated – the satisfaction of seeing your first beautifully piped rosette is truly rewarding!
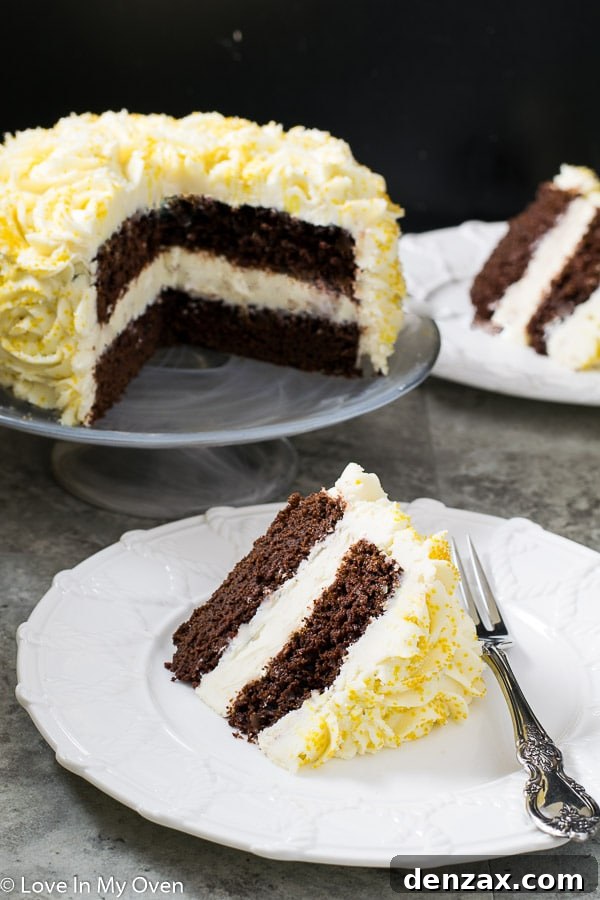
The foundation of this celebratory dessert is a remarkably straightforward chocolate cake recipe, thoughtfully scaled down to create the perfect mini-sized treat. Each ingredient plays a crucial role in achieving its irresistible texture and flavor. The addition of buttermilk is vital; its acidity reacts with the baking soda, contributing to the cake’s tender crumb and delightful moistness. Paired with oil, which ensures a consistently soft and delicate texture, the cake remains wonderfully moist for days.
To truly elevate the chocolate experience, I’ve incorporated melted dark chocolate directly into the batter. This step deepens the chocolate flavor significantly, giving the cake a luxurious richness that cocoa powder alone cannot achieve. For an extra layer of complexity and to truly enhance that profound cocoa taste, a touch of instant espresso powder is included. While entirely optional, I wholeheartedly recommend it; the espresso doesn’t impart a coffee flavor but rather acts as a secret ingredient, intensifying the chocolate notes and making them sing. This meticulous combination of ingredients results in a small batch chocolate cake that delivers an incredibly rich, moist, and utterly satisfying experience, perfect for any special occasion.
So, whether you’re celebrating your own personal milestones like a blogiversary (like me!), a romantic anniversary with your partner, or simply the joy of a quiet evening, this mini chocolate cake is the ultimate indulgence. We all deserve a “little” chocolate cake in our lives, don’t you agree? It’s a sweet reminder to pause, appreciate the small joys, and savor the moments that matter.
Here’s to another fantastic year of baking, sharing, and delicious food!
Looking for more delightful cake ideas? Explore these delicious recipes:
- Matcha Vanilla Cake
- Lovely Lemon Cake
- Orange Carrot Cake
- Healthy Smash Cake
Print Recipe
Anniversary Cake for Two
⭐ 5 Stars
⭐ 4 Stars
⭐ 3 Stars
⭐ 2 Stars
⭐ 1 Star
5 from 4 reviews
- Author: Katherine
Total Time: 3 hours 60 minutes
Yield: 1 6″ cake 1x
Description
This delightful mini chocolate cake is perfectly portioned for two, making it an ideal choice for celebrating anniversaries, romantic date nights, or any special occasion that calls for an intimate, homemade dessert. Topped with a rich, pipeable cream cheese frosting, this 6-inch chocolate cake recipe guarantees a moist, decadent, and utterly charming treat.
Ingredients
Scale
Chocolate Cake
- 1/2 cup all purpose flour
- 1/4 cup cocoa powder (not Dutch-processed)
- 1/2 tsp baking soda
- 1/2 tsp baking powder
- 1/4 tsp salt
- 1/3 cup oil (vegetable or grapeseed)
- 1/2 cup granulated sugar
- 1 egg, room temperature
- 1/2 tsp instant espresso powder*
- 2 oz chopped dark chocolate, melted and cooled slightly
- 1/2 cup buttermilk, room temperature
Cream Cheese Icing*
- 2 pkg (500 grams) full-fat cream cheese, room temperature
- 2/3 cup unsalted butter, room temperature
- 1 1/2 cups powdered sugar
- 1 tsp pure vanilla extract
Instructions
- Preheat the oven to 350 F (175 C) and prepare a 6-inch springform cake pan by lining the bottom with parchment paper and spraying it with non-stick spray. Lightly dust with flour, tapping out any excess.
- In a large mixing bowl, whisk together the dry ingredients: all-purpose flour, cocoa powder (ensure it’s natural, not Dutch-processed), baking soda, baking powder, and salt. Set aside.
- In a separate medium mixing bowl, whisk together the oil and granulated sugar until well combined. Incorporate the room temperature egg, instant espresso powder (if using), and the slightly cooled melted dark chocolate, whisking until smooth. Pour these wet ingredients into the bowl with the dry ingredients. Add half of the room temperature buttermilk and stir gently until partially combined. Add the remaining buttermilk and continue stirring until the batter is thoroughly mixed and lump-free. Be careful not to overmix. Scrape the cake batter into the prepared pan and bake for 30-35 minutes, or until a wooden skewer or toothpick inserted into the center comes out clean. Avoid underbaking, as this can result in a sunken center.
- Once baked, remove the cake from the oven and allow it to cool completely in the pan on a wire rack before attempting to ice it. Cooling thoroughly is crucial for the frosting to adhere properly.
- Prepare the pipeable cream cheese frosting. In the bowl of a stand mixer fitted with the paddle attachment, or using an electric hand mixer, beat the full-fat cream cheese with the unsalted butter on medium-high speed until the mixture is light, fluffy, and well combined. This can take 2-3 minutes. Gradually add half of the powdered sugar, along with the pure vanilla extract, and mix on low speed until incorporated, then increase speed to medium. Add the remaining half of the powdered sugar and beat until the frosting is just combined and reaches a fairly stiff, pipeable consistency. Avoid overbeating.
- Carefully ice and decorate your cooled cake as desired. If you plan to serve the cake on the same day, it can be stored at room temperature, ideally covered to prevent it from drying out. For serving within the next one to two days, store the covered cake in the refrigerator.
Any leftover cake can be kept at room temperature in an airtight container for 1-2 days, or refrigerated for up to 4-5 days. For longer storage, the unfrosted cake can be frozen. Once completely cooled, wrap the cake tightly in plastic wrap and store in the freezer for up to two months. Thaw overnight in the refrigerator before frosting and serving.
Notes
- The instant espresso powder is a secret ingredient that profoundly enhances the chocolate flavor without imparting any coffee taste to the cake. It’s optional, but highly recommended for a truly rich chocolate experience!
- This recipe for cream cheese icing yields enough to create a delicious middle layer within the cake and substantial decorations on the outside. If you prefer a simpler cake without a middle layer or with minimal frosting, you may consider halving the icing recipe ingredients.
- To create a beautiful “2-layer” appearance for this mini cake, simply slice the single baked cake in half horizontally with a serrated knife once it has completely cooled.
- Prep Time: 30 minutes
- Cook Time: 30 minutes