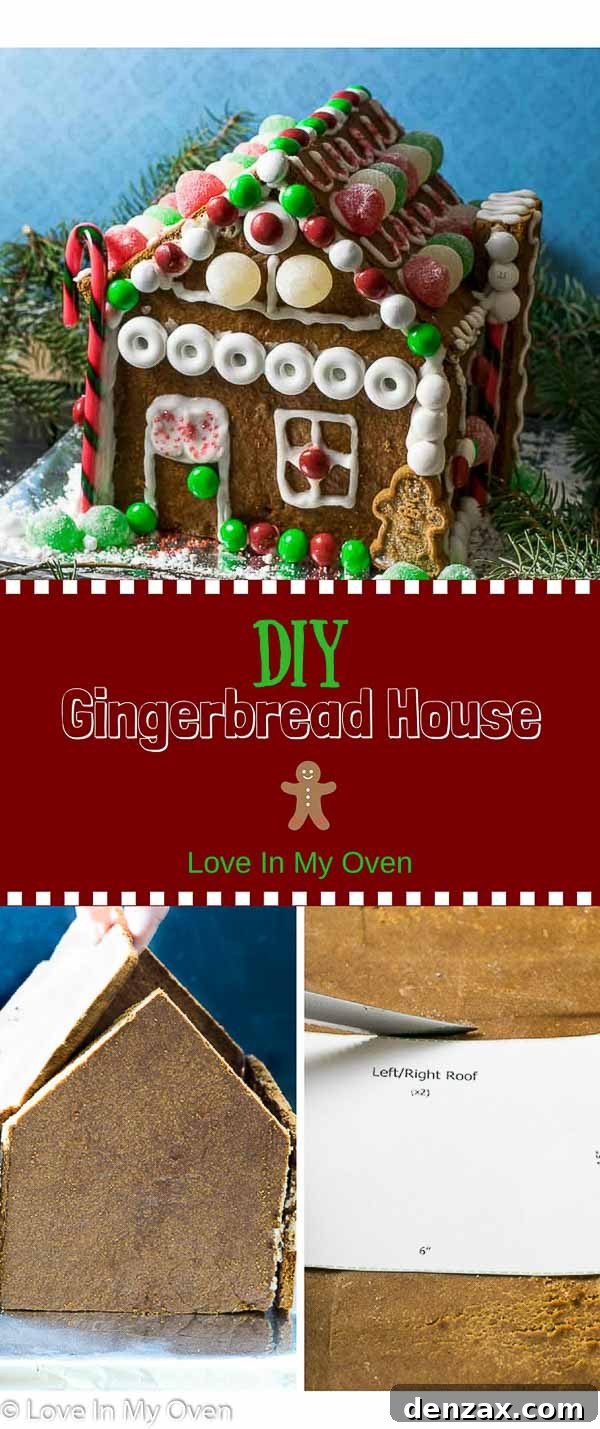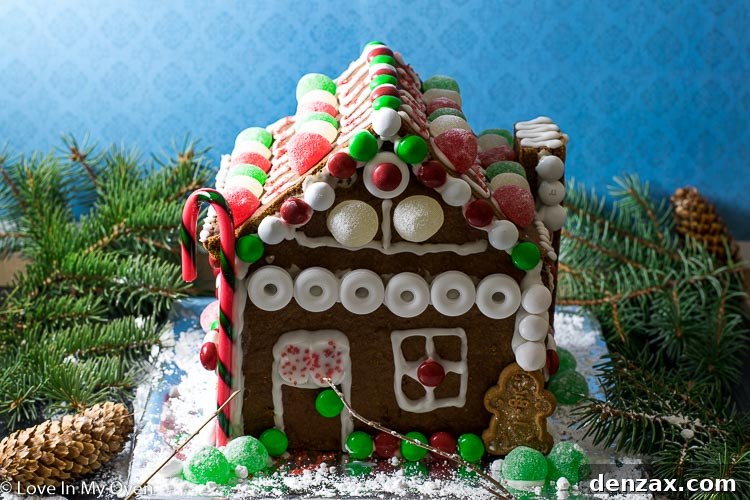
This year, transform your holiday season by creating a magnificent DIY gingerbread house! Crafting an easy gingerbread house begins with simple-to-use gingerbread house patterns, ensuring a stress-free and enjoyable experience. You’ll delight in decorating this charming little house, which boasts an irresistible taste far superior to any store-bought alternative. Get ready to build a delicious masterpiece that will enchant everyone!
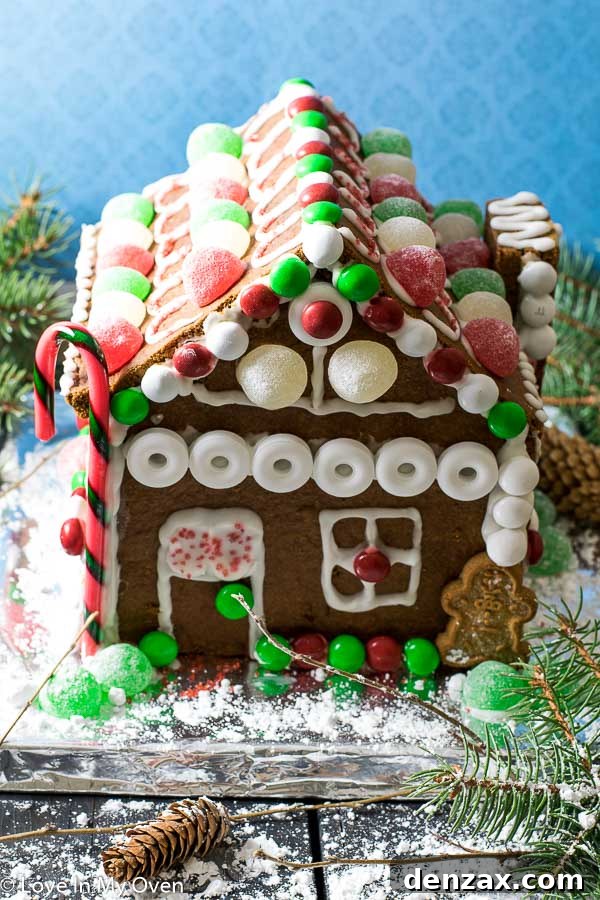
Why Embark on Your Own Gingerbread House Journey?
You might be pondering why you’d invest time in creating a gingerbread house from scratch when countless pre-assembled versions are readily available at every grocery store and seasonal shop. It’s a fair question, especially with the holiday hustle and bustle. However, if you’ve landed on this page, chances are you share a passion for baking, enjoy the satisfaction of a handmade creation, and appreciate the entire process of crafting something special.
The truth is, while convenience has its place, the taste of a homemade gingerbread house is simply unparalleled. Those mass-produced kits often leave much to be desired, tasting more like cardboard than a festive treat. Our recipe, however, guarantees a rich, warmly spiced gingerbread that is genuinely delicious. Plus, with the leftover dough scraps, you can whip up adorable gingerbread men, making this a delightful two-for-one holiday baking project!
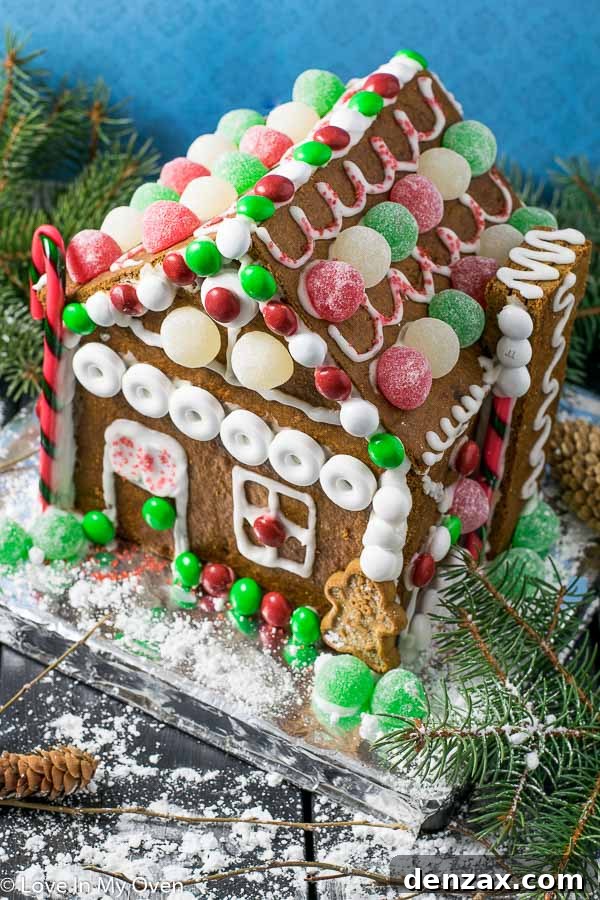
The Unrivaled Taste of Homemade
Imagine the aroma filling your kitchen as the gingerbread bakes – a symphony of cinnamon, ginger, and molasses. This is the authentic flavor experience that store-bought kits simply cannot replicate. Our recipe uses classic ingredients to deliver that iconic, comforting gingerbread taste that is both wonderfully nostalgic and incredibly satisfying. Every bite of your DIY gingerbread house will be a testament to fresh, quality ingredients and a labor of love.
A Cherished Family Tradition
Building a gingerbread house from scratch is more than just baking; it’s an enchanting holiday ritual. It’s an opportunity to gather loved ones, share laughter, and create lasting memories. From mixing the dough to meticulously decorating each wall, every step becomes a cherished moment. It’s the kind of hands-on activity that brings out the inner child in everyone, fostering creativity and togetherness during the most wonderful time of the year.
Creative Freedom & Customization
Forget the generic designs of pre-packaged kits. When you build your own gingerbread house, the only limit is your imagination. You get to choose the colors, the candies, and the overall theme, making it a true reflection of your personal style. Whether you envision a winter wonderland, a whimsical candy cottage, or a rustic woodland cabin, a homemade house offers endless possibilities for customization and artistic expression.
Getting Started: Essential Tools and Ingredients
Before you dive into the magic of gingerbread house construction, let’s ensure you have everything you need. Don’t fret over complex measurements or fancy equipment; our super easy template and straightforward recipe make this process accessible to everyone.
The Perfect Gingerbread Dough
The foundation of any great gingerbread house is, of course, the gingerbread itself. Our recipe creates a sturdy yet tender dough with that quintessential molasses-rich flavor and warm spice profile. You’ll need just a few basic baking ingredients:
- Unsalted Butter: Softened to room temperature for smooth creaming.
- Brown Sugar: Adds moisture and a deep, caramelized sweetness.
- Fancy Molasses: The star ingredient for that distinct gingerbread flavor and dark hue.
- Pure Vanilla Extract: Enhances all the other flavors.
- Spices (Cinnamon, Ground Ginger, All-Spice): The heart and soul of gingerbread, providing warmth and aromatic complexity.
- Baking Soda: A leavening agent that helps the cookies rise slightly.
- All-Purpose Flour: Provides structure to your gingerbread walls.
- Water: Helps bind the dough to the perfect consistency.
One fantastic feature of this dough recipe is that it contains no raw eggs, meaning you can safely snack on any dough scraps without a second thought – a small, delightful perk for any avid baker!
Gathering Your Tools
You don’t need a professional bakery setup, but a few key tools will make the process much smoother:
- Electric Mixer or Stand Mixer: Essential for creaming butter and combining ingredients efficiently.
- Rolling Pin: For evenly flattening your dough.
- Sharp Knife: Crucial for precise cutting of your gingerbread pieces.
- Parchment Paper or Silicone Baking Mats: Prevents sticking and ensures easy transfer of baked goods.
- Rimless Cookie Sheets (Optional but Recommended): Allows for easier rolling and baking directly on the sheet.
- A Ruler: Often overlooked in the kitchen, a ruler is your secret weapon for precise trimming and ensuring your house pieces fit together perfectly. You’ll be surprised how often it comes in handy for other baking projects too, like biscotti!
Templates are Your Best Friend
Worried about getting the dimensions right? Put your ruler anxiety aside! At the very end of this post, you’ll find easy-to-use, printable templates with all the correct dimensions. Simply print them out, cut along the lines, and you’ll have perfectly shaped walls, roofs, and chimneys ready to guide your cutting.
Crafting Your Gingerbread House Pieces
The journey to your gingerbread masterpiece begins with carefully prepared and baked components.
Dough Preparation & Rolling
Once your dough is made, it needs to chill in the refrigerator for at least 30 minutes. This chilling process is vital; it firms up the dough, making it less sticky and much easier to roll out and handle. While your dough is chilling, take the opportunity to print and cut out all your house templates.
After chilling, divide your dough in half. On a lightly floured surface, use your rolling pin to roll each section into a large, even rectangle, approximately 1/4 inch thick. For ultimate convenience, if you have rimless cookie sheets, you can roll the dough directly onto them.
Precise Cutting for a Stable Structure
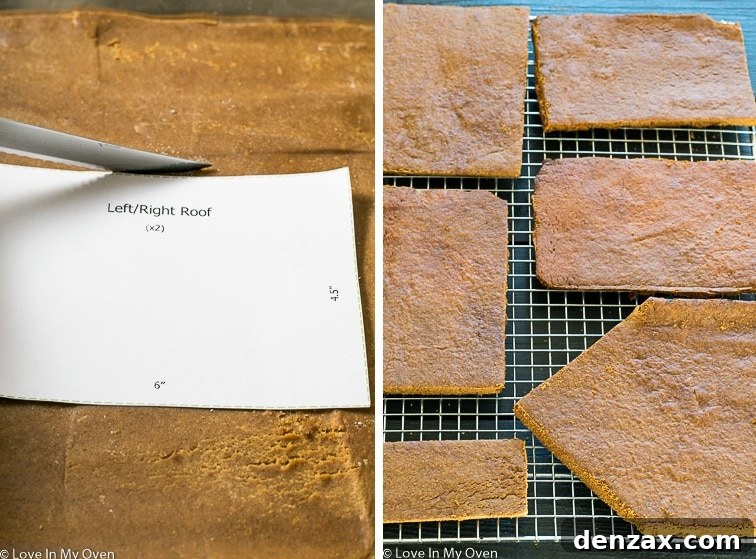
Place your paper templates directly onto the rolled-out dough. Using a sharp knife, carefully cut around the edges of each pattern, aiming for cuts as close to the paper as possible. Leave the cut-out dough pieces in place on your parchment-lined baking sheet. This method helps maintain their shape during baking. Remove the paper templates before baking.
Baking to Perfection
Bake the gingerbread pieces in a preheated oven until they are firm to the touch, typically 13-15 minutes. Watch them closely to prevent over-browning. Once baked, remove them from the oven.
Trimming for a Flawless Fit
As soon as the baked pieces are out of the oven, while they are still warm and pliable, carefully place your templates back on top of the gingerbread outlines. Use your sharp knife to trim any edges that may have spread during baking, ensuring perfect, crisp shapes. Pay particular attention to the side walls; they should be at least 1/2 inch shorter than the roof pieces to allow for a proper overhang. This precision is crucial for a stable and aesthetically pleasing gingerbread house. Once trimmed, transfer all pieces to a wire rack to cool completely. They must be entirely cool and firm before assembly.
Assembling Your Gingerbread Masterpiece: The “Glue” That Holds It All Together
Now for the exciting part: bringing your gingerbread pieces to life! The choice of adhesive is critical for a strong and stable house.
The Power of Caramel Syrup
While royal icing is excellent for decorations, I highly recommend using a simple caramel syrup to glue the main structure of your gingerbread house together. This clever tip, shared by a crafty friend, makes assembly incredibly fast and secure. The syrup, a mixture of sugar and water cooked to a caramelized stage, dries almost clear and, most importantly, hardens very quickly. This eliminates the need for extensive propping and waiting, allowing you to build your house with ease.
Safety First! Working with hot caramel requires extreme caution. The syrup will be very hot and can cause severe burns if it comes into contact with skin. Have everything ready before you start, and work carefully. Keep children at a safe distance during this step.
Tip for Making Caramel Syrup: Combine sugar and water in a small saucepan. Bring the mixture to a boil, then reduce the heat and simmer. The key is to cook it just long enough for it to become a thick, sticky syrup – approximately 15 minutes. Be careful not to simmer it for too long, as it will crystalize and become unusable. As soon as it reaches a thick, syrupy consistency, remove it from the heat immediately. Any remaining heat in the pan can continue the cooking process, leading to crystallization. Once the syrup is ready, use it immediately before it cools and hardens.
The Art of Royal Icing (An Alternative and for Decoration)
If you prefer not to work with hot caramel, you can certainly use royal icing for assembly. Just be prepared for a longer drying time, which means you’ll need to use props (like cans, bottles, or even clothes pins) to support the walls and roof until the icing fully sets. Regardless, royal icing is indispensable for attaching all your delightful candies and creating beautiful snowy details on your finished house.
Step-by-Step Assembly
Using a pastry brush for precise application, work quickly with your caramel syrup. Begin by attaching the front and back pieces to the side walls. Apply a generous bead of caramel along the edges that will join, then firmly press the pieces together, holding them for a few minutes until the caramel sets. Its rapid drying time means you won’t be holding for long! Once the base is stable, carefully apply caramel to the top edges of your walls and place the roof pieces on top, ensuring they align and create a sturdy apex. Finally, once the main structure is completely dry and stable, attach the chimney. If your chimney seems too tall for its intended spot, don’t hesitate to trim an inch or two off the bottom for a perfect fit.
Decorating Your Dream Gingerbread House
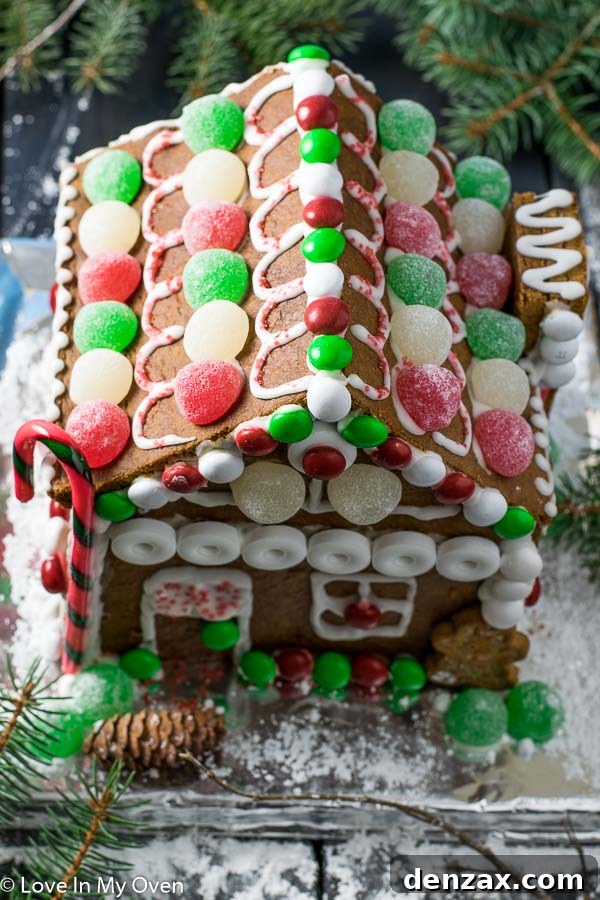
Once your gingerbread house is fully assembled and structurally sound (allow it to rest for at least a couple of hours if using royal icing for assembly), it’s time for the most creative and fun part: decorating! Whip up a batch of royal icing to use as your “snow” and “glue” for candies.
Unleash Your Creativity with Royal Icing
The royal icing should be thick enough to hold candies firmly in place but fluid enough to pipe smoothly through a piping bag. Experiment with different piping tips to create intricate designs, snowy icicles, elegant borders, or whimsical window frames. This is where your artistic vision truly comes to life!
Choosing Your Candies Wisely
While you can use virtually any candy, certain types work best for gingerbread houses. Aim for lighter, flatter, and smaller candies that won’t weigh down the structure or slip off easily. Excellent choices include:
- Peppermint M&M’s or Regular M&M’s: Colorful and easy to attach.
- Mint Lifesavers: Great for windows or decorative borders.
- Holiday Gum Drops: Add festive pops of color and texture.
- Sprinkles: Perfect for creating a snow effect or adding fine detail.
- Mini Marshmallows: Ideal for fluffy snowdrifts or cozy chimney smoke.
- Pretzel Sticks: Can be used for fences, log piles, or roof textures.
- Candy Canes: Classic holiday decor, perfect for outlining or creating miniature paths.
- Licorice: Offers versatile lines for doors, windows, or roof tiles.
- Edible Glitter: Adds a magical sparkle to your snowy landscape.
As you decorate, remember that snacking on candies is an almost inevitable part of the process. You might want to have extra on hand – or, perhaps, ensure you’ve had a snack beforehand to resist the temptation!
Preserving Your Gingerbread House: Longevity and Enjoyment
After all your hard work, you’ll want to enjoy your gingerbread masterpiece for as long as possible. Here’s what to expect regarding its longevity:
How Long Does a Gingerbread House Last?
Your gingerbread house will remain edible for approximately 1 to 2 weeks. However, after the first week, the gingerbread will start to harden significantly. While still technically edible, biting into it might become a challenge for your teeth! The candies, too, can become quite brittle over time.
Storage Tips
To preserve your house for display, keep it at room temperature in a dry environment. A cool, dry pantry or countertop away from direct sunlight is ideal. Covering it loosely with plastic wrap or placing it in a large, clear box can help protect it from dust and humidity, extending its visual appeal for several weeks, even months, if kept dry. Just remember, the longer it sits, the less appealing it will be to eat.
The Joy of the Crumbling
If you have young children, don’t expect your gingerbread house to last even a week without being “picked over”! Kids (and adults!) find it hard to resist plucking off candies and sampling the gingerbread. Embrace the gradual dismantling – it’s all part of the fun and a sign that your delicious creation is being enjoyed. Ultimately, the joy comes not just from the finished product, but from the process and the memories created.
So, gather your rolling pin, piping bags, and your festive spirit. Get ready to bake, build, and decorate a delightful DIY gingerbread house that will capture hearts and taste buds, inspiring even Hansel and Gretel to come running!

Beyond the House: More Holiday Baking Inspiration
If you’re still in the mood for festive baking, explore these other delicious Christmas goodies:
- Mint Nanaimo Bars
- Christmas Cookie Pops
- Chocolate Candy Cane Cookies

DIY Gingerbread House
5 Stars 4 Stars 3 Stars 2 Stars 1 Star
4 from 1 review
Author: Katherine
Total Time: 2 hours 20 minutes
Yield: 1 house 1x
Description
Forget the bland, store-bought house in a cardboard box. Use this super simple recipe and template to craft your very own delicious, made-from-scratch gingerbread house that tastes as good as it looks!
Ingredients
Scale
Gingerbread Dough
- 1 cup unsalted butter, softened to room temperature
- 3/4 cup brown sugar
- 1/2 cup fancy molasses
- 1 tsp pure vanilla extract
- 2 tbsp cinnamon
- 1 tbsp ground ginger
- 1 tsp all-spice
- 1 tsp baking soda
- 3 3/4 cups all-purpose flour
- 1/4 cup water
Caramel Syrup
- 1 1/3 cups sugar
- 3/4 cup water
Royal Icing
- 1 tbsp egg-white substitute
- 3 1/2 – 4 cups powdered sugar
- 1 tsp water
Assorted candy, for decorating
Instructions
- Prepare the dough. Using an electric mixer or a stand mixer fitted with the paddle attachment, cream the butter until soft and fluffy. Add the brown sugar, molasses, and vanilla extract and beat until combined. Add the spices and baking soda. Slowly add the flour and water and mix just until a stiff dough forms. Place the dough in the fridge for at least 30 minutes to chill.
- While the dough chills, print and cut out the templates for the house (found at the end of this recipe). You will need two of each, other than the chimney.
- Preheat the oven to 375 F and line two large baking sheets with parchment paper or a silicone baking mat*. Divide the chilled dough into two, and using a lightly floured surface, roll each section out into a large rectangle, about 1/4″ thick. Place the cut-outs on top of the dough and using a sharp knife, outline around the cut-outs, keeping the outlined pieces in place. Remove the paper, and bake the dough for 13-15 minutes or until the dough feels firm to the touch. Allow to cool 5 minutes.
- Place the cut-out patterns on top of the outlines again and trim to ensure the pieces are the correct size. You will want to make sure the sides are shorter than the roof, at least by 1/2″. Sometimes the pieces spread in the oven, so trim the sides as necessary. Place them on top of the roof pieces to see. Remove the cut-out pieces and place on a wire rack to cool completely.
- Once the shapes have cooled, prepare the surface for the gingerbread house. I used a small cookie sheet wrapped in foil.
- Prepare the caramel syrup*** Stir together the sugar and water until combined, in a small saucepan. Bring the mixture to a boil, then reduce heat and simmer until a caramel syrup is formed, about 15 minutes. It will look thick and syrupy. Once the syrup forms, turn off the heat and remove the saucepan, or the syrup will crystalize. Using a pastry brush, use the caramel immediately to glue the house together. Starting with the sides of the house, apply the caramel to one end and hold it against the front or back of the house, holding in place for a few minutes until hardened. You can also use chip clips or any other props you have around to keep the pieces propped up while drying. Work quickly to assemble the rest of the house. If you’re using royal icing instead of the syrup, wait 30 minutes before adding the roof to the house. I glued the chimney last. If you’ve chosen to place the chimney on the side vs the back of the house, it may be too tall. Trim 1-2 inches off the end.
- Prepare the royal icing. Allow the house to rest for at least a couple of hours to really set before preparing the icing to decorate. In a medium bowl, use an electric mixer to beat together the egg whites and water with the powdered sugar. Add more water or more powdered sugar to achieve the right consistency. It should be thick enough to hold candy in place, but thin enough to pipe through a piping bag.
- Use a piping bag to decorate the house, holding candy in place for a few seconds until it sticks. Leave the house in place until everything has hardened, about 15 minutes. Display, then enjoy immediately!
Gingerbread house will keep at room temperature for 3-4 weeks, but will be much less edible after 1 week.
Notes
- If you own rimless baking sheets, roll the dough right onto the baking sheet.
- Use gum drops, M&M’s, licorice, marshmallows, gum drops and lifesavers to decorate.
- If you’d prefer not to use syrup to glue the house together, you can also just make extra royal icing and use that instead!
Caramel syrup adapted from Martha Stewart.
- Prep Time: 1 hours
- Cook Time: 20 minutes
- Category: sweet tooth
- Method: DIY
- Cuisine: Christmas Baking
Gingerbread House Templates
For a complete house, print two copies of the “Front and Back” template and two copies of the “Chimney” template.
Front and Back Template (PDF)
Sides and Roof Template (PDF)
Chimney Template (PDF)