
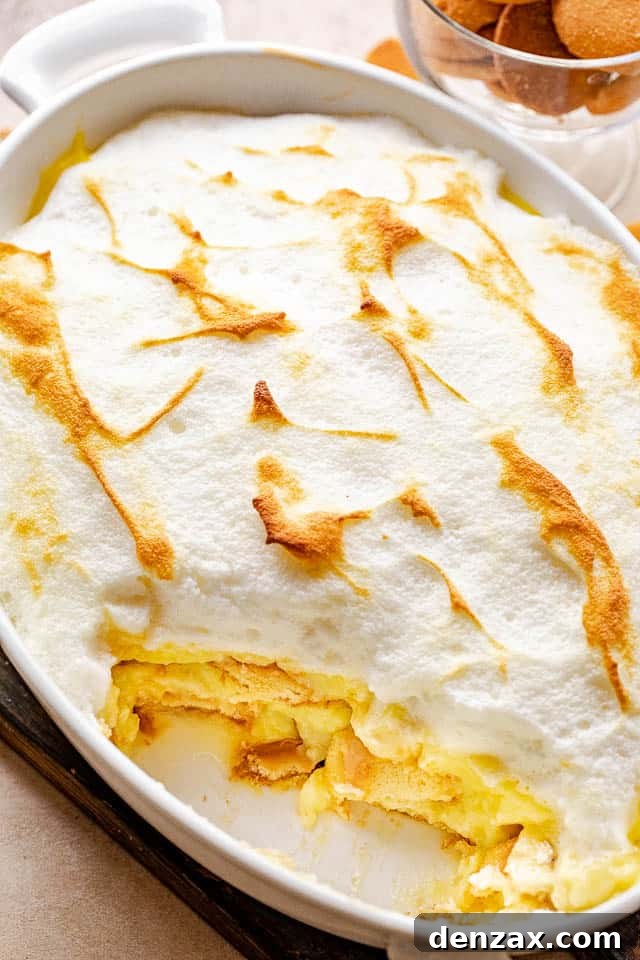
Welcome to the ultimate guide for creating the most luscious and authentic **Homemade Banana Pudding** you’ve ever tasted! This isn’t just any dessert; it’s a comforting classic, a Southern tradition brought to life in your kitchen. Imagine layers of creamy, rich vanilla pudding, perfectly ripe banana slices, and crisp vanilla wafers, all mingling together to create a symphony of flavors and textures. It’s a truly delightful experience that’s surprisingly easy to achieve from scratch, using just a handful of simple ingredients.
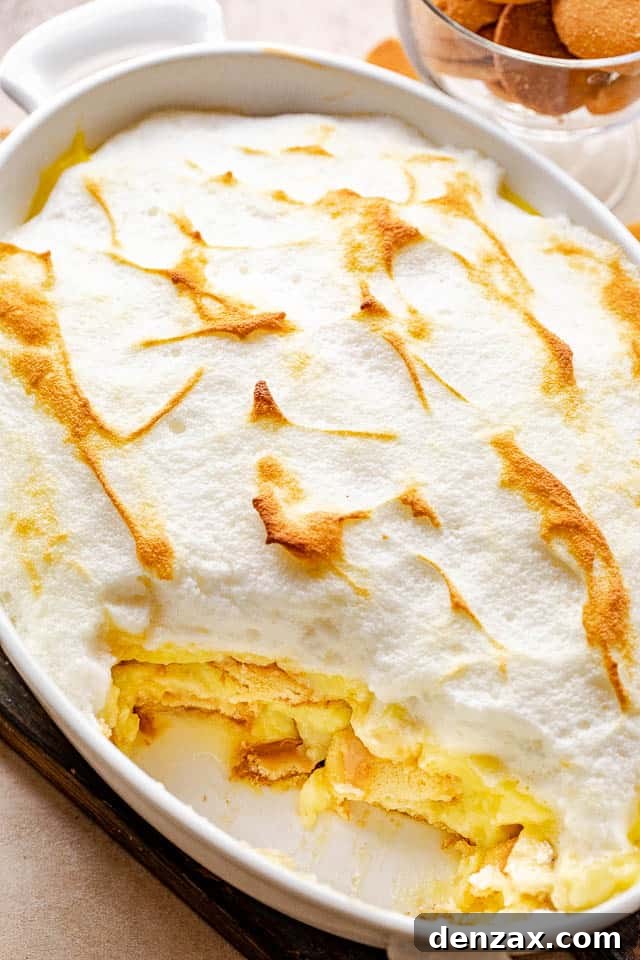
Crafting the Perfect Homemade Banana Pudding from Scratch
There’s an undeniable charm and unparalleled satisfaction that comes with a cool, creamy dessert, especially one as beloved as banana pudding. While store-bought versions exist, nothing compares to the depth of flavor and velvety texture of a truly homemade pudding. This recipe elevates the humble banana pudding to an art form, featuring a rich, velvety vanilla custard that’s cooked to perfection, creating a sublime base that perfectly complements the soft banana slices and slightly crunchy vanilla wafers. It’s more than just a dessert; it’s a culinary hug, evoking nostalgic memories and creating new ones with every spoonful.
Banana pudding stands as an iconic Southern comfort food, cherished for its delightful sweetness, indulgent creaminess, and robust banana flavor. It’s a versatile treat, equally at home at festive celebrations and as a simple, joyful indulgence on an ordinary evening. If you have a fondness for bananas, this easy, no-bake (unless you opt for a meringue topping!) dessert is an absolute must-try. The beauty of making it from scratch lies in controlling the quality of ingredients and savoring the process of creating something truly special. For those looking to explore more decadent banana-infused delights, consider trying Banana Pudding Cupcakes – but for now, let’s master the classic.
Essential Ingredients for Your Banana Pudding
Creating an outstanding banana pudding begins with selecting the right ingredients. Each component plays a vital role in achieving that perfect balance of sweetness, creaminess, and texture. Here’s a detailed look at what you’ll need:
- Granulated Sugar: This provides the foundational sweetness for our creamy pudding. It balances the flavors and contributes to the custard’s smooth consistency.
- All-Purpose Flour: Acts as the thickening agent for the pudding, ensuring it reaches that desirable, luxurious texture without being too runny or too stiff.
- Salt: A pinch of salt is crucial. It doesn’t make the pudding salty, but rather enhances and balances the sweetness, bringing out the true flavors of the vanilla and banana.
- Milk (2% or higher): The fat content in milk contributes significantly to the richness and creaminess of your pudding. While 2% is a good standard, whole milk will yield an even more decadent result. Avoid skim milk, as it won’t provide the necessary body or flavor.
- Eggs: Eggs are essential for creating a custard-like pudding. They provide structure, richness, and help with thickening. We’ll be tempering them to ensure a smooth, lump-free custard.
- Pure Vanilla Extract: This is where much of the pudding’s classic flavor comes from. Always opt for pure vanilla extract over imitation for the best, most authentic taste. It truly makes a difference.
- Vanilla Wafers: These iconic cookies are a non-negotiable component of traditional banana pudding. They soften as they absorb the pudding’s moisture, creating a delightful cake-like texture that contrasts beautifully with the fresh banana slices. Look for good quality, crisp wafers.
- Bananas: The star of the show! Choose ripe but firm bananas. They should have a few brown spots, indicating sweetness, but not be overly soft or mushy. Slice them into approximately 1/4-inch pieces for optimal layering and texture in each bite.
Step-by-Step Guide: How to Make Banana Pudding from Scratch
Making homemade banana pudding might sound intricate, but with these clear steps, you’ll master it in no time. The key is patience and consistent stirring to achieve that perfectly smooth, creamy texture. Follow these instructions carefully for a truly unforgettable dessert.
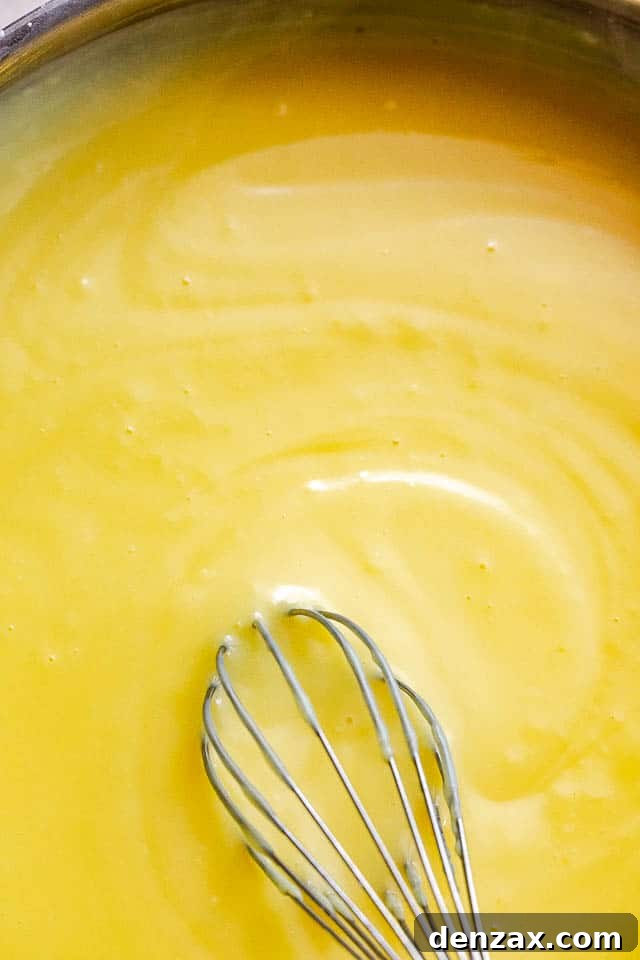
- Prepare the Dry Ingredients and Milk: In a large, heavy-bottomed nonstick saucepan, combine the granulated sugar, all-purpose flour, and salt. Whisk these dry ingredients together thoroughly. Gradually pour in the milk, whisking continuously to ensure there are no lumps and the mixture is well combined. Place the saucepan over medium heat.
- Begin Cooking the Pudding Base: Continue to cook the mixture over medium heat, stirring and whisking constantly. This is crucial to prevent scorching and to ensure the flour thickens evenly. Cook until the mixture visibly thickens and begins to bubble gently. This typically takes about 8-10 minutes.
- Reduce Heat and Continue Cooking: Once the pudding has thickened and is bubbling, reduce the heat to low. Continue to stir and cook for an additional 2 minutes. This step helps cook out any raw flour taste, ensuring a perfectly smooth and flavorful pudding. Remove the saucepan from the heat and set it aside momentarily.
- Temper the Eggs: In a separate medium bowl, whisk the eggs until they are light yellow and well blended. To prevent the eggs from scrambling when added to the hot pudding base, you need to “temper” them. Slowly ladle a small amount (about 1/2 to 3/4 cup) of the hot milk mixture into the whisked eggs, whisking vigorously the entire time. This gradually raises the temperature of the eggs.
- Incorporate Eggs into Pudding: Once tempered, slowly pour the entire egg mixture back into the hot milk mixture in the saucepan. Continue whisking as you pour to fully combine the ingredients and maintain smoothness.
- Return to Heat and Finish Cooking: Place the saucepan back on the stovetop over medium heat. Bring the mixture to a gentle boil, stirring and whisking constantly, and cook for another 2 minutes. This final cook time ensures the eggs are fully cooked and the pudding reaches its ultimate thick, creamy consistency.
- Add Vanilla and Cool: Remove the saucepan from the heat immediately. Whisk in the pure vanilla extract until fully incorporated. Allow the pudding to cool for about 15 minutes, stirring occasionally during this time to prevent a skin from forming on top.
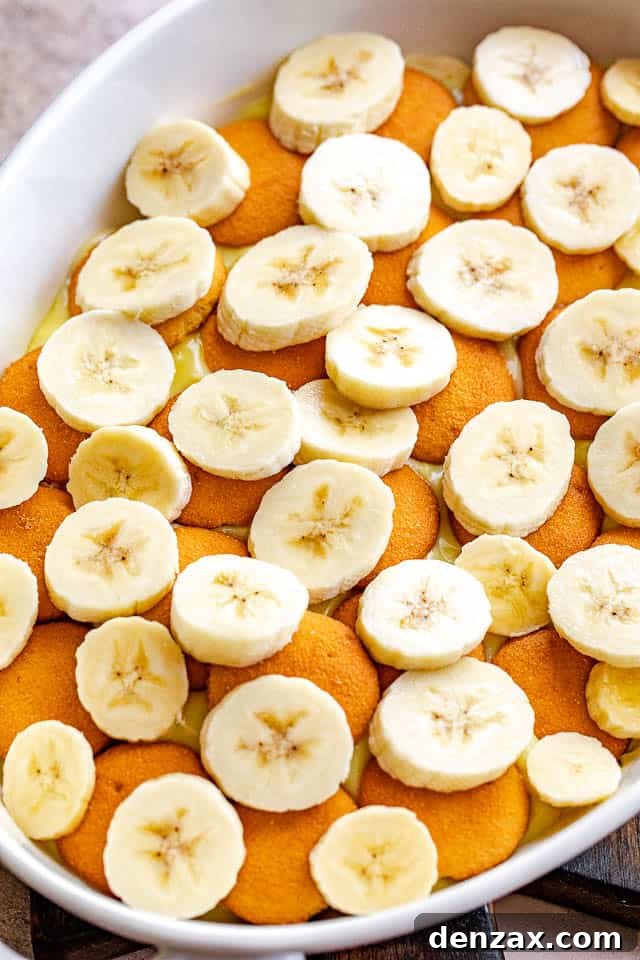
- Assemble Your Dessert: Begin by arranging a single layer of vanilla wafers in the bottom of an 8-inch or 9-inch baking dish or brownie pan. You want a good, solid base of wafers. Next, layer half of your freshly sliced bananas over the vanilla wafers, distributing them evenly. Pour half of the prepared pudding mixture over the bananas, spreading it gently to cover. Repeat these layers: another layer of vanilla wafers, followed by the remaining banana slices, and finally, the rest of the pudding.
- Chill for Perfection: To ensure your pudding sets beautifully and the flavors meld, cover the baking dish with plastic wrap. Press the plastic wrap gently directly onto the surface of the pudding to prevent a skin from forming. Refrigerate the banana pudding for a minimum of 6 hours, or ideally, overnight, before serving. This chilling time is essential for the wafers to soften and the pudding to firm up and develop its full flavor potential.
Expert Tips for the Best Banana Pudding
Achieving a truly spectacular homemade banana pudding is all about attention to detail. These tips will help you avoid common pitfalls and ensure your dessert is a resounding success:
- Mastering Egg Tempering: The most crucial step when adding eggs to a hot mixture is tempering them. Before you combine your whisked eggs with the milk mixture, slowly pour a small amount of the hot pudding base into the eggs while whisking constantly. This gradual heating prevents the eggs from scrambling and ensures a silky-smooth custard. Take your time with this step – it’s worth it!
- Continuous Stirring is Key: While this pudding recipe is straightforward, it requires your full attention. Constant stirring and whisking, especially during the cooking phases, are absolutely essential. This prevents the pudding from sticking to the bottom of the pan, burning, or developing lumps, guaranteeing a perfectly creamy texture. Don’t step away from the stovetop!
- The Magic of Overnight Chilling: While 6 hours of refrigeration will yield a good pudding, chilling it overnight truly unlocks its full potential. This extended period allows the flavors to deepen and meld beautifully, creating a more intense “banana-y” taste. Furthermore, the vanilla wafers will fully soften, absorbing the creamy pudding and becoming cake-like in texture, which is a hallmark of classic banana pudding.
- Selecting the Right Bananas: The quality of your bananas directly impacts the final taste. Opt for ripe bananas that have some brown speckles on their skins but are still firm to the touch. Overripe bananas can become mushy and too sweet, while underripe bananas lack the necessary sweetness and characteristic banana flavor. Aim for that perfect sweet spot – ripe but not overly soft.
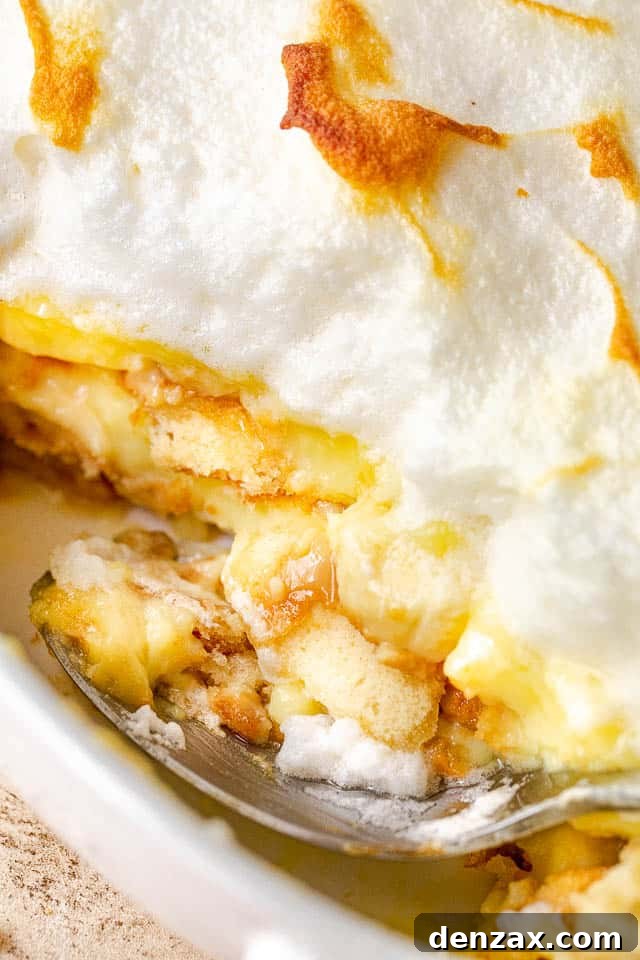
- Choosing Your Baking Dish: A clear glass baking dish not only looks beautiful, showcasing the layers, but also conducts heat well if you choose to bake a meringue topping. An 8 or 9-inch square dish or a similar-sized rectangular pan works perfectly for the recipe’s proportions.
- Don’t Forget the Vanilla Wafers: While some recipes suggest alternative cookies, classic banana pudding truly shines with vanilla wafers. Their light, crisp texture and subtle vanilla flavor are the perfect complement.
Preventing Banana Browning: Keeping Your Pudding Fresh and Appealing
One of the most common concerns when making banana pudding is preventing the banana slices from browning, which can detract from the dessert’s visual appeal. While a slight discoloration is natural over time, especially with fresh fruit, there are effective strategies to minimize it and keep your pudding looking delicious:
- Choose Wisely: The easiest and most effective way to prevent excessive browning is by using bananas that are ripe but not overripe. Bananas with just a few brown spots are ideal as they are sweet but still firm. Overripe bananas brown much faster due to higher sugar content and softer flesh.
- The Lemon Juice Trick: If you’re particularly worried about browning, or if you plan to make the pudding ahead of time, lightly toss your sliced bananas in a very small amount of lemon juice (or lime juice) before layering them into the baking dish. The acidity in the lemon juice acts as a natural antioxidant, significantly slowing down the oxidation process that causes browning. Be careful not to use too much, as it can impart a tart flavor to your pudding. Just a quick, light coating is enough.
- Airtight Storage: Once assembled, ensure your banana pudding is covered tightly with plastic wrap, pressing the wrap directly onto the surface of the pudding. This minimizes exposure to air, which is the primary catalyst for oxidation and browning.
- Swift Assembly: Slice your bananas just before you’re ready to layer them. The less time they are exposed to air after being sliced, the less likely they are to brown quickly.
Storing Leftover Banana Pudding
While homemade banana pudding is often devoured quickly, it’s good to know how to properly store any leftovers to maintain its freshness and quality. Proper storage is key to enjoying this delightful dessert for a few more days.
- Refrigeration is Essential: Always store leftover banana pudding in an airtight container or keep it covered tightly with plastic wrap directly pressed onto the surface. Place it promptly in the refrigerator.
- Shelf Life: Stored correctly, homemade banana pudding will generally stay fresh and delicious for 2 to 3 days in the refrigerator.
- Anticipate Changes: It’s important to note that the longer your pudding sits in the refrigerator, the more likely the banana slices are to brown slightly, even with preventative measures. Additionally, the vanilla wafers will continue to soften, eventually losing their distinct cake-like texture and becoming very tender. These changes are natural and don’t affect the taste, but they are something to be aware of regarding texture and appearance.
Freezing Banana Pudding for Future Enjoyment
Planning ahead or want to save some banana pudding for a rainy day? Freezing is a viable option, but it requires a bit of foresight and proper technique to ensure the best results upon thawing.
- Make-Ahead Convenience: This dessert is perfect for preparing 1 to 2 days in advance if you plan to keep it refrigerated. This allows the flavors to fully develop and makes entertaining stress-free.
- Freezing for Longer Storage: If you intend to freeze the pudding for later use, ensure it cools completely after preparation. Transfer the pudding (without the wafers or fresh bananas for best results, if possible, or accept the texture change) into a freezer-safe, resealable bag or an airtight container. It can be stored in the freezer for up to 3 months. Freezing the pudding base separately and assembling with fresh wafers and bananas after thawing often yields a superior texture.
- Thawing Instructions: When you’re ready to enjoy your frozen pudding, transfer it from the freezer to the refrigerator and allow it to thaw overnight. Once thawed, you can then assemble the pudding with fresh vanilla wafers and sliced bananas, if you froze the pudding base separately, or simply serve the pre-assembled version. Be aware that bananas in a frozen and thawed pudding might be a bit softer and potentially browner, and wafers will be quite soft.
Homemade Banana Pudding
Ingredients
- 3/4 cup sugar
- 1/4 cup all-purpose flour
- 1/4 teaspoon salt
- 3 cups milk, 2% or higher
- 3 large eggs
- 2 teaspoons pure vanilla extract
- 8 ounces vanilla wafers, divided
- 4 large bananas, cut into 1/4 inch slices
For the Meringue Topping (Optional)
- 4 egg whites
- Pinch of salt
- ¼ cup granulated sugar
Instructions
-
In a large saucepan, combine sugar, flour, and salt; whisk in the milk and set the saucepan over medium heat.
-
Cook and stir until thickened and bubbly.
-
Reduce heat to low and continue to stir and cook for 2 more minutes; remove from heat and set aside.
-
Whisk the eggs in a separate bowl; add a little amount of the hot milk mixture into the eggs and whisk.
-
Whisk the entire egg mixture into the milk mixture.
-
Set the saucepan back on the stovetop over medium heat; bring to a boil and cook and stir with the whisk for 2 more minutes.
-
Whisk in the vanilla and remove from heat; set aside to cool for 15 minutes, stirring occasionally.
-
Arrange two layers of vanilla wafers in an 8-inch or 9-inch baking dish or brownie pan.
-
Layer half of the sliced bananas over the wafers.
-
Pour half of the pudding over the bananas.
-
Repeat layers with cookies, banana slices, and finish with the remaining pudding.
-
Add plastic wrap over the top and press gently onto the surface of the pudding.
SKIP THIS PART IF ADDING THE MERINGUE.
-
Refrigerate for 6 hours, or overnight.
-
Serve and enjoy!
For the Meringue Topping (Optional)
-
Preheat oven to 425˚F.
-
In your mixer’s bowl, beat the 4 egg whites with a pinch of salt until they are stiff.
-
Gradually beat in the sugar and continue beating until the whites will not slide out of the mixing bowl.
-
Spread meringue topping over the banana pudding.
-
Bake for 5 minutes, or until meringue begins to brown on top.
Equipment
- Stovetop
- Large nonstick saucepan
- Whisk
- Medium bowl
- 8-inch or 9-inch baking dish or brownie pan
- Plastic wrap
- (Optional: Electric mixer for meringue)
Nutrition
Calories: 282 kcal | Carbohydrates: 48 g | Protein: 6 g | Fat: 8 g | Saturated Fat: 3 g | Cholesterol: 57 mg | Sodium: 200 mg | Potassium: 303 mg | Fiber: 2 g | Sugar: 32 g | Vitamin A: 220 IU | Vitamin C: 4 mg | Calcium: 92 mg | Iron: 1 mg
Nutritional info is an estimate and provided as courtesy. Values may vary according to the ingredients and tools used. Please use your preferred nutritional calculator for more detailed info.
Frequently Asked Questions About Homemade Banana Pudding
Here are answers to some common questions you might have when making this delightful Southern dessert:
Can I use instant pudding instead of making it from scratch?
While you can technically use instant vanilla pudding, making the custard from scratch is highly recommended for the authentic, rich, and creamy texture that sets homemade banana pudding apart. Instant pudding will result in a lighter, less complex flavor and texture. If time is a major constraint, you can use it, but be prepared for a different result.
What kind of vanilla wafers should I use?
Classic Nilla Wafers are the traditional choice and work perfectly due to their crisp texture and subtle vanilla flavor, which softens beautifully with the pudding. However, any similar plain, crisp vanilla cookie can be a suitable substitute if Nilla Wafers are unavailable.
Can I add whipped cream instead of meringue?
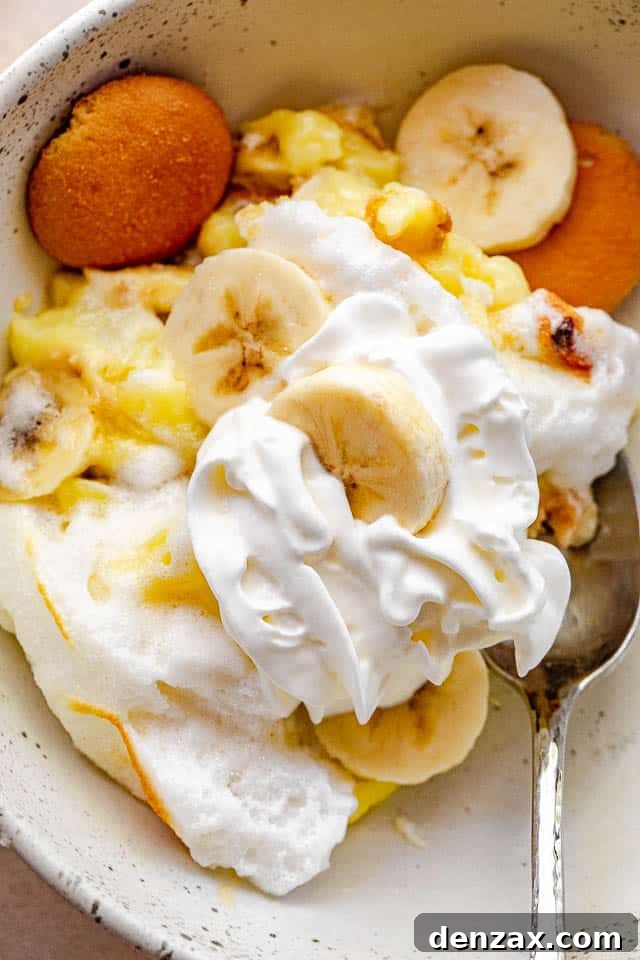
Absolutely! Many traditional banana pudding recipes are topped with a generous layer of freshly whipped cream instead of baked meringue. If opting for whipped cream, chill the pudding fully first, then whip heavy cream with a little sugar and vanilla until stiff peaks form, and spread it over the chilled pudding just before serving. This creates an equally delicious, lighter topping.
How do I know when the pudding is thick enough?
The pudding is ready when it coats the back of a spoon and holds its shape when stirred. It should be thick and bubbly, but still pourable. Remember, it will continue to thicken as it cools and chills in the refrigerator.
Can I make individual servings?
Yes, banana pudding is wonderful served in individual portions! Instead of a large baking dish, layer the wafers, bananas, and pudding in small ramekins, parfait glasses, or mason jars. This makes for an elegant presentation and easy serving, perfect for parties or portion control.
What are some variations I can try?
While the classic recipe is perfect, you can experiment! Consider adding a sprinkle of cinnamon or nutmeg to the pudding, or a dash of banana extract for an extra banana boost. You could also try different cookie layers, such as shortbread or graham crackers, for a slightly different flavor profile. Some people even add a layer of caramel or dulce de leche for an extra touch of indulgence.
Conclusion: Your Homemade Banana Pudding Awaits!
There’s truly nothing quite like the experience of digging into a freshly made, perfectly chilled Homemade Banana Pudding. It’s a dessert that brings smiles, evokes cherished memories, and proves that sometimes, the simplest ingredients can create the most profound culinary delights. From its rich, velvety custard to the tender banana slices and comforting vanilla wafers, every layer tells a story of Southern hospitality and sweet indulgence. We hope this comprehensive guide inspires you to whip up a batch of this magnificent dessert in your own kitchen. Gather your ingredients, follow our steps, and prepare to be rewarded with a dessert that will earn you rave reviews. Enjoy the process, savor the flavors, and share the joy of this timeless classic!