
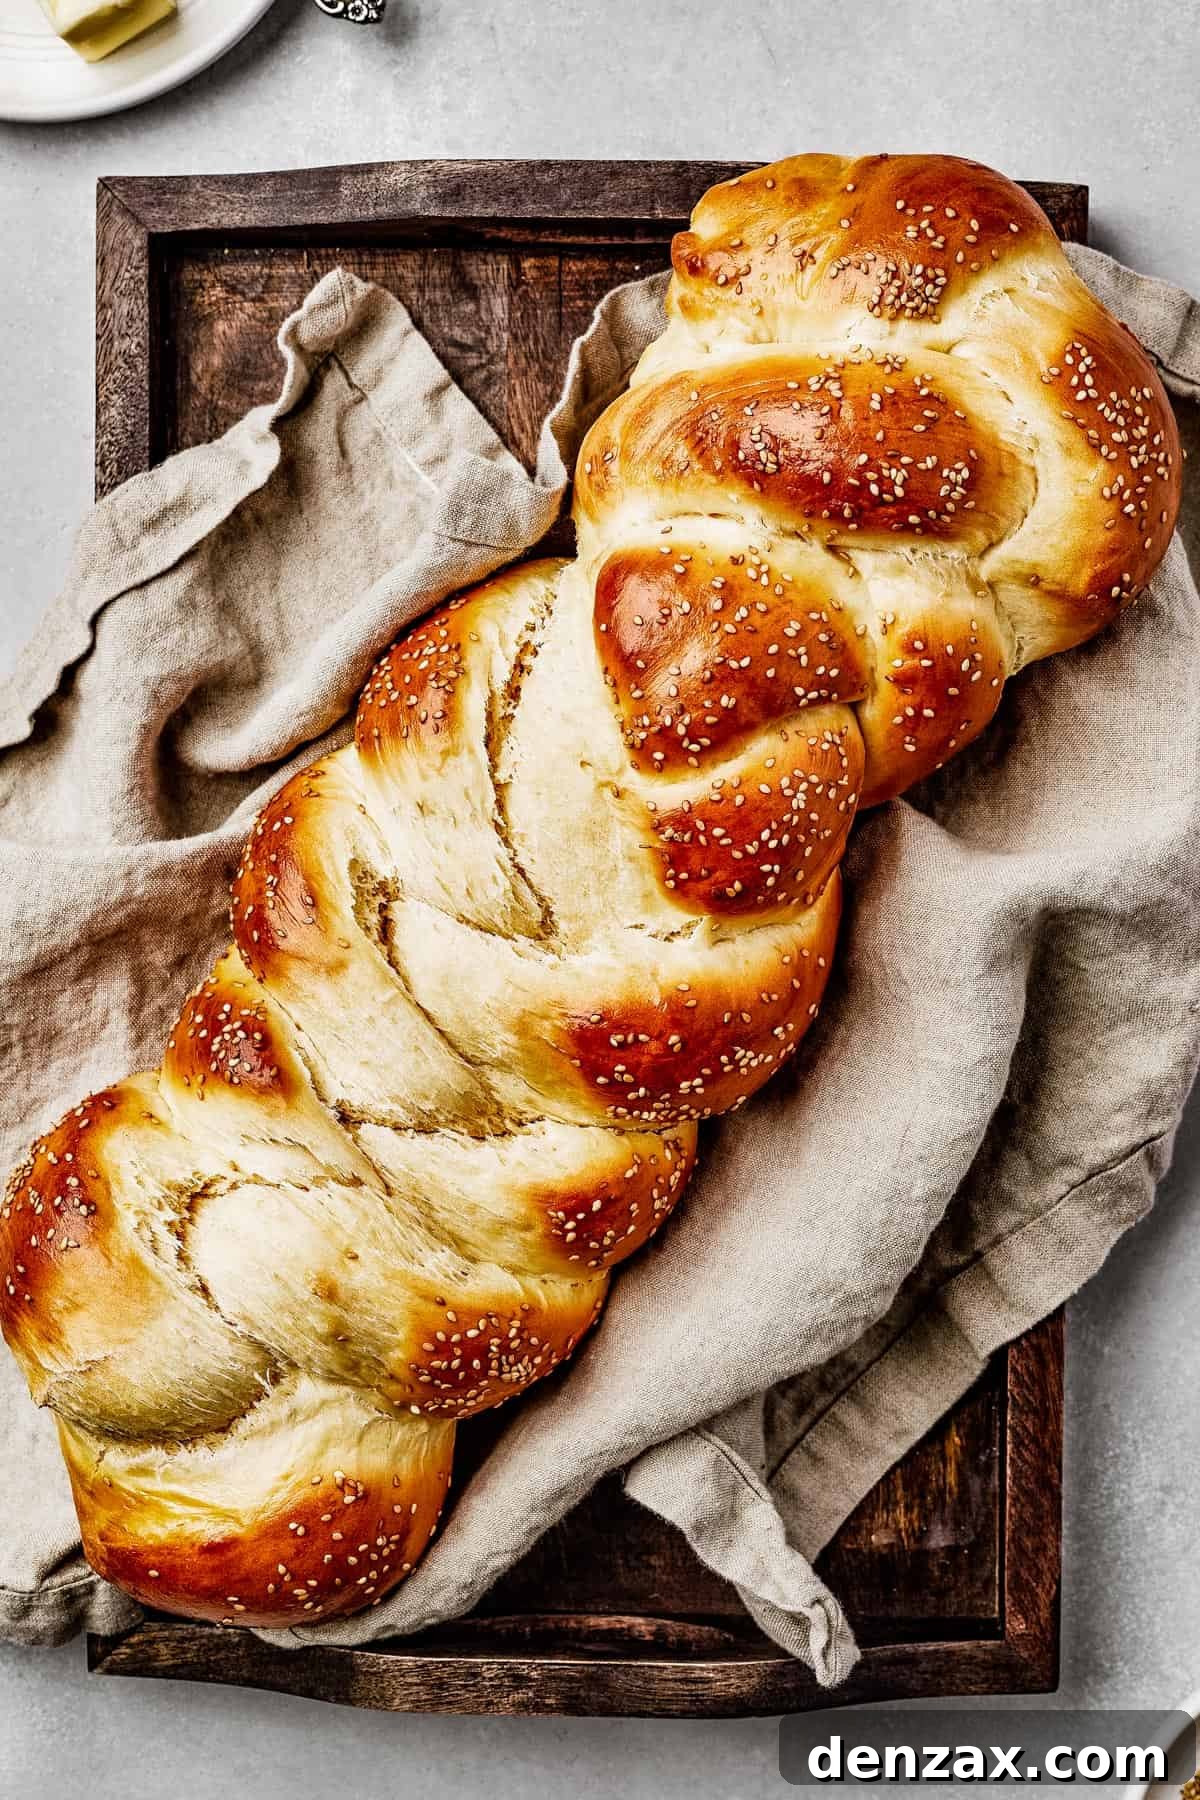
You’re about to discover the ultimate recipe for the most delightful Challah Bread. This isn’t just a recipe; it’s an invitation to experience the joy of baking a golden-brown, soft, rich, and subtly sweet braided loaf that feels as light as air. Prepare to fall in love with homemade Challah – a bread that truly elevates any meal or moment.
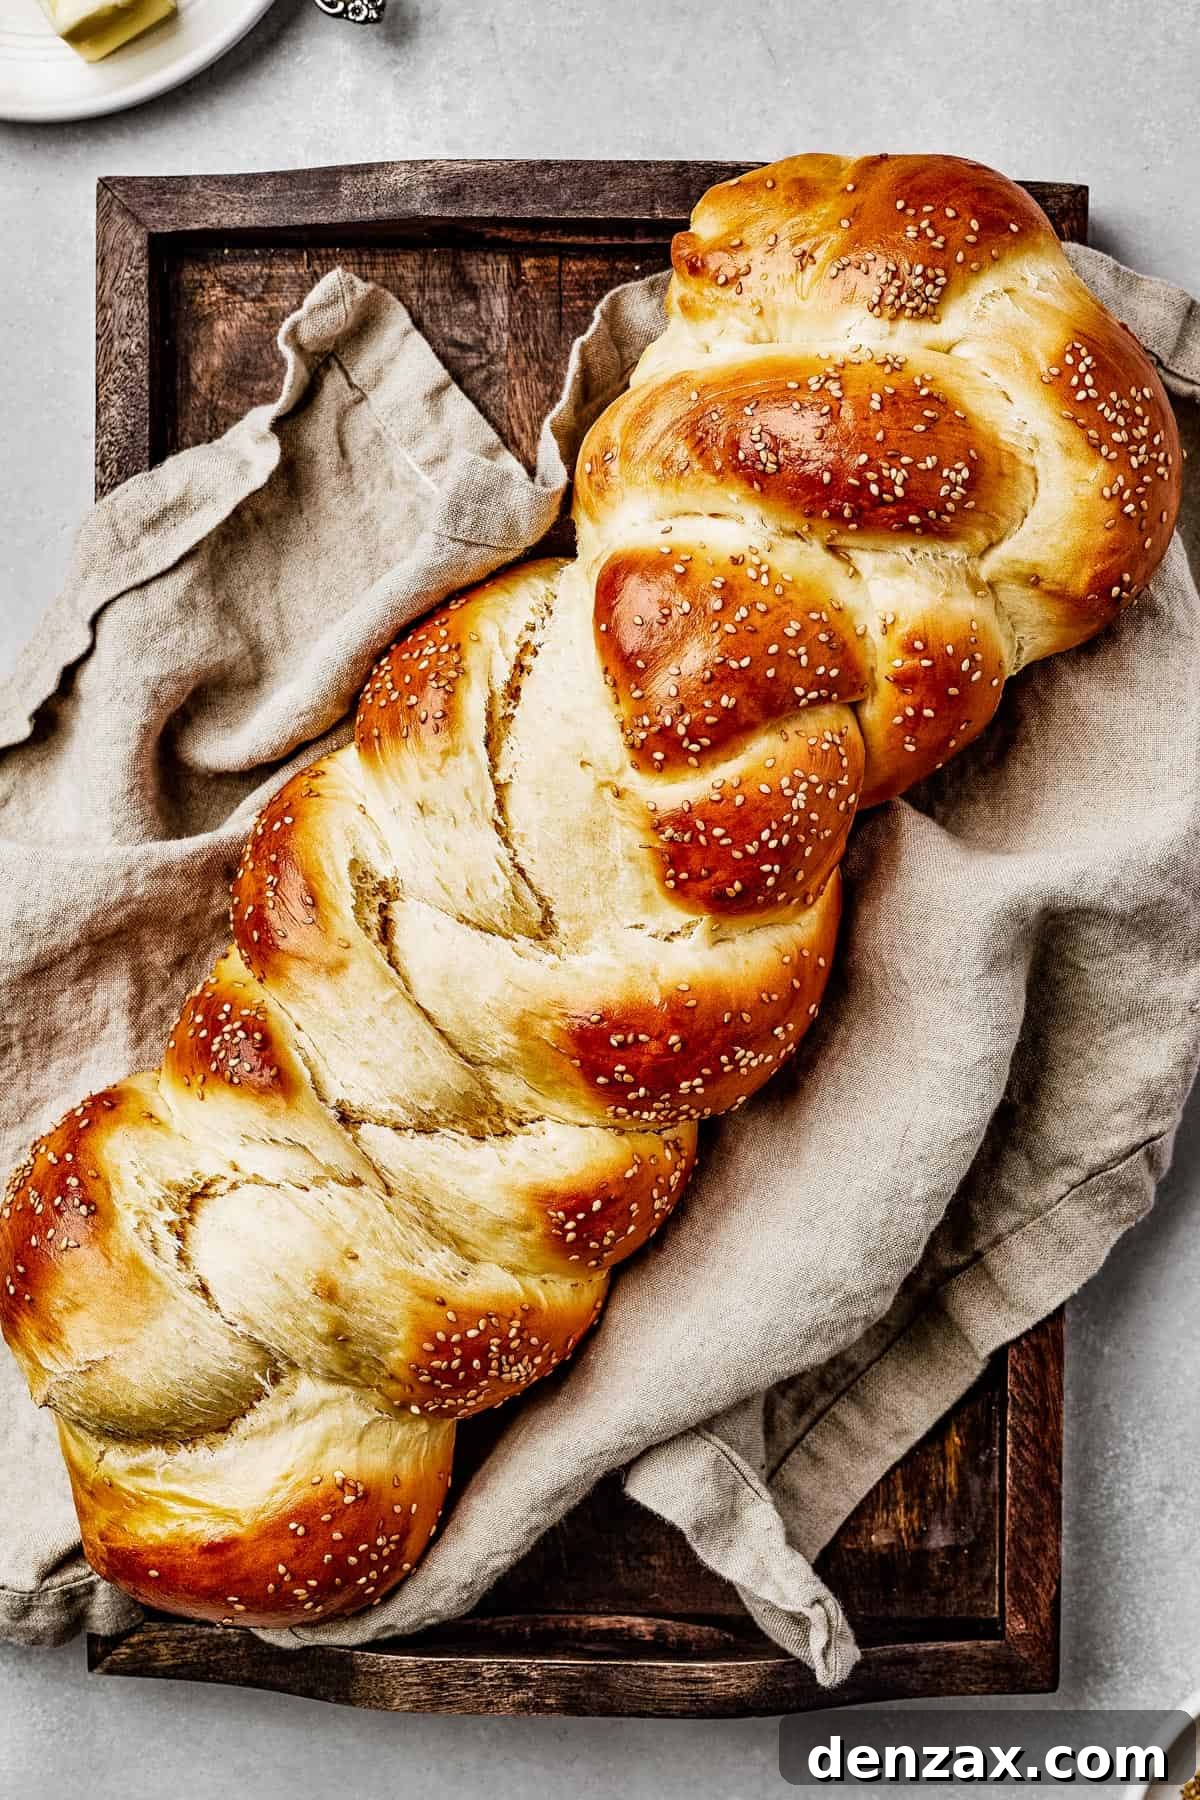
Discover the Magic of Easy Homemade Challah
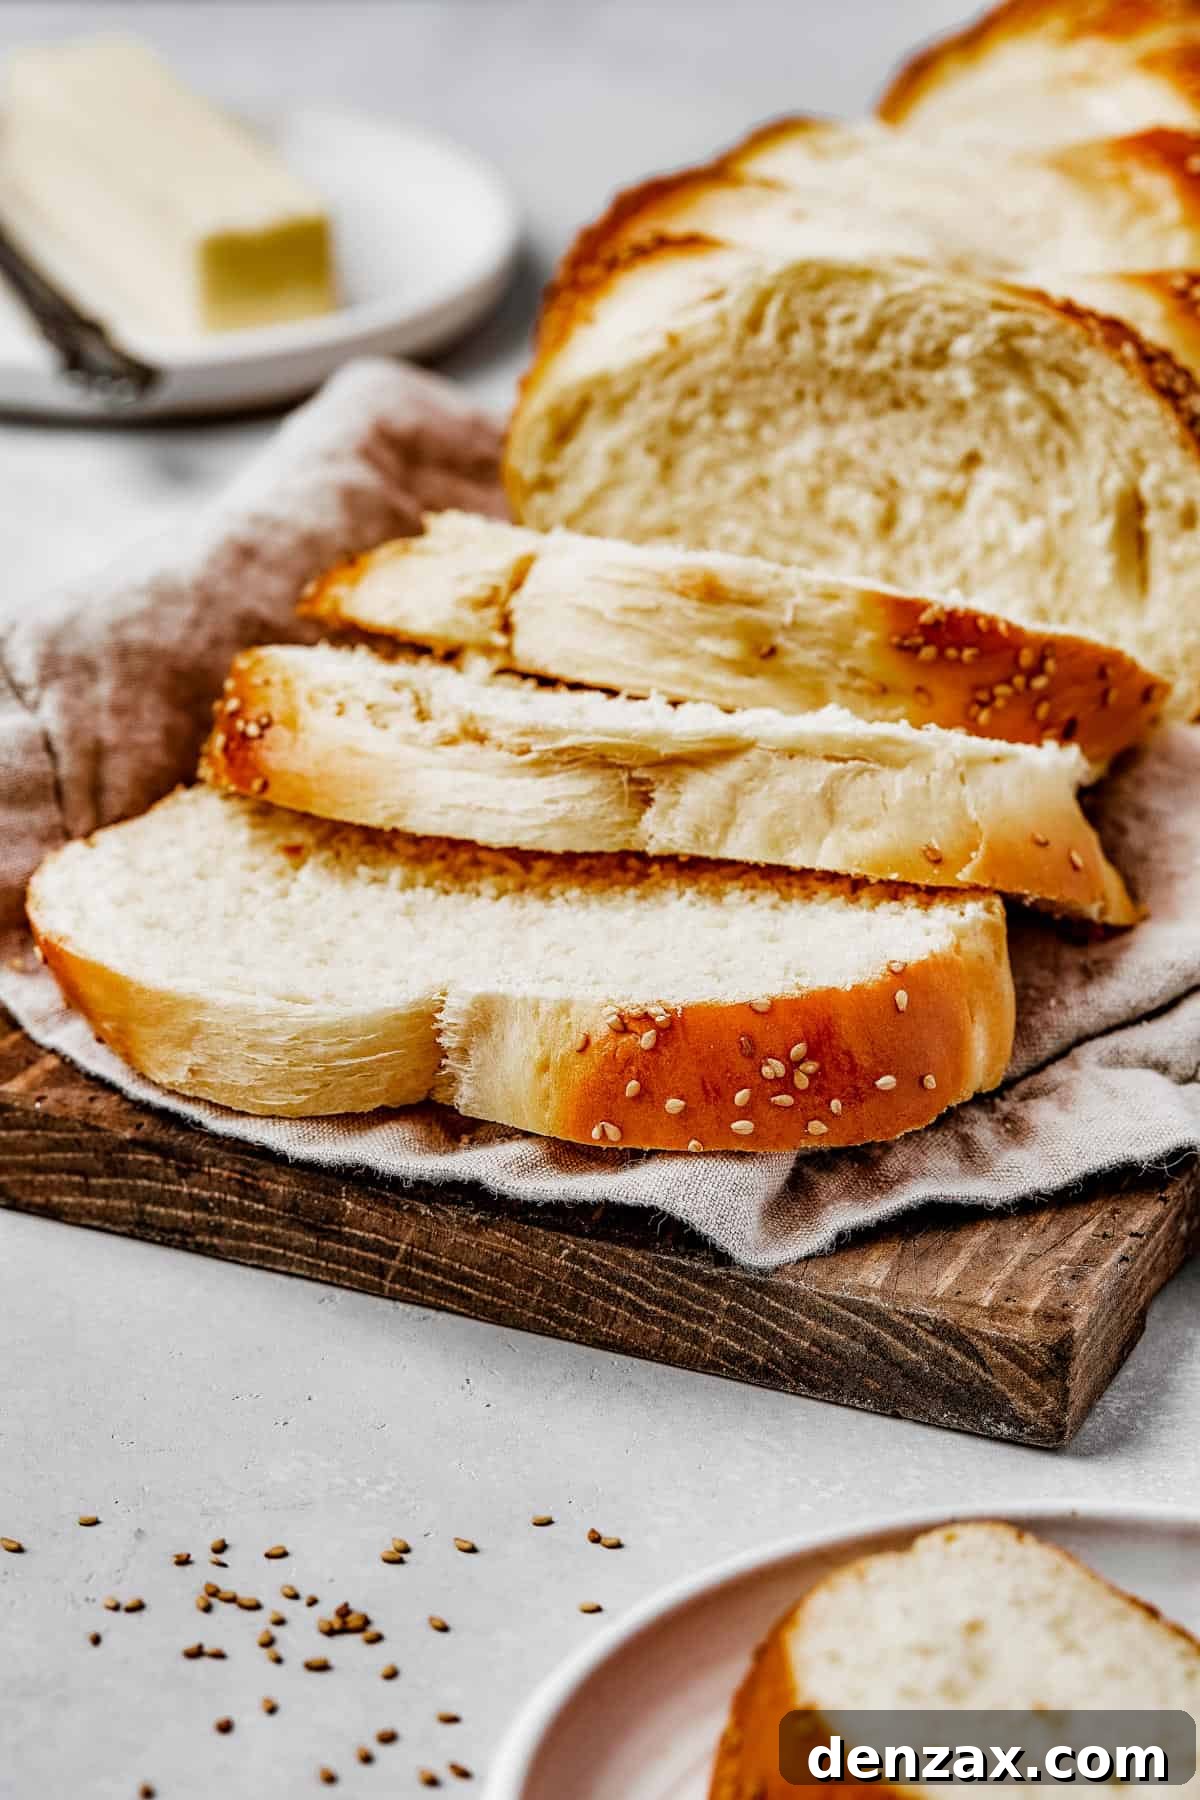
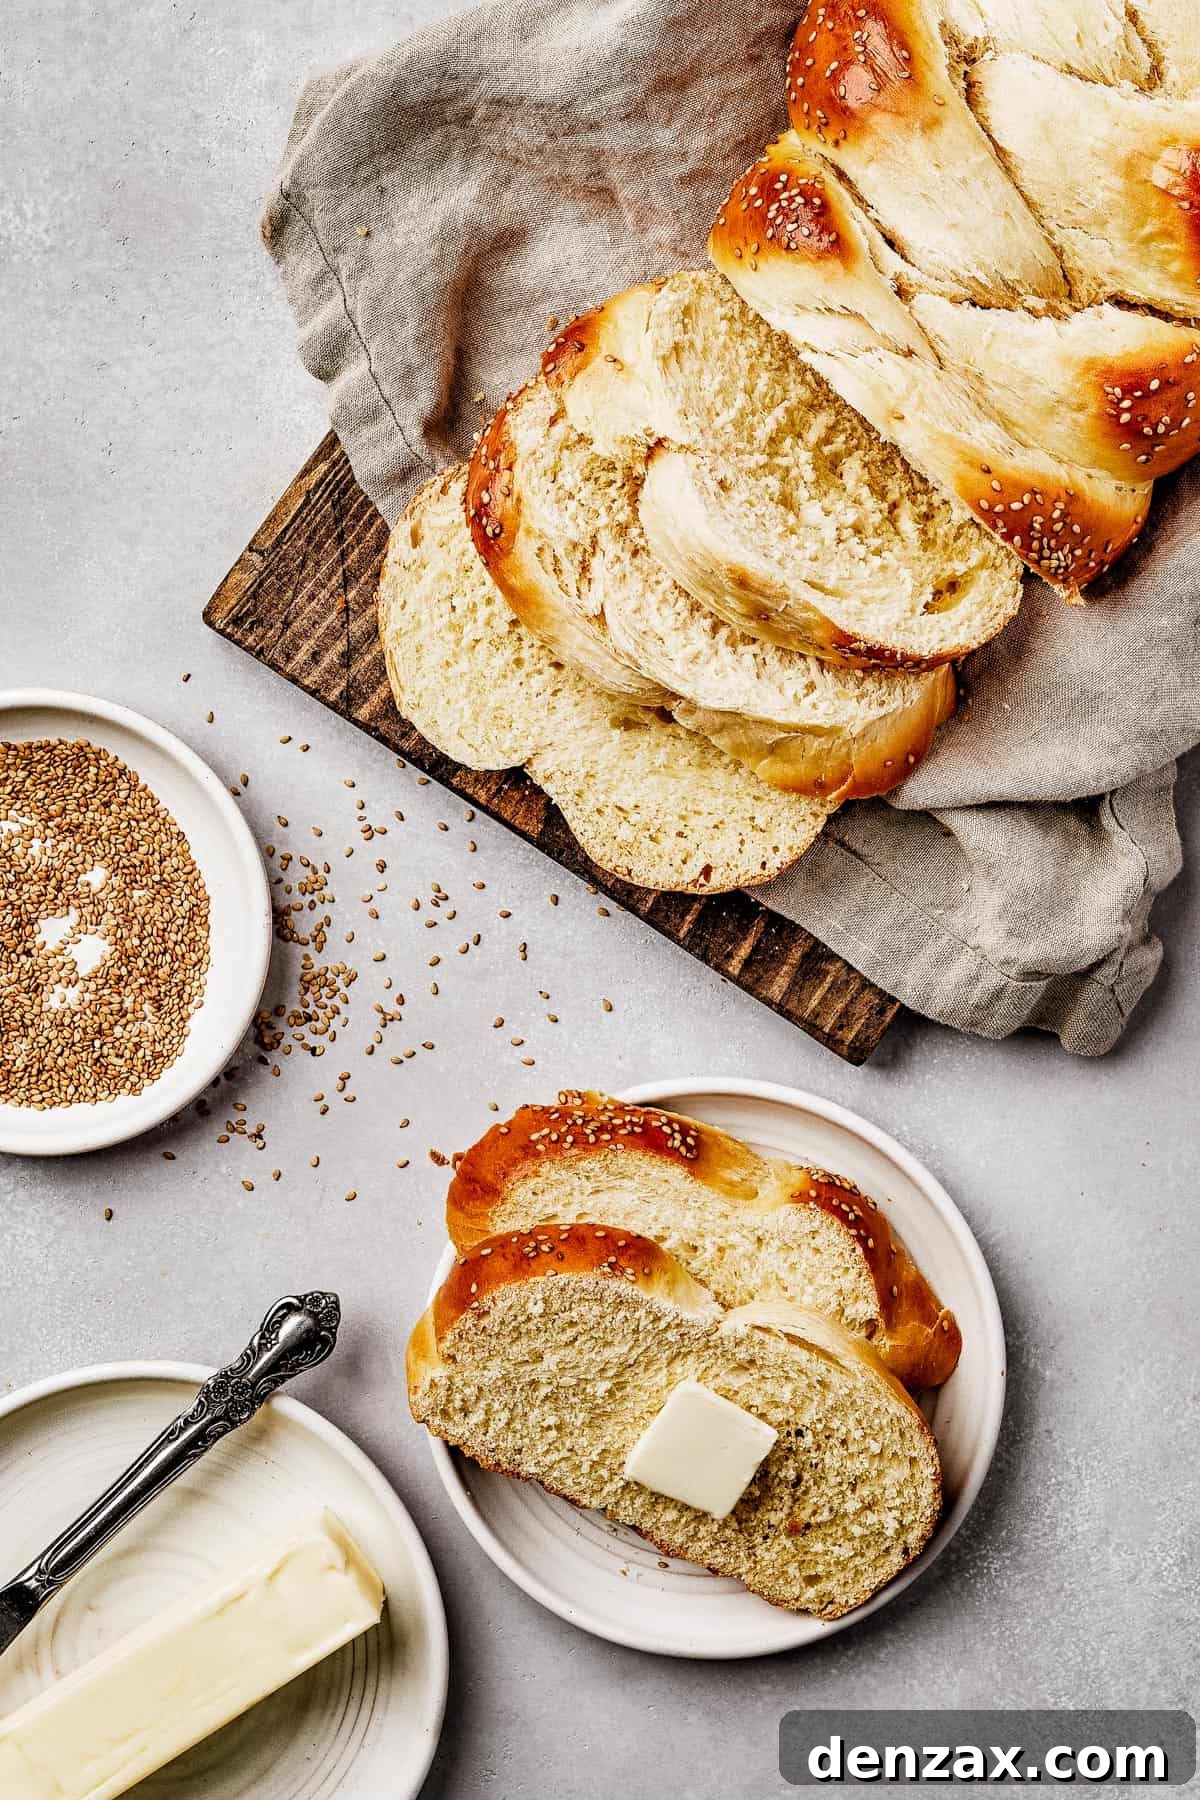
Challah bread is renowned for its signature braided appearance, ethereal fluffiness, and distinct rich flavor. If you’ve never tried making it, you’re in for a treat that will undoubtedly become a staple in your kitchen. From its cloud-like texture to its delicate sweetness, Challah is more than just bread – it’s an experience. Whether you’re slicing it for elegant sandwiches, transforming stale pieces into the most luxurious French toast, or simply tearing off warm, fluffy chunks for a snack, this bread is a special indulgence.
Its inherent softness and gentle sweetness make it versatile enough to be enjoyed as a light dessert. Drizzle it with honey, spread it with Nutella, or pair it with your favorite fruit jam for a truly comforting treat. The possibilities are endless, and the satisfaction is immense.
For those new to the world of bread baking, the idea of making Challah might seem daunting due to its intricate braid. However, this recipe is designed to be incredibly straightforward and approachable, even for beginners. You’ll be amazed at how easily you can create a stunning, springy loaf of golden bread in just a few hours, with much of that time dedicated to passive rising. This hands-off approach allows you to enjoy the process without feeling rushed or overwhelmed.
We promise, once you experience the aroma and taste of freshly baked homemade Challah, you’ll be eager to bake it again and again. It’s a culinary journey worth taking, leading to a truly rewarding result that will impress family and friends alike.
What Makes Challah Unique? An Enriched Dough Explained
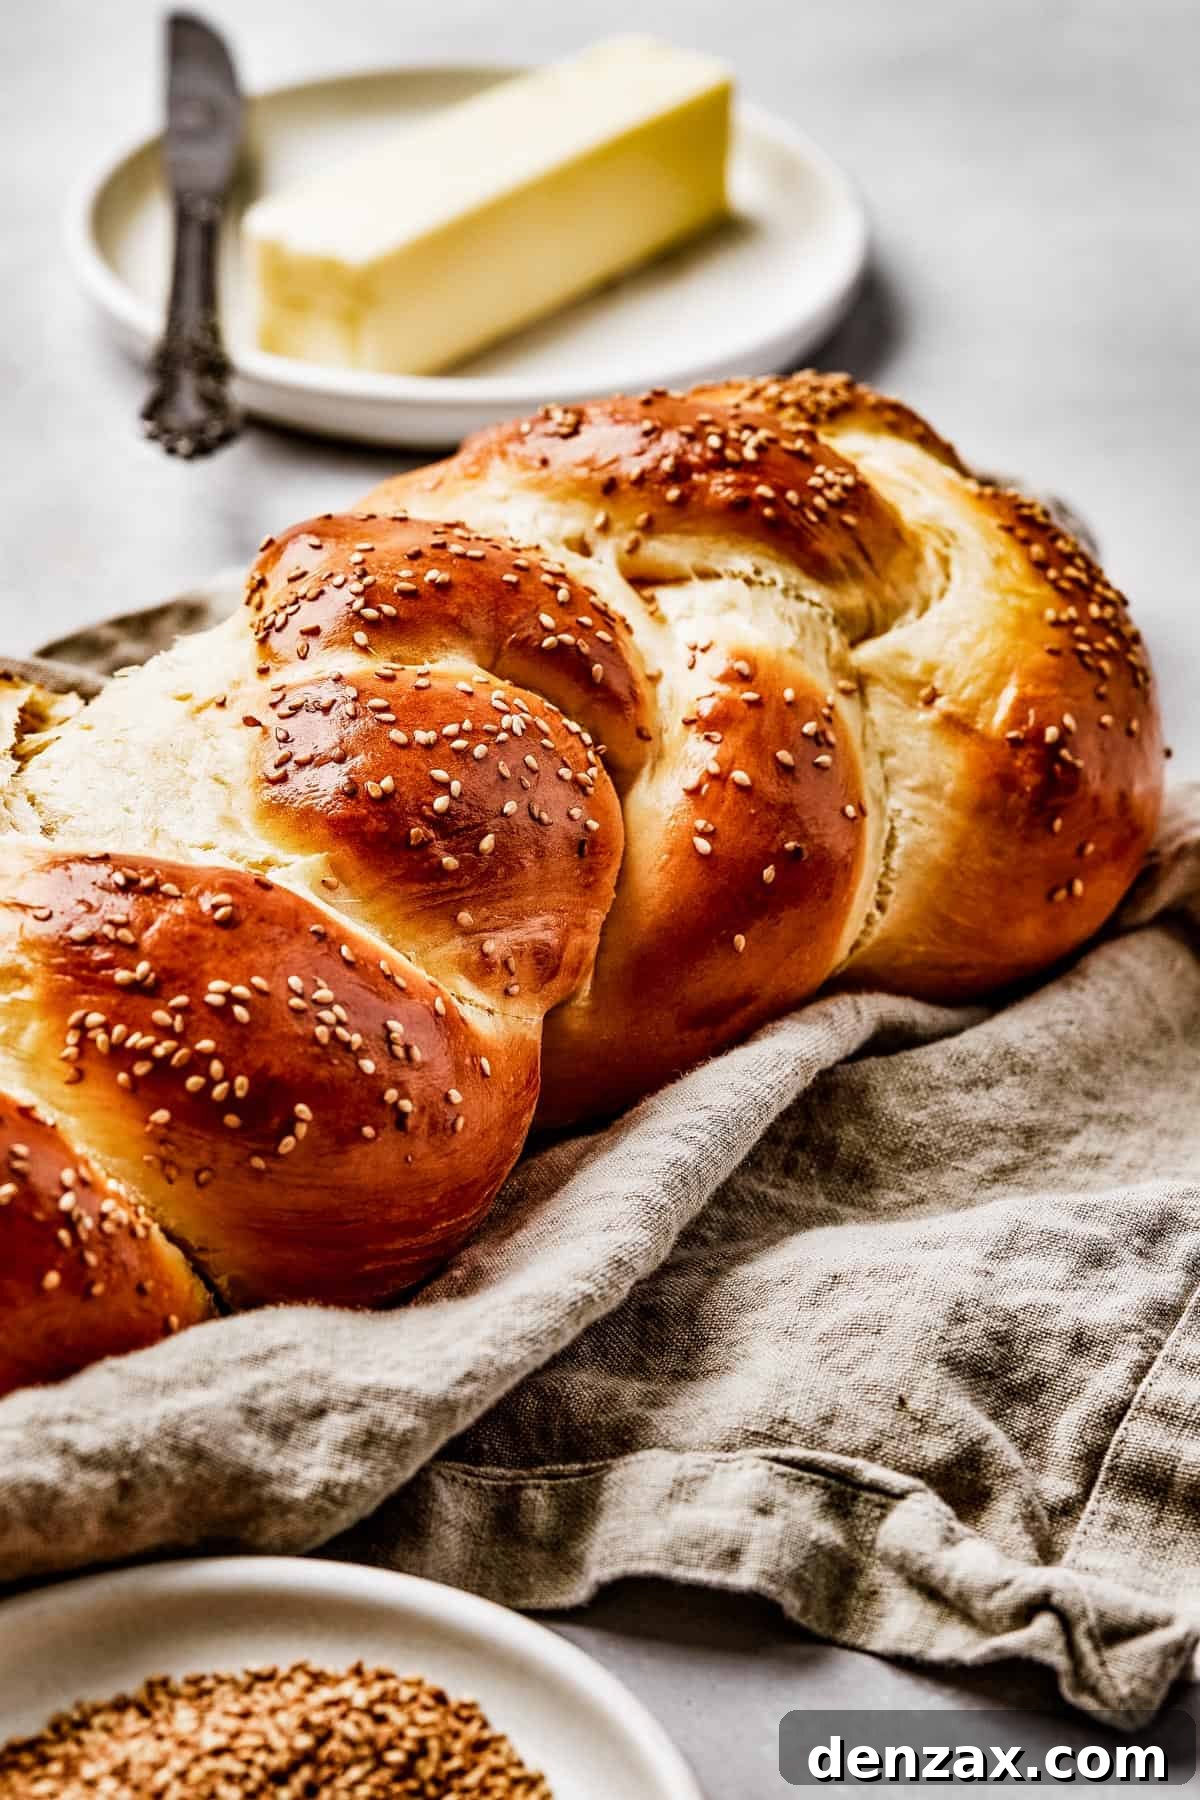
What sets Challah apart from other common white breads, such as a rustic baguette or everyday sandwich bread? The secret lies in its enriched dough. Unlike leaner doughs that rely primarily on flour, water, yeast, and salt, Challah incorporates both eggs and additional fat. This enrichment is the key to its distinctive smooth, luscious texture and significantly enhanced flavor profile. The eggs contribute to its beautiful golden hue, tender crumb, and overall richness, while the fat ensures a moist and soft result.
This characteristic places Challah in a similar category to brioche, another beloved enriched bread. However, there’s a crucial distinction: brioche is famously known for its generous butter content, which gives it a remarkably rich and flaky texture. Challah, on the other hand, traditionally uses oil as its primary fat source. This makes it a perfect choice for those seeking a rich, yeasted bread that remains delightfully fluffy and light, often aligning with dietary preferences that avoid dairy, such as keeping kosher (a buttery Challah would no longer be considered pareve, or neutral, in kosher cuisine). The neutral flavor of vegetable oil allows the subtle sweetness and eggy richness of the Challah to truly shine.
Beyond its unique dough, Challah is typically recognized by its elegant braided shape. While the traditional three-strand braid is most common, the dough is incredibly versatile and can be shaped in various beautiful ways. It also boasts a subtle sweetness, which can be adjusted to your preference. If you choose to reduce the sugar, be mindful that sugar also plays a role in activating the yeast and aiding the bread’s rise, so proceed with caution to maintain the desired airy texture.
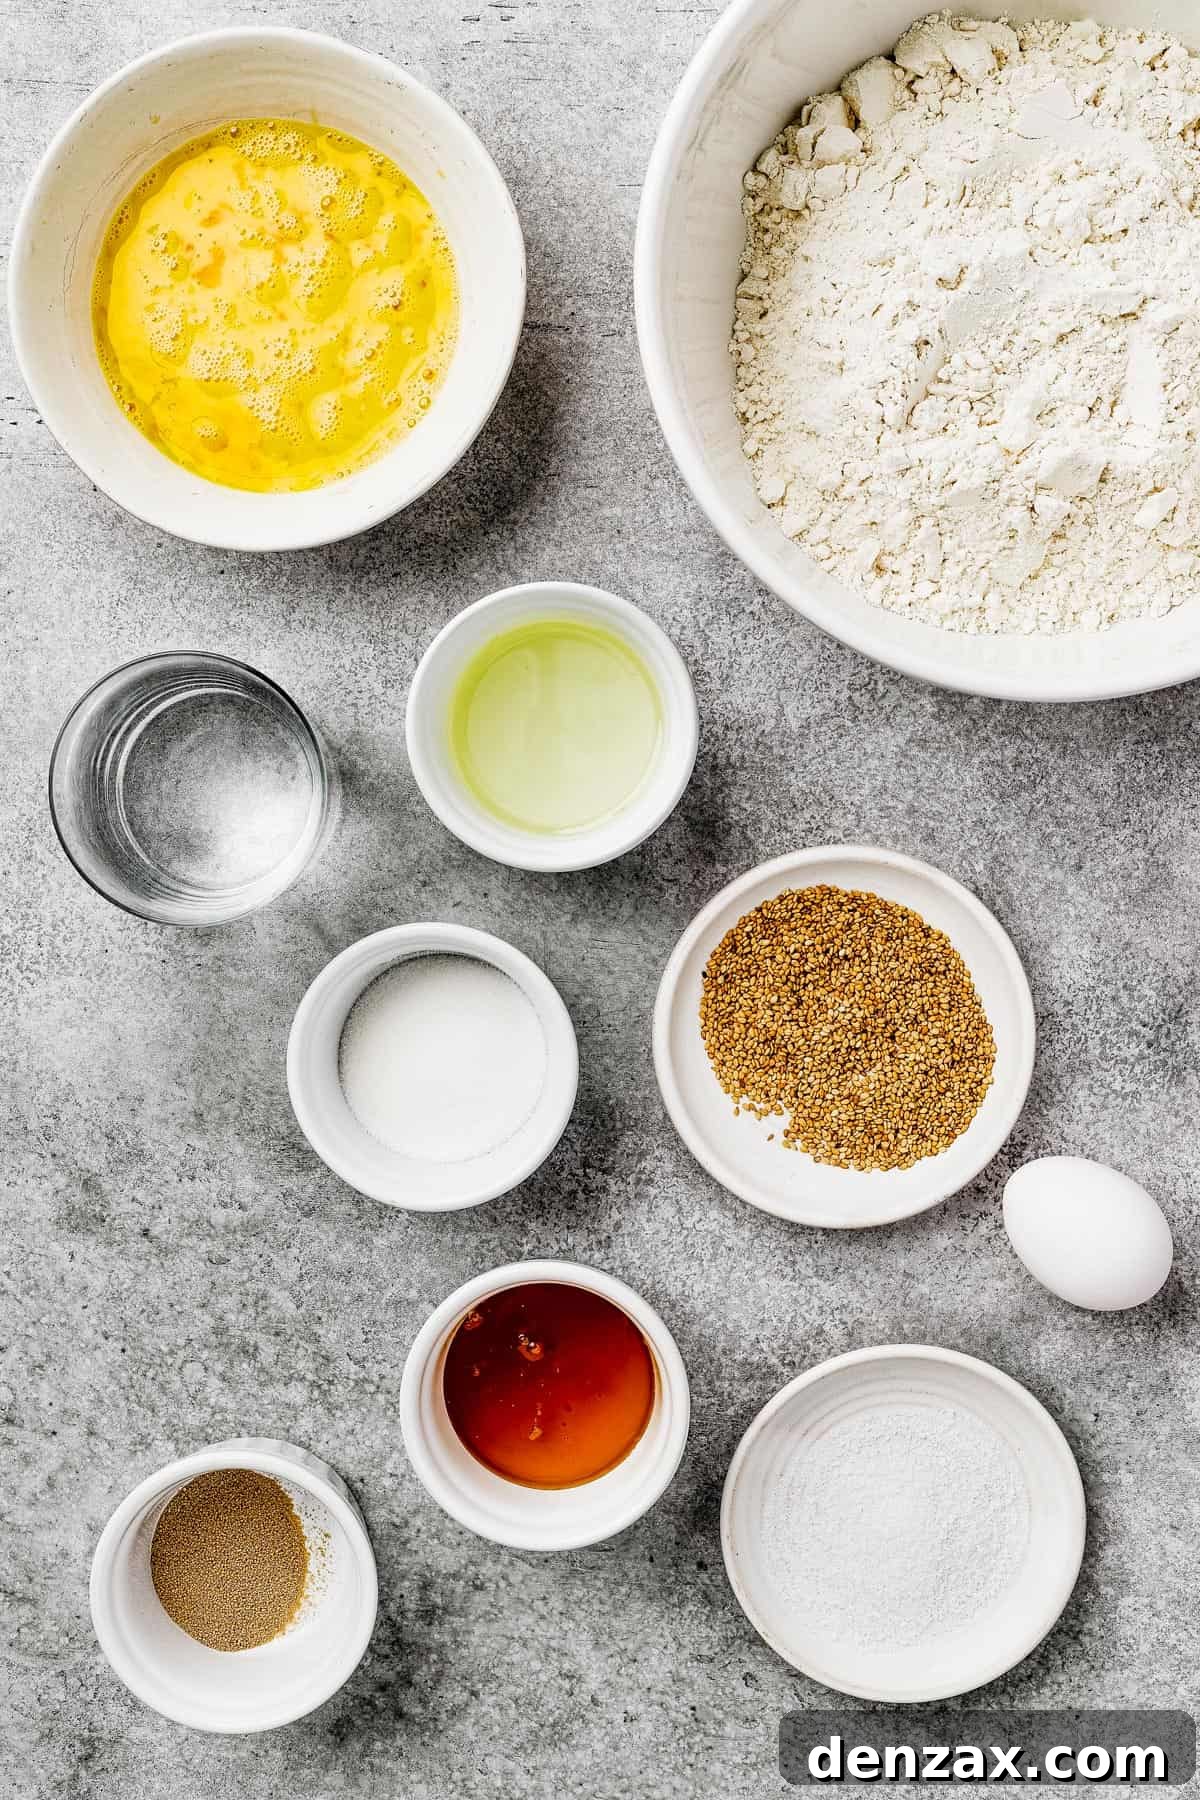
Essential Ingredients for Your Golden Challah Loaf
Crafting this scrumptious Challah bread is remarkably simple, and you likely have most of the necessary ingredients in your pantry. Here’s a detailed look at what you’ll need to create your magnificent loaf:
For the Challah Dough
- Active Dry Yeast: One packet (typically 2 ¼ teaspoons) of active dry yeast is perfect for this recipe. Ensure your yeast is fresh and active for the best rise.
- Warm Water: The water temperature is crucial for yeast activation. Aim for approximately body temperature, around 105-115°F (40-46°C). Water that’s too hot will kill the yeast, preventing the dough from rising, while cold water won’t activate it effectively.
- Granulated Sugar: Sugar serves multiple purposes in Challah. It not only provides that signature subtle sweetness but also acts as “food” for the yeast, aiding in its fermentation process and ensuring a robust rise.
- Honey: Adding a touch of honey alongside sugar enhances the bread’s sunny richness and adds another layer of delicate sweetness, contributing to its appealing golden crust.
- Eggs: Three whole eggs are essential for Challah’s enriched dough. Using room temperature eggs is highly recommended as they integrate more smoothly into the dough and don’t significantly cool down the yeast, allowing for a more consistent and efficient rise.
- Vegetable Oil: In contrast to many butter-based breads, Challah traditionally uses oil. Vegetable oil offers a neutral flavor that allows the other ingredients to shine. You can also opt for a light olive oil for a slightly different nuance, or even melted butter if you don’t need to keep the bread pareve.
- All-Purpose Flour: Standard all-purpose flour works beautifully for this recipe, yielding a tender crumb. If you choose to use bread flour, which has a higher protein content, you might need to add a tiny bit more liquid during kneading to achieve the desired smooth, elastic dough texture.
- Salt: A teaspoon of salt is vital for balancing the flavors and controlling the yeast’s activity, preventing the dough from over-proofing too quickly.
For the Perfect Golden Topping
- Egg: One additional whole egg, whisked in a small bowl, creates the perfect egg wash. Brushing this over your braided loaf before baking gives Challah its characteristic glossy, deep golden-brown crust.
- Sesame Seeds: A generous sprinkling of sesame seeds is an iconic, flavorful, and aesthetically pleasing optional topping. They add a delightful nutty crunch and aroma to the finished bread. Other options include poppy seeds, flaky sea salt, or a sprinkle of cinnamon sugar for a sweeter loaf.
Master the Art of Challah Baking: Step-by-Step Guide
Now that you have all your ingredients ready, it’s time to embark on the rewarding journey of making your own Challah loaf! If you have some experience with bread baking, you’ll find this process quite manageable. If you’re a novice, don’t worry – it’s still very accessible. To ensure success, we highly recommend reading through all the instructions a couple of times to familiarize yourself with each step before you begin mixing.
- Activate Your Yeast & Prepare the Dough: In a small bowl, combine the warm water, sugar, and honey, then sprinkle the active dry yeast over the top. Gently stir and let this mixture sit for 5-10 minutes. You should see a frothy layer form on the surface, indicating the yeast is active and ready. While the yeast is blooming, in a stand mixer fitted with a whisk attachment, lightly beat the three room-temperature eggs and vegetable oil on low speed until they are just combined. Remove the whisk attachment and switch to a dough hook attachment. Pour the activated yeast mixture into the mixer bowl, followed by the flour and salt. Mix all the ingredients together on medium speed for about 7-10 minutes. Continue mixing until the dough becomes smooth, elastic, and pulls away cleanly from the sides of the bowl without being sticky. If the dough appears too wet, add more flour one tablespoon at a time until the desired consistency is achieved. Alternatively, you can mix the dough in a large bowl and then knead it by hand on a lightly floured surface for 5 to 10 minutes until it’s perfectly smooth and elastic.
- The First Rise: Patience is a Virtue: Once your dough is beautifully smooth and elastic, lightly grease a large mixing bowl with a touch of oil. Gather the dough from the mixer (or your hands) and gently shape it into a large, round ball. Place the dough into the greased bowl, turning it over a couple of times to ensure it’s evenly coated in a thin layer of oil – this prevents it from drying out and sticking. Cover the bowl tightly with a damp kitchen towel or plastic wrap. Place the covered bowl in a warm, draft-free place for its first rise. Let it rise for 1 to 2 hours, or until the dough has impressively doubled in size. A warm environment is crucial for optimal rising.
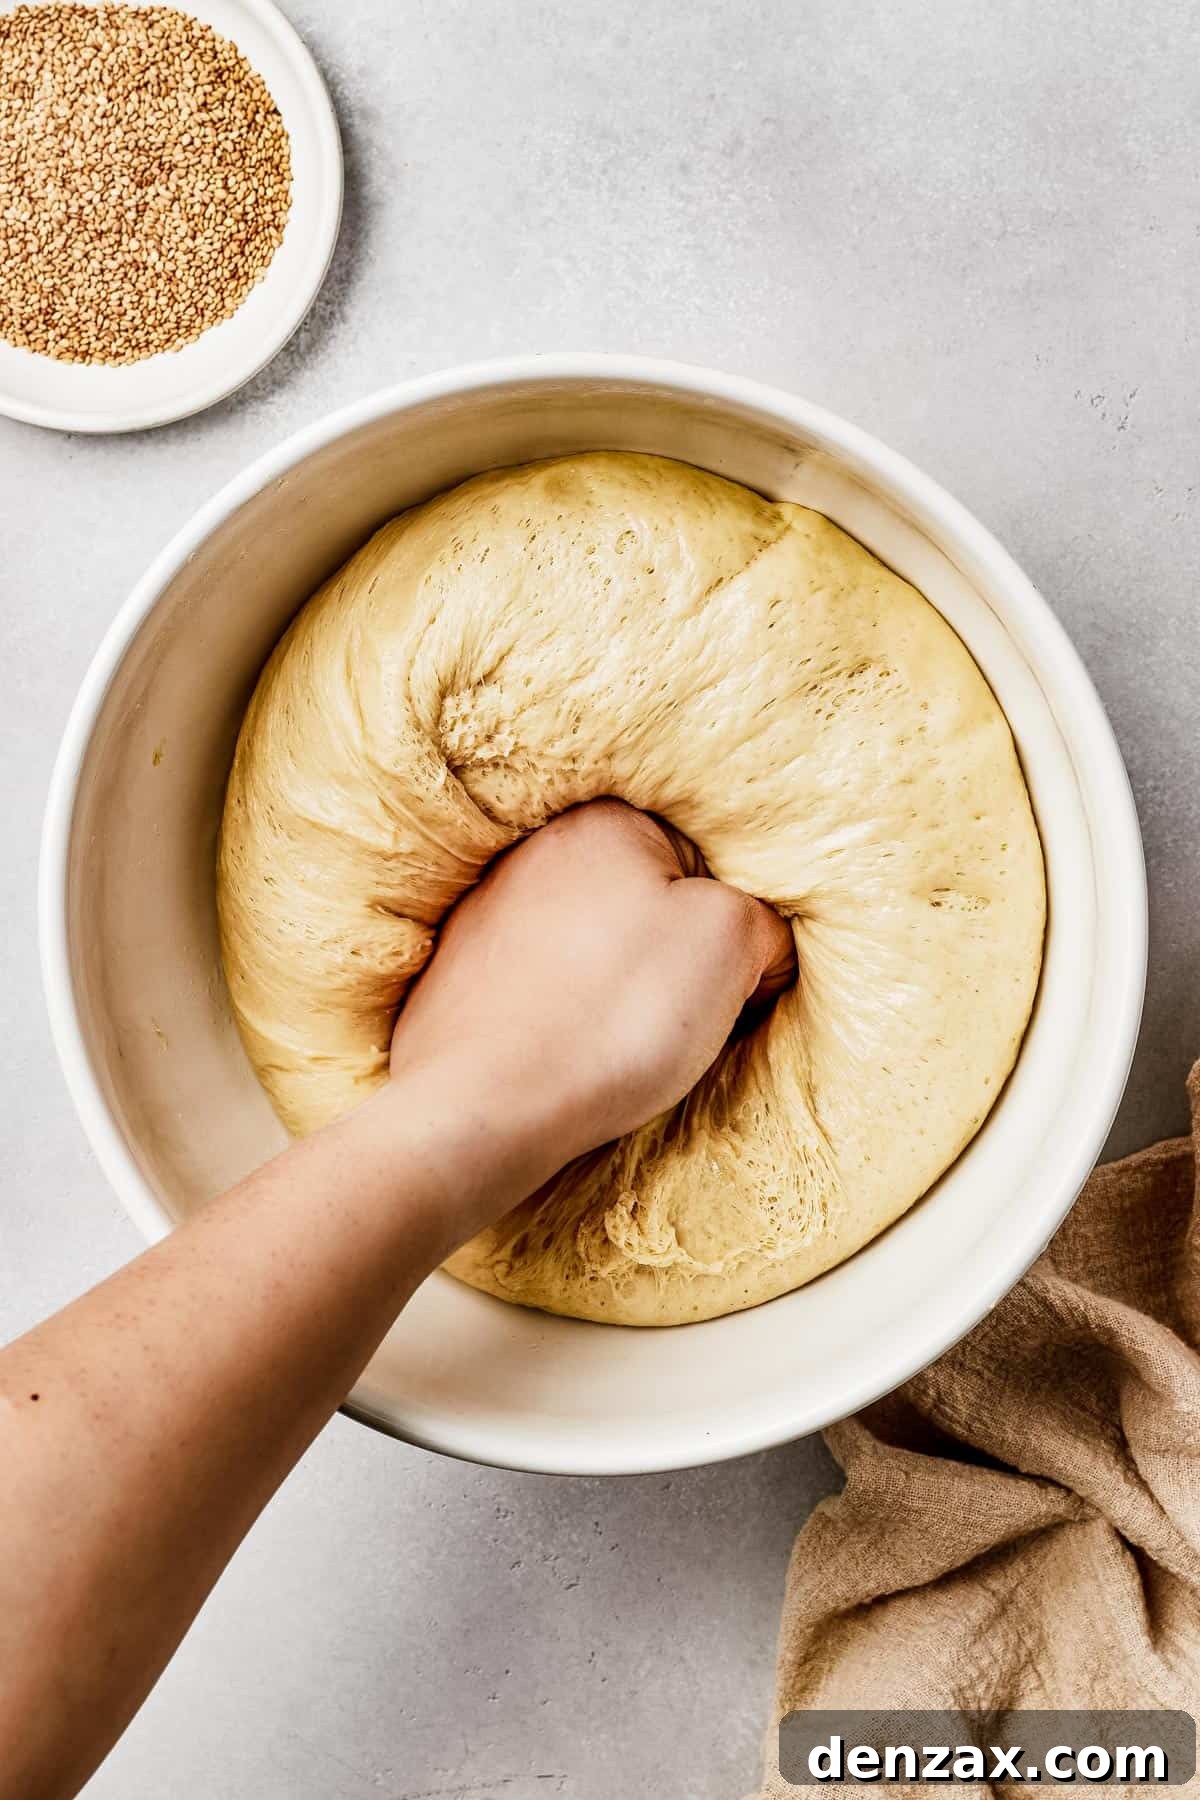
- Gentle Kneading for a Smooth Texture: When the dough has successfully completed its first rise and doubled in volume, it’s time to gently deflate it. Lightly punch down the center of the risen dough to release the air. Turn the dough out onto a lightly floured clean surface. Knead the dough again for about 3 to 5 minutes. This brief kneading helps to redistribute the yeast and creates an even finer texture in the final loaf. Add just a minimal amount of extra flour if needed to prevent sticking, being careful not to incorporate too much, as this can make your Challah dry and dense.
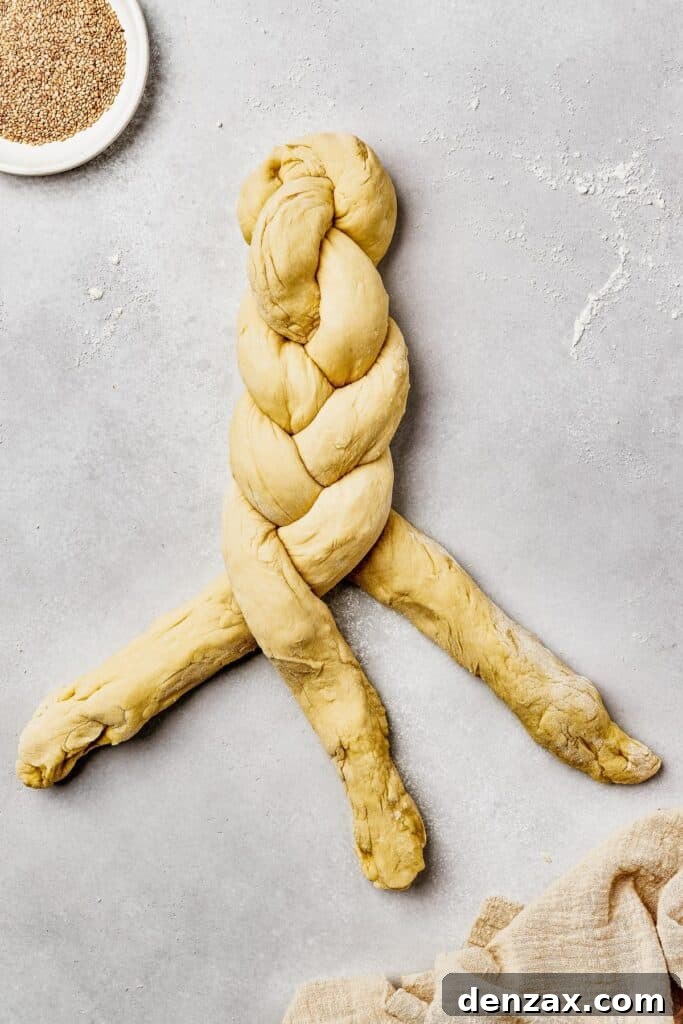
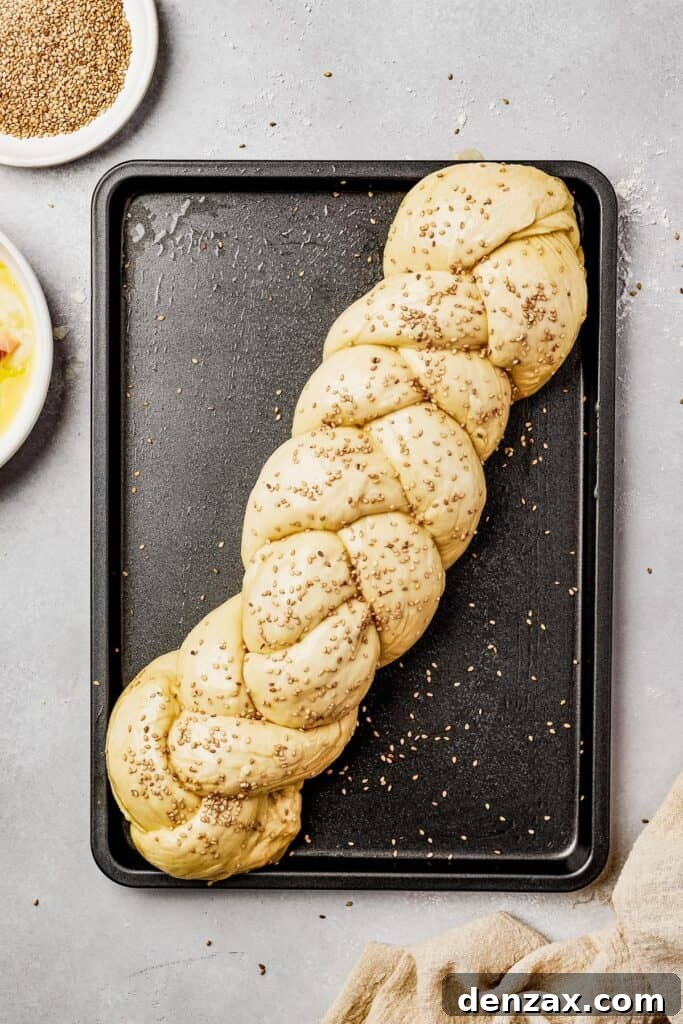
- The Iconic Challah Braid: Simple & Elegant: Divide the kneaded dough into three equal pieces. On your lightly floured surface, roll each piece of dough into a long, uniform “snake” shape, aiming for about 1 to 2 inches in diameter and roughly 16-18 inches in length. Arrange the three long strands of dough parallel to each other. Pinch the top ends of the three strands firmly together to join them securely. Now, begin to braid the pieces, alternating the outer strands over the middle one, all the way down to the bottom. Once you reach the end, pinch the three bottom ends together to seal the braid and form a cohesive loaf. You can gently tuck the pinched ends underneath for a cleaner look.
- The Second Rise: Developing Airiness: Lightly grease a baking sheet with a small amount of oil or line it with parchment paper. Carefully transfer your beautifully braided Challah loaf onto the prepared baking sheet. Cover the loaf loosely with a damp tea towel or kitchen towel. Allow it to rise again in a warm, draft-free place for its second proofing, which usually takes about 30 minutes to 1 hour. During this stage, the loaf will puff up noticeably, becoming even more airy and light.
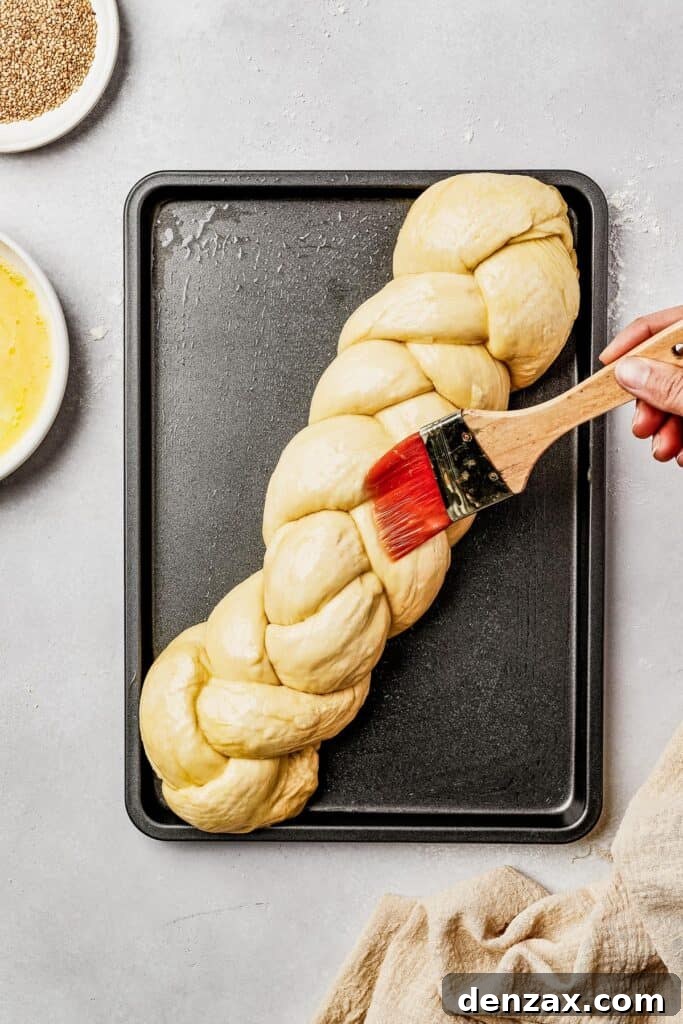
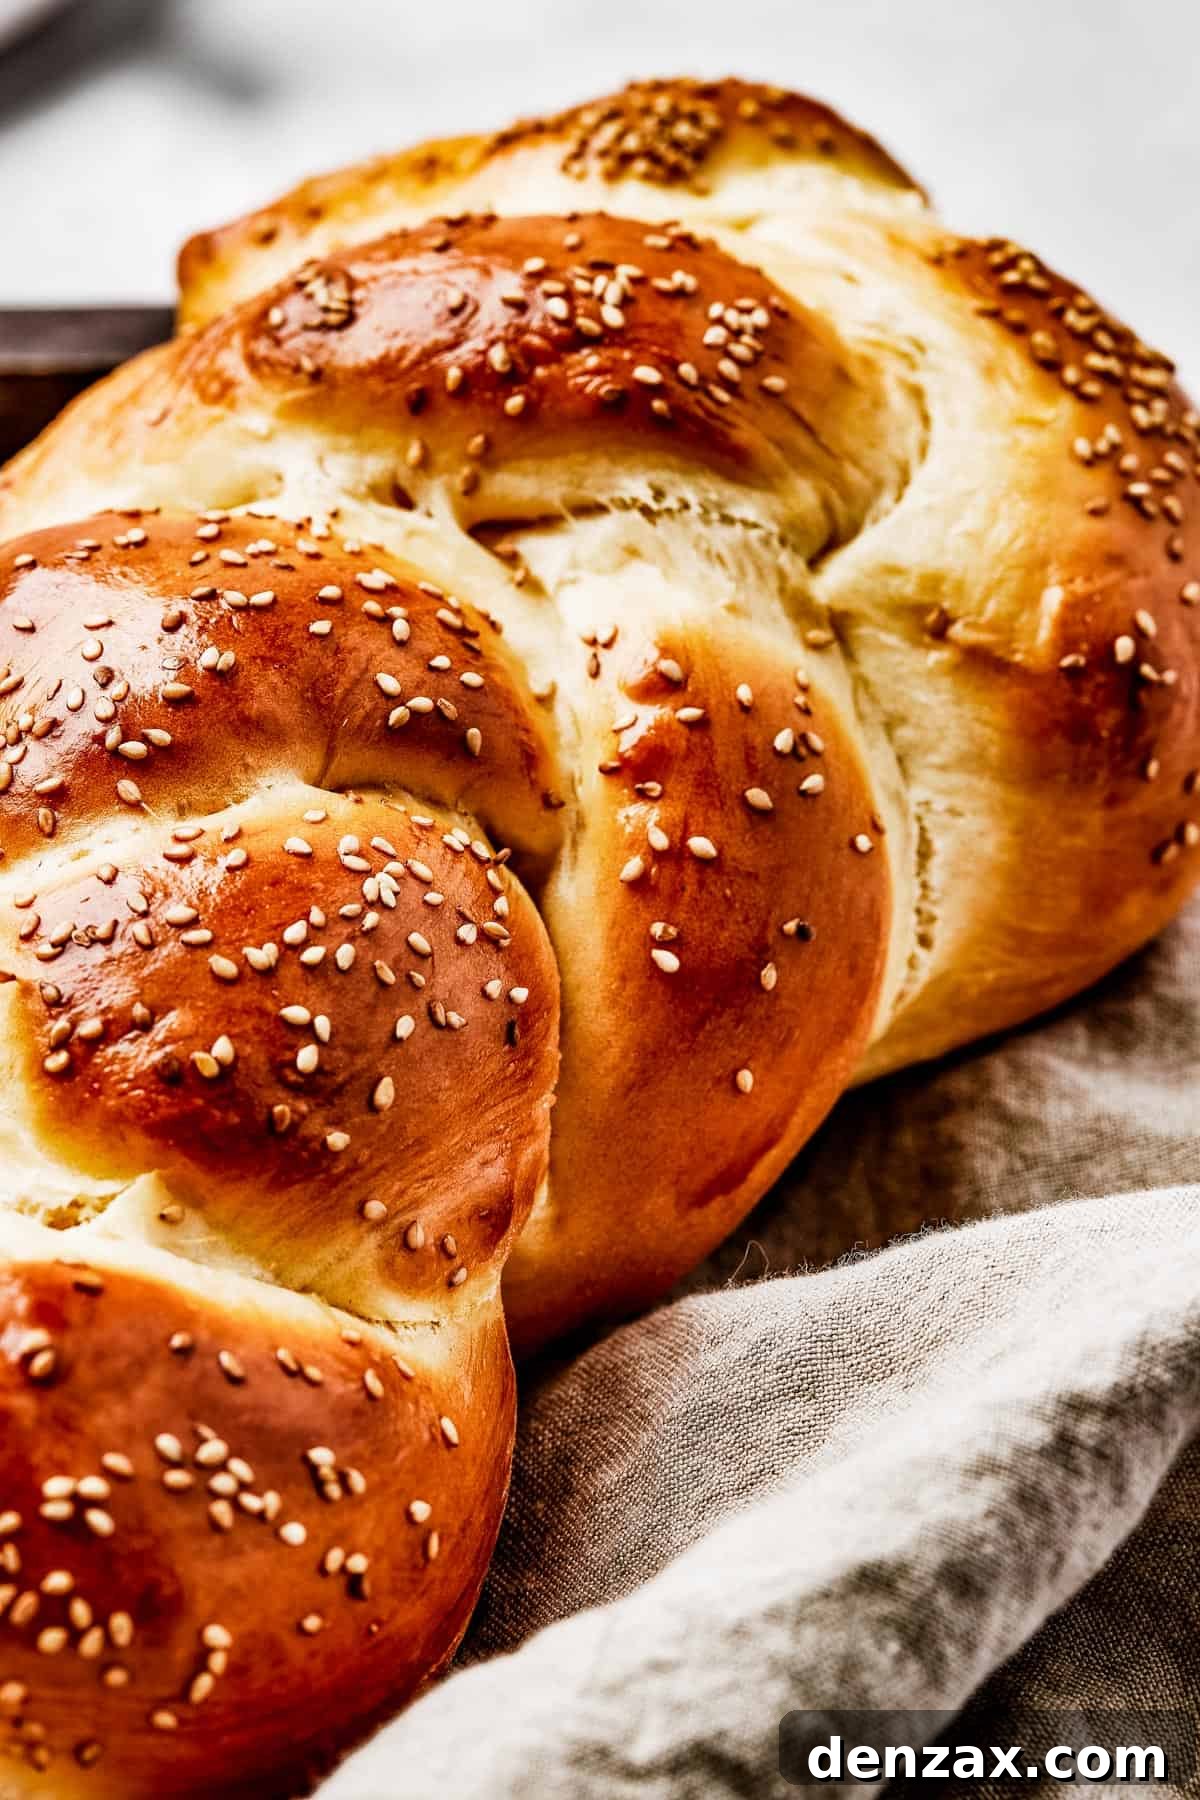
- Baking to Golden Perfection: About 15 minutes before the second rise is complete, preheat your oven to 350°F (175°C). In a small bowl, whisk the remaining whole egg to create your egg wash. Once the Challah has completed its second rise, gently brush the beaten egg evenly over the entire surface of the loaf, ensuring a beautiful golden finish. If desired, generously sprinkle your preferred toppings, such as sesame seeds, over the egg-washed loaf. Place the baking sheet with the Challah in the preheated oven and bake for 35 to 40 minutes. The Challah is done when it has a deep golden-brown crust and, when gently tapped on the bottom, sounds hollow. If it doesn’t sound hollow, indicating too much moisture inside, continue baking in short 2 to 4 minute increments until it does. Once baked, transfer the Challah to a wire rack and let it cool completely before slicing and serving. Cooling properly ensures a superior texture and prevents the interior from becoming gummy.
Expert Tips for Flawless Challah Every Time
Baking is often described as a science, and understanding a few key principles can significantly impact your results. Here are some invaluable pointers to help you achieve perfect Challah bread consistently:
- Check Your Yeast’s Vitality: Before you mix all your ingredients, always ensure your yeast is active. If, after 5 to 10 minutes of mixing with warm water, sugar, and honey, the mixture does not develop a frothy, foamy layer on top, your yeast may be expired or inactive. In this case, it’s best to discard it and start with a fresh packet of yeast to avoid a flat loaf.
- Master the Kneading Poke Test: Knowing when your dough is perfectly kneaded is key. To perform the “poke test,” gently press your finger into the dough. If the indentation springs back slowly and almost completely, and the dough doesn’t stick to your finger, it’s ready. If the indentation remains deeply or the dough feels sticky, continue kneading for a few more minutes until it passes the test. Proper kneading develops the gluten, giving Challah its characteristic chewiness and structure.
- Create an Ideal Warm Rising Environment: Yeast thrives in warmth. For maximum rising, ensure your dough is proofing in a warm, draft-free spot. If your kitchen is cool, you can easily create a makeshift proofing environment: place the covered dough in a turned-off oven along with a bowl or small pan of boiling water. The residual warmth and steam from the hot water will create a wonderfully humid and warm microclimate, encouraging the dough to rise beautifully.
- Determine Sufficient Rising with a Gentle Poke: For both the first and second rises, you can test if the dough has risen enough by gently poking it with a floured finger. If the indentation remains, the dough has reached its peak rise. If the indentation slowly fills back in, the dough needs a bit more time to proof.
- Achieve Perfect Doneness with the “Hollow Sound” Test: To confirm your Challah is fully baked, carefully remove it from the oven (wearing oven mitts!) and tap the bottom of the loaf. A fully baked loaf will produce a distinct hollow sound. If it sounds dense or thud-like, it indicates that there’s still too much moisture inside and not enough airy structure. Return it to the oven for additional baking in short increments of 2 to 4 minutes until it passes the hollow sound test.
- Accurate Flour Measurement: While often overlooked, measuring flour correctly is crucial. Use the “spoon and level” method: spoon flour into your measuring cup until it overflows, then level off the top with a straight edge (like a knife). Scooping directly with the measuring cup can compact the flour, leading to too much flour and a dry, dense loaf.
- Room Temperature Ingredients: Beyond eggs, ensuring all cold ingredients (like water, if not explicitly warmed) are at room temperature helps the dough come together more smoothly and supports consistent yeast activity.
Creative Variations to Personalize Your Challah
While the classic fluffy Challah with sesame seeds is undeniably delicious, this versatile dough provides an excellent canvas for countless creative variations. Don’t hesitate to experiment and make this recipe truly your own! Here are some exciting ideas to get you started:
- Delightful Mix-Ins: After the first rise, once you’ve punched down the dough and are ready to shape it, you can fold in a variety of scrumptious additions. For a sweet twist, try incorporating golden raisins, dried cranberries, or chocolate chunks (dark or milk chocolate works beautifully). For a savory surprise, consider adding finely chopped caramelized onions, sun-dried tomatoes, or a blend of your favorite herbs and cheeses.
- Explore Different Shapes: The three-strand braid is iconic, but the dough can be shaped in many captivating ways.
- Small Rolls: Divide the dough into smaller portions and shape them into individual round rolls. These will bake much faster and are perfect for dinner parties or individual servings.
- Four or Five-Strand Braid: For a more intricate and impressive presentation, challenge yourself with a four or five-strand braid. These create a denser, wider loaf with a beautiful, complex pattern.
- Round Braided Loaf (Challah Kugel): For holidays or a special centerpiece, form the braided strands into a spiral or circular shape. This creates a stunning round loaf that’s often seen during Rosh Hashanah.
- Plain Sandwich Loaf: For everyday convenience, simply shape the dough into a traditional loaf and bake it in a loaf pan. It will still have all the wonderful flavor and texture but in a more conventional form.
- Flavor Infusions: Beyond mix-ins, you can infuse your Challah with diverse flavor profiles.
- Sweet & Spicy: Sprinkle cinnamon sugar onto the dough before braiding, or add a hint of cardamom for an aromatic loaf perfect with coffee.
- Savory & Herby: Introduce garlic powder and freshly chopped chives into the dough for a fragrant, savory bread that pairs wonderfully with meals. Rosemary and cracked black pepper, or even a touch of everything bagel seasoning, are also excellent choices for a more robust flavor.
- Citrus Zest: A little lemon or orange zest can brighten the flavor of a sweet Challah, adding a refreshing note.
Storing and Enjoying Your Challah Leftovers
To preserve the incredible freshness and soft texture of your homemade Challah, proper storage is key:
- For immediate enjoyment, keep your leftover Challah loaf at room temperature. Ensure it is stored in an airtight container or a tightly sealed plastic bag. This will prevent it from drying out and help maintain its softness for up to a week. However, for the best quality, it’s recommended to consume it within 3-4 days.
- To revive day-old Challah, you can lightly toast slices, or gently warm the entire loaf in a preheated oven at 300°F (150°C) for about 5-10 minutes until warmed through and slightly crisp on the outside.
Can You Freeze Challah Bread? Absolutely!
Challah freezes exceptionally well, allowing you to enjoy homemade goodness whenever a craving strikes or for meal prepping:
- To freeze your freshly baked Challah loaf, first ensure it has cooled completely to room temperature. Then, wrap the entire loaf tightly in several layers of plastic wrap, making sure no air pockets remain. Follow this by wrapping it in aluminum foil or placing it in a heavy-duty freezer bag, pressing out as much air as possible before sealing. Properly stored, Challah can be kept in the freezer for up to three months without compromising its quality.
- When you’re ready to enjoy your frozen Challah, simply thaw it at room temperature, still wrapped, for several hours or overnight. For a “fresh from the oven” taste and texture, you can then warm the thawed loaf in a 350°F (175°C) oven for 10-15 minutes.
The Best Homemade Challah Bread
You’ll absolutely love this Homemade Challah Bread recipe! It yields a soft, rich, and slightly sweet braided loaf, golden-brown and light as air, perfect for any occasion.
Prep Time: 2 hours (includes rising time)
Cook Time: 35-40 minutes
Total Time: 2 hours 45 minutes – 3 hours
Servings: 12 Slices
Ingredients
For the Challah Dough
- 2 ¼ teaspoons active dry yeast (one packet)
- 1 cup warm water (105-115°F / 40-46°C)
- ¼ cup granulated sugar
- 3 tablespoons honey
- 3 whole eggs, room temperature
- ¼ cup vegetable oil (or light olive oil)
- 5 cups all-purpose flour (or bread flour)
- 1 teaspoon salt
For Topping
- 1 whole egg, room temperature (for egg wash)
- 1-2 tablespoons sesame seeds, optional
Instructions
- In a small bowl, combine the yeast, warm water, sugar, and honey. Stir gently and let sit for 5-10 minutes until a frothy layer forms on top, indicating activated yeast.
- In a stand mixer fitted with a whisk attachment, mix the three room-temperature eggs and vegetable oil on low speed until just combined.
- Switch to a dough hook attachment. Pour the activated yeast mixture into the mixer bowl, then add the flour and salt. Mix on medium speed for 7-10 minutes until the dough is smooth, elastic, and no longer sticky. Add more flour, one tablespoon at a time, if the dough is too wet. (Alternatively, knead by hand for 5-10 minutes on a floured surface.)
- Lightly grease a large mixing bowl with oil. Shape the dough into a ball and place it in the greased bowl, turning it once or twice to coat with oil. Cover with a damp cloth or plastic wrap and let rise in a warm, draft-free place for 1-2 hours, or until doubled in size.
- Once risen, gently punch down the dough to deflate it. Turn the dough out onto a lightly floured surface. Knead the dough again for about 3-5 minutes, adding minimal flour as needed to prevent sticking.
- Divide the dough into three equal pieces. Roll each piece into a long “snake” shape, approximately 1-2 inches in diameter and 16-18 inches long.
- Lay the three dough strands parallel to each other. Pinch the top ends firmly together. Braid the pieces by alternating the outer strands over the middle. Continue braiding until you reach the bottom, then pinch the three bottom ends together to seal the loaf.
- Lightly grease a baking sheet or line with parchment paper. Carefully transfer the braided loaf onto the prepared baking sheet. Cover with a damp towel and let rise in a warm environment for a second time, for 30 minutes to 1 hour, or until visibly puffy.
- Preheat your oven to 350°F (175°C). Whisk the remaining egg in a small bowl to create an egg wash. Gently brush the beaten egg over the entire surface of the risen Challah loaf. If desired, sprinkle with sesame seeds or other toppings.
- Bake for 35-40 minutes, or until the loaf is golden brown and sounds hollow when tapped on the bottom. If it doesn’t sound hollow, continue baking in 2-4 minute increments.
- Transfer the baked Challah to a wire rack and let it cool completely before slicing and serving to ensure the best texture.
Nutrition
Nutritional information is an estimate and provided as a courtesy. Values may vary according to ingredients and preparation methods.
Calories: 254kcal | Carbohydrates: 49g | Protein: 8g | Fat: 2g | Saturated Fat: 1g | Polyunsaturated Fat: 1g | Monounsaturated Fat: 1g | Trans Fat: 1g | Cholesterol: 55mg | Sodium: 218mg | Potassium: 103mg | Fiber: 2g | Sugar: 9g | Vitamin A: 79IU | Vitamin C: 1mg | Calcium: 24mg | Iron: 3mg
Explore More Irresistible Bread Recipes
If you loved baking this Challah, you might enjoy trying these other fantastic bread recipes:
- Cheesy Garlic Pull-Apart Bread
- Sweet Cinnamon Monkey Bread
- Easy Homemade Flatbread Recipe