

Irresistible Chocolate Covered Shortbread Cookies: A Festive Baking Delight
Discover the ultimate recipe for melt-in-your-mouth shortbread cookies, exquisitely dipped in rich chocolate and adorned with your favorite toppings. Perfect for holidays or any special occasion, these customizable treats are sure to be a crowd-pleaser!

Please note this post contains affiliate links, which may earn me a small commission, at no extra cost to you.
As the holiday season swiftly approaches, there’s an undeniable buzz in the air – and in my kitchen! With Christmas just around the corner, my baking endeavors are in full swing, turning my home into a sweet-smelling haven. Among the many festive treats I adore creating, these chocolate covered shortbread cookies have quickly become a cherished favorite. They’re not just fantastic in taste, but also incredibly fun to make, offering a delightful activity for everyone, especially the little ones!
The beauty of these cookies lies in their simplicity and versatility. Starting with a classic, buttery shortbread base that truly melts in your mouth, they are then elevated with a decadent chocolate coating. The real magic, however, happens with the toppings. Forget fiddly icing bottles and intricate designs; these cookies offer an effortless and super fun way for kids (and adults!) to get creative with decorations. From colorful sprinkles to crushed candy canes, the possibilities are endless and entirely customizable, making each batch a unique masterpiece.
These buttery shortbread cookies are more than just a treat; they’re a holiday essential, bringing warmth and joy with every bite. Let’s dive into making these delightful cookies that are bound to become a staple in your seasonal baking traditions.
The Classic Shortbread: A Buttery Foundation
Shortbread cookies are renowned for their rich, buttery flavor and delicate, crumbly texture. But what exactly goes into making these iconic biscuits? At their core, shortbread cookies are defined by a high butter content, which imparts their signature melt-in-your-mouth quality. My recipe enhances this classic by incorporating both powdered sugar and granulated sugar directly into the cookie dough. The powdered sugar is key to maintaining a wonderfully soft and tender crumb for longer, ensuring your cookies stay fresh and delicious.
Beyond the butter and sugar, the essential ingredients typically include all-purpose flour, a touch of salt to balance the sweetness, and a generous splash of pure vanilla extract for that comforting aroma. A unique twist in my recipe is the addition of a mere 1/4 teaspoon of pure almond extract. This subtle hint of almond complements the vanilla beautifully, adding an extra layer of sophisticated flavor that truly sets these cookies apart from the rest.
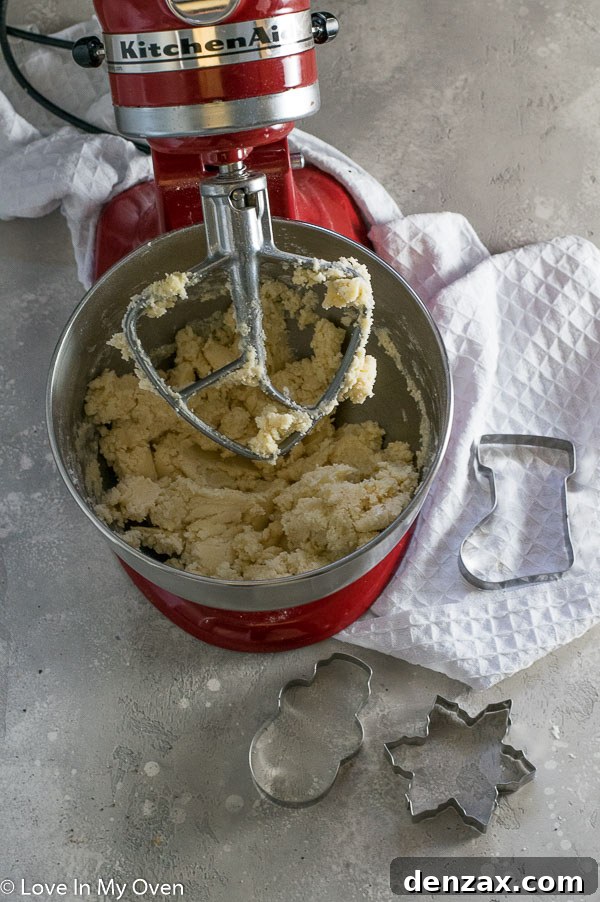
The Art of Chilling: Why Dough Relaxation Matters
Many bakers wonder if chilling shortbread cookie dough is truly necessary. From my experience, it’s a crucial step that can make all the difference in achieving perfect cookies. My very first batch, made without chilling, spread out excessively on the baking sheet and became a bit too brown around the edges. The result was still edible, but far from the ideal shortbread texture.
The solution? Chilling the dough. Even an hour in the refrigerator transformed the next batch, yielding cookies with beautifully defined shapes and a lovely golden hue. The cold butter in the dough firms up, preventing excessive spreading during baking and ensuring your cookies maintain their shape and tender crumb. If your baking schedule requires a longer chill, say overnight or up to three days, simply remember to remove the dough from the fridge about 30 minutes before you plan to roll it out. This allows the butter to soften slightly, making the dough much easier to work with without it cracking or tearing.
Working with chilled dough can sometimes be a bit of a dance. If you find your dough becoming too soft and sticky while rolling, cutting, and transferring, don’t hesitate to pop it back into the fridge for 15-20 minutes. This quick chill will firm up the butter again, making it manageable. To minimize mess and make rolling a breeze, I highly recommend rolling your dough between two sheets of parchment paper. It works like a charm every time, preventing sticking and ensuring an even thickness.
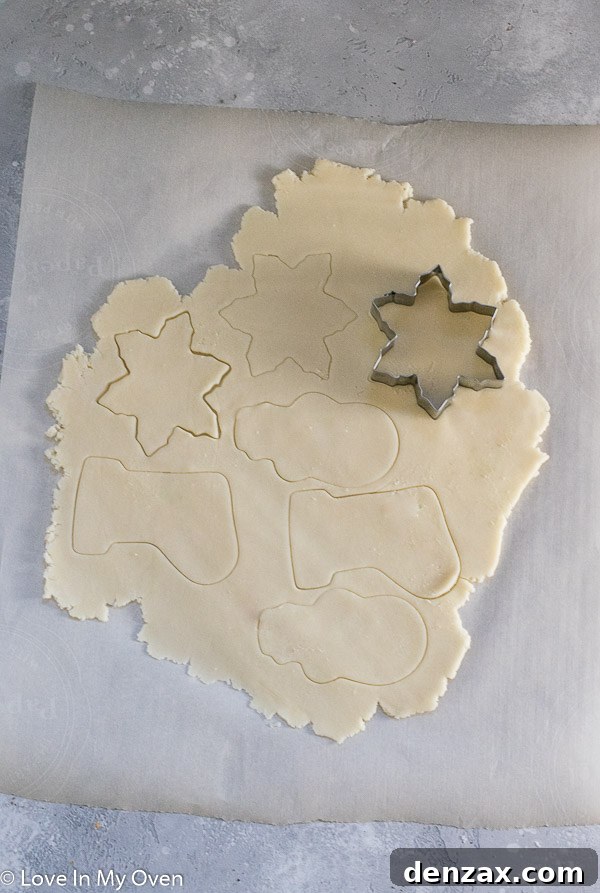
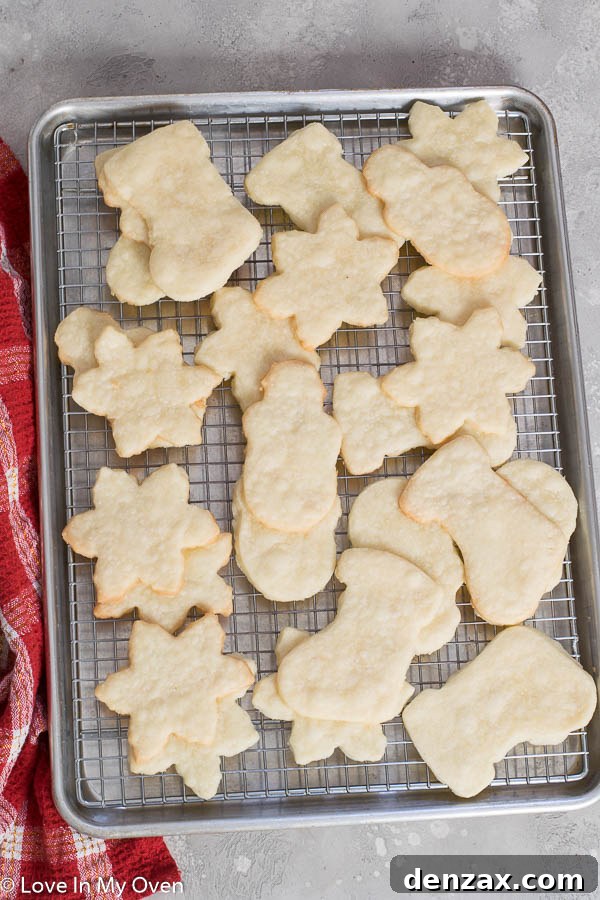
Once your beautifully shaped cookies are ready, bake them for approximately 9-11 minutes, or until the edges are just barely golden. After baking, let them cool completely on a wire rack before moving on to the exciting step of dipping them in chocolate and adding your favorite decorations.
Dipping Perfection: Mastering the Chocolate Coating
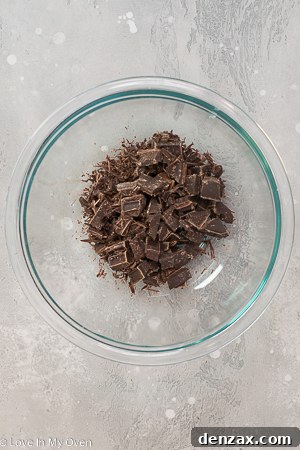
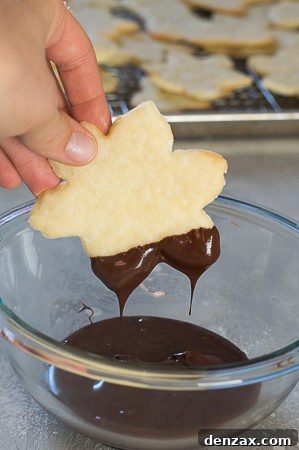
The decadent chocolate coating is what elevates these shortbread cookies from delicious to absolutely irresistible. Achieving a smooth, glossy chocolate dip is simpler than you might think. I typically use chopped semi-sweet chocolate, which I melt in the microwave in 30-second intervals, stirring thoroughly after each interval, until it’s perfectly smooth and runny. This method is quick and efficient. Alternatively, you can opt for the classic double boiler system, gently melting the chocolate over simmering water for a consistent, controlled temperature.
For dipping, choose a fairly small bowl. This concentrates the melted chocolate at the bottom, making it much easier to coat your cookies without needing excessive amounts of chocolate. Once your cookie is dipped, a small spoon or a butter knife can be invaluable for spreading the chocolate evenly over the desired portion of the cookie and gently scraping off any excess. This ensures a neat, professional finish.
Creative Topping Ideas for Every Occasion
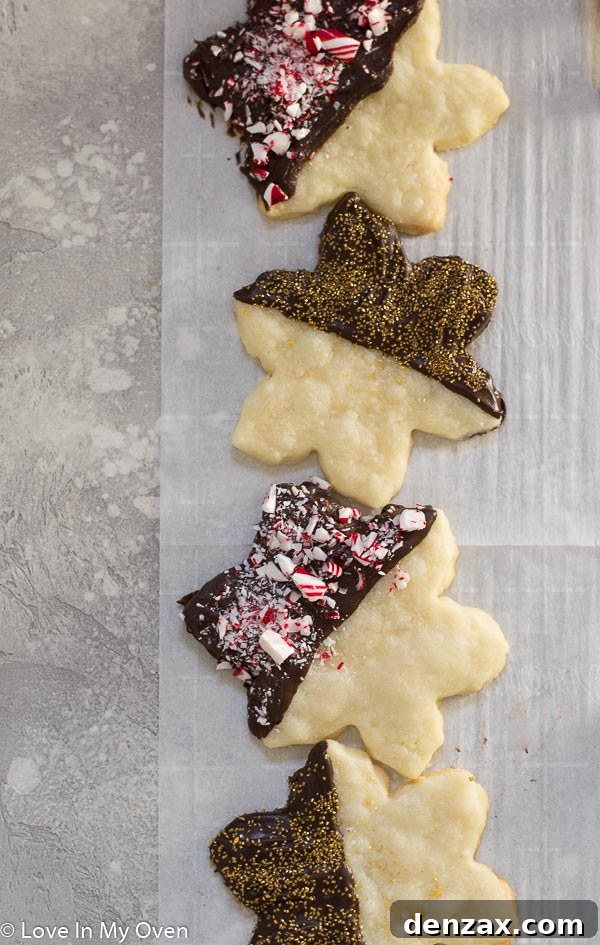
Once you’ve dipped a cookie, immediately lay it on a parchment-lined baking sheet and let the fun begin with toppings! This is where you can truly let your creativity shine. While it’s full-on Christmas season in my kitchen, inspiring festive sprinkles and crushed candy cane, these cookies are incredibly adaptable for any celebration. Think outside the box and consider these ideas:
- For the Holidays: Besides classic sprinkles and candy cane, try finely chopped pistachios, edible gold dust, mini chocolate chips, or a drizzle of contrasting white chocolate.
- For Valentine’s Day: Adorn with freeze-dried raspberries, delicate dried rose petals, pink and red sprinkles, or a romantic white chocolate swirl.
- For Autumn/Thanksgiving: Sprinkle with chopped pecans or walnuts, a dusting of cinnamon sugar, or finely crushed ginger snaps.
- For Everyday Indulgence: A sprinkle of sea salt flakes to enhance the chocolate, toasted coconut, crushed pretzels for a sweet and salty crunch, or a hint of espresso powder for depth.
- Kids’ Party Fun: Rainbow sprinkles, mini marshmallows, or even tiny gummy candies.
The immediate application of toppings is key, as the chocolate sets quickly. Once decorated, allow the chocolate to harden completely before stacking or storing the cookies. This ensures your beautiful designs stay intact.

Storage & Freezing: Keeping Your Cookies Fresh
One of the best features of these chocolate covered shortbread cookies is their excellent shelf life and freezer-friendliness. Once the chocolate has completely hardened and the cookies are thoroughly cooled, you can easily store them. Stack them carefully in an airtight container at room temperature, and they will remain fresh and delicious for up to two weeks.
For longer preservation, these cookies freeze beautifully! Simply arrange them in a single layer in a freezer-safe container or bag, ensuring they are tightly sealed to prevent freezer burn. They will keep well for up to two months. When you’re ready to enjoy them, simply thaw the cookies in the refrigerator for a few hours. A little secret: they’re surprisingly delightful even when enjoyed straight from the freezer for a chilly, firm treat!
Making these cookies was such a joy, especially with my kiddos. They absolutely loved using our festive Christmas cookie cutters with the dough and eagerly sprinkling decorations over the melted chocolate. It’s a wonderful activity that creates lasting memories (and delicious results!). The Christmas cookie cutters we used added that extra touch of holiday magic.
This shortbread recipe is incredibly versatile, making it suitable for any special occasion beyond Christmas. Imagine heart-shaped cookies for Valentine’s Day, star-shaped cookies for a summer barbecue, or custom shapes for birthdays. The possibilities are truly endless, making this recipe a year-round favorite.

Serving Suggestions and Perfect Pairings
These chocolate covered shortbread cookies are delightful on their own, but they also make a wonderful addition to any dessert spread or a thoughtful homemade gift. Serve them alongside a warm cup of coffee, tea, or a glass of cold milk for a comforting treat. For holiday gatherings, arrange them on a festive platter with other homemade goodies. Their beautiful presentation and customizable toppings make them a standout.
If you’re gifting them, consider packaging them in a decorative tin or a clear cellophane bag tied with a ribbon. A handmade tag with the recipe name adds a personal touch. These cookies are sturdy enough to travel well, making them perfect for sharing with friends and family near and far.
Frequently Asked Questions About Shortbread Cookies
What makes shortbread different from other cookies?
Shortbread distinguishes itself through its high butter content and minimal leavening (sometimes none at all). This unique composition gives it a rich, buttery flavor and a distinct crumbly, tender texture that melts in your mouth, unlike chewier or crispier cookie varieties.
Can I use margarine instead of butter?
While technically possible, I strongly advise against using margarine. Butter is fundamental to shortbread’s signature flavor and texture. Margarine contains more water and less fat, which will result in a tougher, less flavorful cookie that won’t have the desired melt-in-your-mouth quality.
How thick should I roll the dough?
For classic shortbread, aim for a thickness of about 1/4 inch (approximately 6mm). This thickness ensures a good balance of tender crumb and sturdy structure, preventing them from becoming too brittle or too doughy.
How can I prevent my chocolate from seizing when melting?
Chocolate seizes when even a tiny amount of water or steam gets into it. To prevent this, ensure your bowl and utensils are completely dry. When using a double boiler, make sure the bottom of the bowl does not touch the simmering water, and prevent any steam from escaping into the chocolate. For microwave melting, use short bursts and stir frequently.
How long do chocolate covered shortbread cookies last?
Stored in an airtight container at room temperature, these cookies will remain fresh for up to two weeks. If stored in the freezer, they can last for up to two months. Always ensure the chocolate coating is fully hardened before storing.
Other Cookie Favorites for Your Baking List
It’s cookie season, and if you love these chocolate covered shortbread cookies, you’re sure to enjoy some of my other tried-and-true favorites:
- Chocolate Chip Snowball Cookies
- Raspberry Filled Sugar Cookies
- Christmas Cookie Pops
- Coconut Caramel Bars

Chocolate Covered Shortbread Cookies
5 Stars 4 Stars 3 Stars 2 Stars 1 Star
5 from 11 reviews
Author: Katherine | Love In My Oven
Total Time: 1 hour
Yield: 30 cookies 1x
Description
There are many shortbread cookie variations out there, but these chocolate covered shortbread cookies are the best! Switch up the toppings to keep things fun and interesting.
Ingredients
Scale
- 1 cup unsalted butter, room temperature
- 1/2 cup powdered sugar
- 1/4 cup granulated sugar
- 1 tsp pure vanilla extract
- 1/4 tsp pure almond extract
- 2 cups all-purpose flour
- 1/2 tsp salt
- 6 oz chopped semi-sweet chocolate
- sprinkles, crushed candy cane, other decorations, etc for topping
Instructions
- Prepare the cookie dough. In the bowl of a stand mixer fitted with the paddle attachment, or using a handheld electric mixer, beat the butter with both the sugars for 2 full minutes on medium-high, until smooth and creamy. Add the extracts and beat again for another 10-15 seconds. Whisk together the flour with the salt in a large bowl, then slowly add the flour mixture to the mixing bowl, mixing on low continuously until the dough comes together. Continue mixing on slow until everything is soft and combined. Cover the dough tightly with plastic wrap and chill for at least 1 hour, and up to 3 days.*
- Bake the cookies. Preheat the oven to 350 F and line two large baking sheets with parchment paper. Remove half of the dough from the mixing bowl and form a disc with your hands. Place it between two sheets of parchment paper, or on top of a well-floured surface. Roll the dough out to a 1/4″ thickness. Use cookie cutters in different shapes to cut out the dough and remove it gently to the lined sheets, keeping the cookies about 1″ apart. Repeat with leftover dough**. Bake the cookies for 9-11 minutes, or until just barely browned on the outsides. Allow the cookies to cool for 5 minutes before removing to a wire rack to completely cool.
- Dip the cookies in chocolate. Place the chopped chocolate in a microwave-safe bowl and heat on high in 30 second increments, stirring in between until the chocolate is smooth and runny. Grabbing one cookie at a time, dunk it into the chocolate, and use a butter knife or the back of a small spoon to smooth the chocolate over the end of the cookie and scrape off the excess. Place the dipped cookie onto a baking sheet lined with parchment, and immediately decorate with sprinkles, crushed candy cane, etc. Repeat with remaining cookies. Allow the chocolate to completely harden before storing or stacking.
Cookies (once hardened and cooled) can be stacked and stored in an airtight container and kept at room temperature for up to 2 weeks, or in the freezer for up to 2 months.
Notes
*If chilling the dough for longer than 1 hour, when you’re ready to bake the cookies, allow the dough to rest at room temperature for 30 minutes before attempting to roll it.
**If the cookie dough is getting too soft and sticky while you’re rolling it out, pop it into the fridge for 15-20 minutes to let it harden up again before continuing.
- Prep Time: 30 minutes
- Cook Time: 30 minutes
- Category: cookies
- Method: bake