
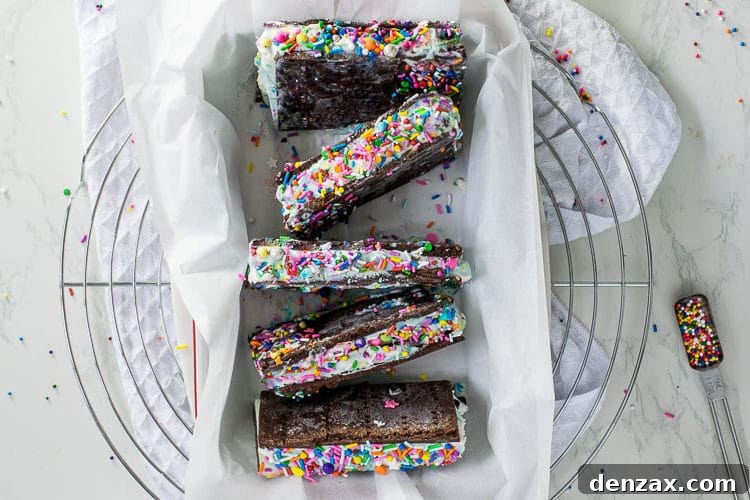
Take one bite and you’ll agree, these are the BEST ice cream sandwiches! Serve these birthday cake ice cream sandwiches at your next birthday party and you’ll be the coolest parent on the block!
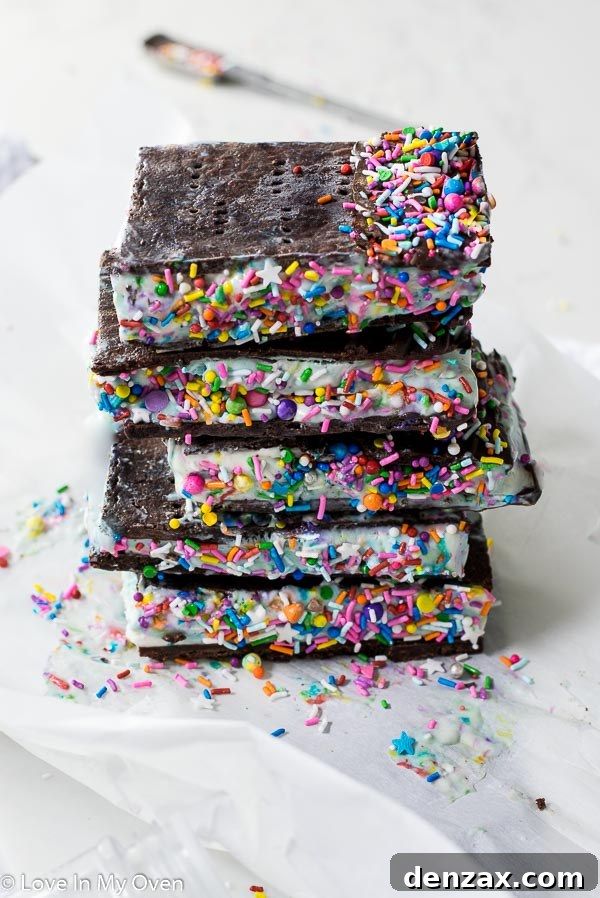
Unleash Your Inner Dessert Architect with the Ultimate Birthday Cake Ice Cream Sandwiches
Prepare to elevate your dessert game and become the star of any gathering with these incredible birthday cake ice cream sandwiches. Forget everything you thought you knew about store-bought treats; these homemade delights are a game-changer, bursting with vibrant flavors and a texture that will have everyone reaching for more. Seriously, these are not just good; they are, without a doubt, the BEST ice cream sandwiches you will ever taste. Imagine a soft, rich chocolate cookie embracing a generous scoop of creamy, sprinkle-filled birthday cake ice cream – it’s a symphony of sweet indulgence that captures the joyous spirit of a celebration in every single bite. Perfect for a summer party, a special birthday, or simply a delightful treat, these sandwiches promise to bring smiles and make lasting memories. Get ready to be hailed as the coolest host on the block!
There’s something uniquely comforting about a classic ice cream sandwich, isn’t there? Many of us grew up with those iconic treats from popular ice cream shops, featuring a wonderfully soft chocolate cookie hugging a cool, smooth vanilla ice cream filling. Those were the days! These Birthday Cake Ice Cream Sandwiches are a loving homage to that timeless nostalgia, but with a vibrant, modern twist that truly kicks things up a notch. We’re taking that beloved concept and infusing it with an extra dose of fun and flavor, transforming a simple dessert into an extraordinary experience.
The foundation of these magnificent sandwiches lies in their cookies. Just like the classics we adore, our chocolate cookies are designed to be incredibly soft and intensely chocolatey – so much so that they’re gloriously messy in the best possible way. This delightful chewiness provides the perfect contrast to the creamy filling. But here’s where we veer off the beaten path: instead of a traditional plain vanilla, we’ve opted for a spectacular homemade no-churn birthday cake ice cream. This isn’t just any ice cream; it’s a celebration in itself, packed with colorful sprinkles and a distinct cake batter flavor that perfectly complements the rich chocolate cookies. This no-churn wonder, a fan favorite from a few weeks ago, truly is the undeniable star of this recipe, bringing all the festive vibes to your dessert!
This fantastic recipe was actually a highlight of a recent #summerfunweekcollab, where the theme was all about creative and delicious ice cream creations. It was an incredible opportunity to dive deep into the world of frozen treats and experiment with exciting new flavors and combinations. Naturally, this collaboration led to a flurry of sweet creations in my kitchen, much to the delight of my family – though I suspect we might all be due for a dentist visit soon! But when the results are this delicious, it’s a small price to pay for such unparalleled dessert bliss.
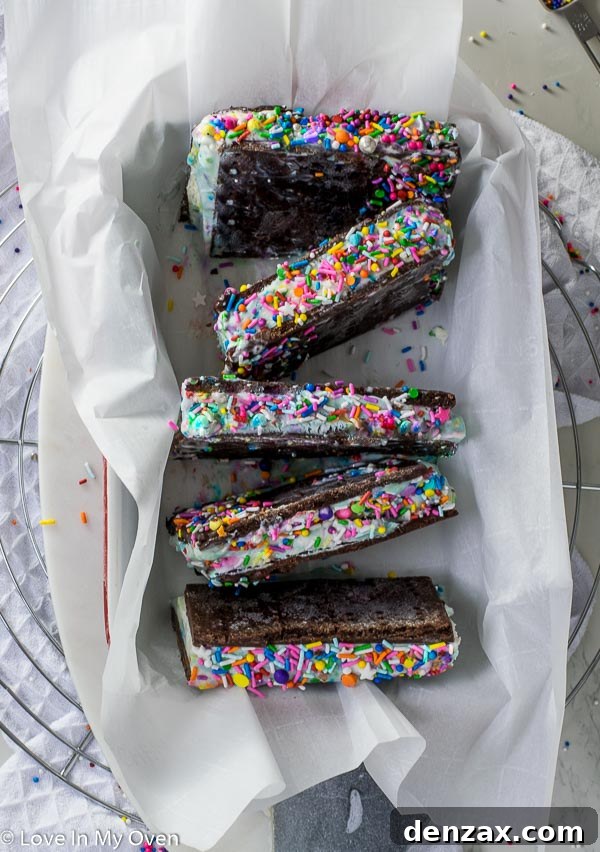
Crafting Perfection: Your Guide to Irresistible Birthday Cake Ice Cream Sandwiches
Making these birthday cake ice cream sandwiches is an exciting culinary adventure, albeit one that requires a little planning and patience. Due to the various freezing stages, it’s typically a two-day process, but every moment invested is well worth the incredible result. The first and most crucial step is to prepare your ice cream well in advance. For the best outcome, the birthday cake ice cream needs to be thoroughly frozen – ideally for at least 6 hours, or even overnight – before it can be perfectly sandwiched between the cookies. This ensures the ice cream holds its shape beautifully and provides that satisfyingly firm yet creamy texture when you bite into it.
And here’s a little secret for flexibility: while our no-churn birthday cake ice cream is highly recommended for its festive flair, these sandwiches are incredibly versatile! You can absolutely experiment with ANY of my other delicious no-churn ice cream flavors. I’ve linked some fantastic options at the bottom of this post that pair wonderfully with chocolate cookies. For an even quicker route, feel free to use your favorite store-bought ice cream. Just make sure it’s a good quality, flavorful variety that complements chocolate!
Once your chosen ice cream is perfectly chilled and set, it’s time to turn your attention to the glorious chocolate cookies. The cookie recipe and method I use are inspired by the renowned Christine Cushing, a name synonymous with culinary excellence. Her approach ensures a cookie that is not only rich in chocolate flavor but also possesses that essential soft, chewy texture – the ideal counterpoint to the frozen filling. This recipe creates a sturdy yet tender base that won’t crumble, ensuring your ice cream sandwiches hold together beautifully from the first bite to the last. Trust me, with Christine Cushing’s guidance, you’re in for a treat!
Essential Tips for Flawless Ice Cream Sandwiches
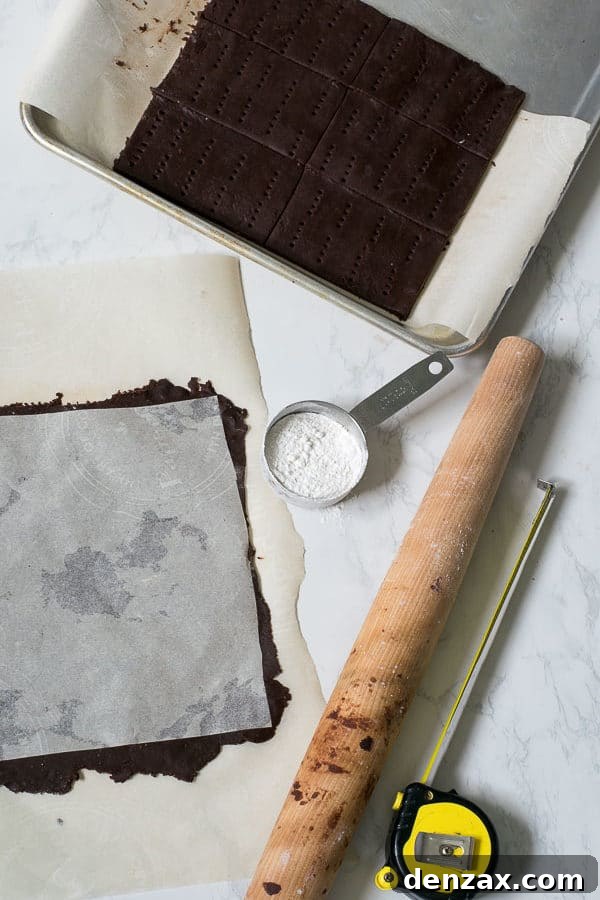
- Dough Handling Expertise: The chocolate cookie dough, while incredibly delicious, can be a bit sticky. To ensure a smooth and frustration-free process, always roll out the dough directly onto a piece of parchment paper. A light dusting of flour on your rolling pin will also work wonders, preventing sticking and allowing you to achieve that perfect, even thickness required for uniform cookies. This method also makes transferring the delicate dough rectangles to the baking sheet a breeze, minimizing handling and maintaining their shape.
- Precision Cutting for Perfect Portions: For visually appealing and evenly sized ice cream sandwiches, a measuring tape is your best friend when cutting the dough into rectangles. This seemingly small step makes a significant difference, ensuring that each cookie half is the same size, which is crucial for neatly assembled sandwiches. Consistency in size not only looks professional but also guarantees an even ice cream-to-cookie ratio in every bite.
- Patience is Key: Cool Down Completely: It might be tempting to rush, but it’s absolutely critical that your cookies are completely cooled before you even think about adding the ice cream layer. Warm or even slightly warm cookies will immediately melt the ice cream, turning your masterpiece into a gooey mess. Allow them ample time to reach room temperature, or even pop them into the refrigerator briefly if you’re short on time, to ensure they’re firm and ready for their frozen filling.
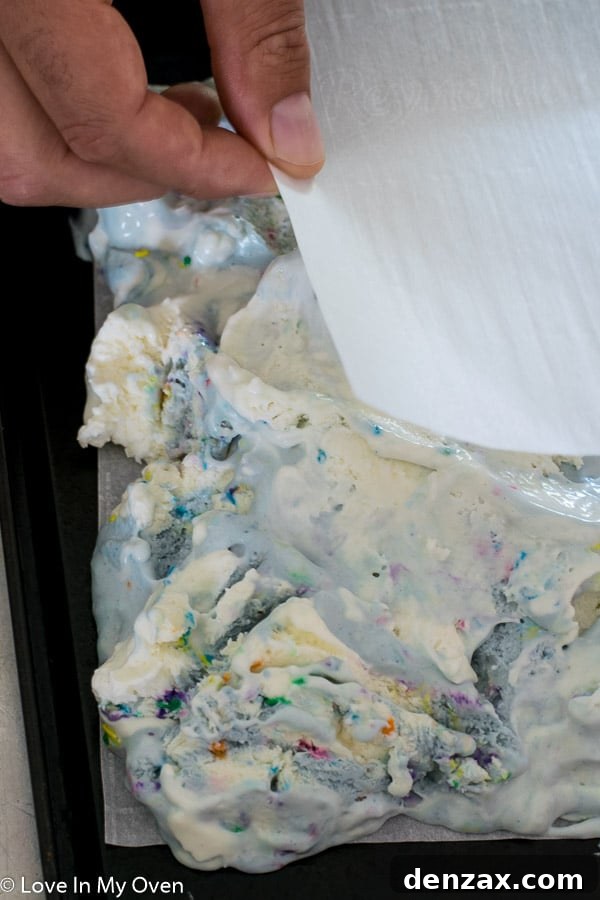
- Achieving the Ideal Ice Cream Layer: The key to a beautiful ice cream sandwich lies in an evenly distributed filling. After slightly thawing your pre-made birthday cake ice cream, spread it out smoothly between two pieces of parchment paper. Roll or press it down to an even thickness (around 1 inch is ideal, but refer to the recipe for precise dimensions). This step is vital for creating a uniform ice cream slab that can be easily cut to match your cookie rectangles, ensuring every sandwich has that perfect balance and an aesthetically pleasing cross-section.
Storage & Styling: Keeping Your Treats Fresh and Fabulous
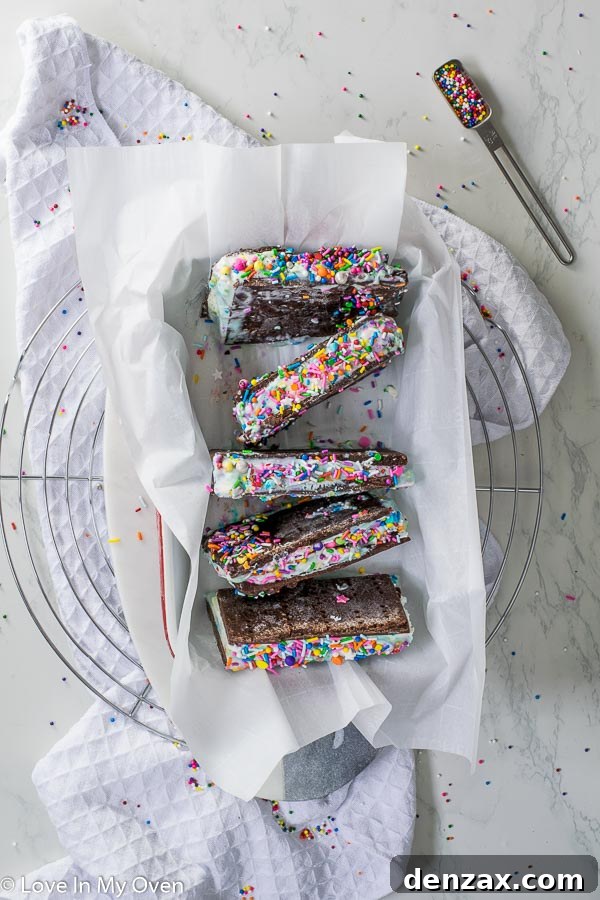
One of the fantastic advantages of ice cream sandwiches is their excellent freezer-friendly nature. Properly stored, these delightful treats can last for a significant period, allowing you to enjoy them long after you’ve made them. While they rarely last long in my household, you can comfortably store and enjoy these birthday cake ice cream sandwiches for up to two months, provided they are wrapped correctly. The key to preserving their freshness, flavor, and texture is individual wrapping. I highly recommend wrapping each sandwich individually in parchment paper, followed by a layer of plastic wrap or foil, and then storing them in an airtight container or freezer bag. This meticulous wrapping prevents freezer burn, maintains the integrity of the cookies, and keeps the ice cream perfectly creamy. Plus, that individual wrapping adds a special, ready-to-eat treat feeling, making each one feel like a little gift!
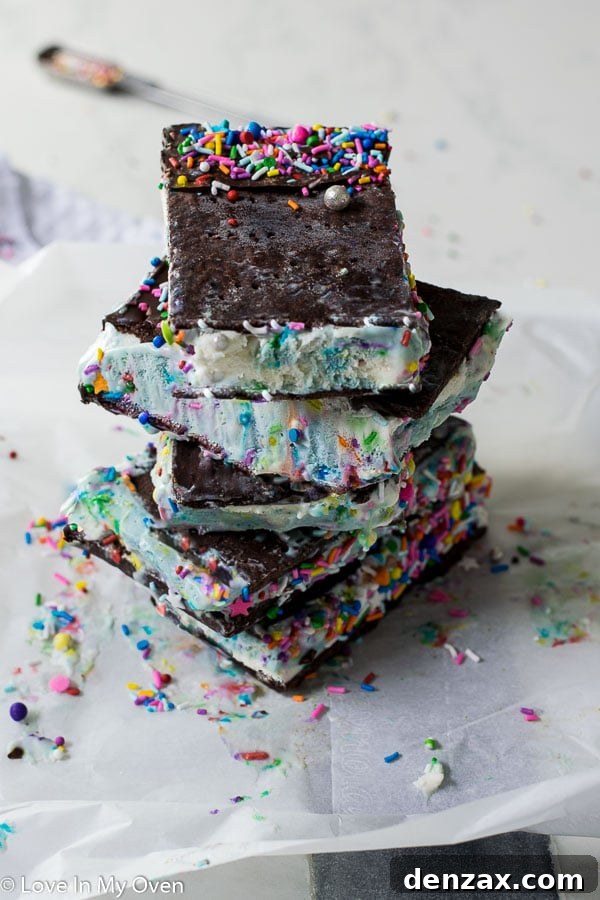
Now for the fun part: decorating your magnificent creations! While you have complete freedom to personalize your sandwiches as you wish, if you’re sticking with the festive birthday cake theme, I cannot emphasize enough how much sprinkles enhance the experience. Colorful sprinkles instantly elevate the visual appeal and reinforce that celebratory vibe. The best time to apply the sprinkles (or any other garnishes like chopped nuts or mini chocolate chips) is immediately after you’ve assembled the cookie halves with the ice cream filling. The slight stickiness of the freshly sandwiched ice cream will help the decorations adhere perfectly before they freeze solid. Feel free to get creative with different sprinkle mixes, edible glitter, or even a drizzle of melted white chocolate for an extra touch of elegance. And remember, if you decide to whip up these sensational treats, be sure to tag me on Instagram @loveinmyoven! I absolutely adore seeing your culinary masterpieces and would love to feature your amazing creations!
Explore Endless Flavor Combinations with Our Versatile Chocolate Cookie Base
While these are undeniably the ultimate Birthday Cake Ice Cream Sandwiches, the beauty of this recipe lies in its incredibly versatile chocolate cookie base. This perfectly soft, rich chocolate cookie is not just for birthday cake ice cream; it’s an ideal canvas for an array of other no-churn ice cream flavors! Don’t limit your imagination; these cookies are designed to complement a wide spectrum of tastes, making them perfect for any season or occasion. Here are some fantastic no-churn ice cream flavor ideas that pair exceptionally well with the decadent chocolate cookie:
- Rolo No-Churn Ice Cream: Imagine the combination of rich chocolate cookies with creamy caramel and chocolate chunks. This flavor profile creates a truly indulgent and satisfying treat that’s reminiscent of your favorite candy bar.
- Matcha No-Churn Ice Cream: For those who appreciate a more sophisticated and unique flavor, matcha ice cream offers a delightful earthy bitterness that beautifully balances the sweetness of the chocolate cookie. It’s an unexpected pairing that’s surprisingly refreshing and elegant.
- Roasted Strawberry-Rhubarb No-Churn Ice Cream: Embrace the taste of summer with this vibrant and tangy ice cream. The sweet-tart notes of roasted strawberry and rhubarb provide a bright, fruity contrast to the rich chocolate, creating a dynamic and utterly delicious sandwich.
- Tiger Tail No-Churn Ice Cream: If you’re looking for a fun and nostalgic flavor, Tiger Tail ice cream, with its orange and black licorice swirl, makes for a bold and adventurous pairing with chocolate cookies. It’s a delightful throwback that’s sure to intrigue and satisfy.
- Real Mint-Chocolate No-Churn Ice Cream: A classic combination for a reason! The cool, refreshing burst of mint perfectly complements the rich, dark chocolate cookie. This timeless pairing offers a delightful sensation that’s both invigorating and deeply satisfying, especially after a meal.
Print Recipe

Birthday Cake Ice Cream Sandwiches
5 from 14 reviews
Author: Katherine | Love In My Oven
Total Time: 8 hours
Yield: 4-6 sandwiches
Description
Take one bite and you’ll agree, these are the BEST ice cream sandwiches! Serve these birthday cake ice cream sandwiches at your next birthday party and you’ll be the coolest parent on the block!
Ingredients
- 1 recipe birthday cake no-churn ice cream*
- 1/2 cup unsalted butter, room temperature
- 1/4 cup granulated sugar
- 1/4 cup brown sugar, packed
- 2 egg yolks
- 1/2 tsp vanilla extract
- 1 cup all-purpose flour
- 1/2 cup cocoa powder
- 1/2 tsp salt
- sprinkles, nuts, mini chocolate chips for garnish
Instructions
- Make the birthday cake ice cream and allow it to freeze for at least 6 hours before using it in the cookie recipe.
- Make the cookies. Preheat the oven to 350 F. In the bowl of your stand mixer fitted with the paddle attachment, or using a handheld mixer, beat the butter and both sugars together until fluffy, about 2 minutes. Add the egg yolks and vanilla, and beat again for another minute, scraping down the sides as necessary.
- In another mixing bowl, sift together the flour, cocoa powder, and salt. With the mixer running on low, add the dry ingredients to the wet, beating until just combined. Turn out the dough onto a lightly floured surface, and using your fingers, shape the dough into a log shape. Place the dough on a piece of parchment paper, and using a lightly floured rolling pin, roll it out into a rectangle, 3mm thick. Cut another piece of parchment paper to 7 1/2″ x 8″ and place it over top of the rectangle of dough. Trim the excess dough around the sides of the top parchment piece. Peel off the top piece of parchment paper, and using a measuring tape, cut the dough into either 4 or 6 even rectangles, but do not pull the dough apart! Using the scraps of dough you previously gathered, create another rectangle of dough the same shape and thickness (you should have no dough left) and cut into the same amount of rectangles. You’ll have either 8 or 12 in total! Prick all of the cookies with a fork a few times.
- Place the rectangles of dough (keeping them on the parchment) on a baking sheet and bake for 10-11 minutes, or just beginning to set. Allow them to cool completely.
- Prepare the ice cream. Place the ice cream in the fridge for an hour to thaw slightly. After an hour, line a rectangular container or a large baking sheet with parchment paper. Whatever you use, it needs to be at least the size of your cookies! Empty the thawed ice cream out onto the parchment paper, and use a spatula to smooth out the ice cream to 1″ thickness and top with another piece of parchment paper, smoothing it out completely and evenly. Freeze for 30 minutes – 1 hour.
- Make the sandwiches. Remove the ice cream from the freezer. Remove the top layer of parchment paper, and lay the slab of ice cream on top of one half of the cookies. Cut through the ice cream on top of the cookies to match the shape of the cookies underneath. Pull the cookies apart, and top each with another cookie. Decorate the sides immediately with sprinkles, nuts, or mini chocolate chips. Wrap each cookie in parchment paper and freeze the sandwiches for 2-3 hours.
Ice cream sandwiches will keep in the freezer for at least two months. They will still be safe to eat after that, but the texture of the ice cream will begin to deteriorate.
Notes
*You’re welcome to use another ice cream recipe or a store-bought version. This recipe will use 1 small tub (about 2lbs) ice cream
Note: The cookie recipe is adapted from an ice cream sandwich recipe I read in a magazine (unsure which one), by Christine Cushing.
- Prep Time: 8 hours
- Cook Time: 10 minutes