
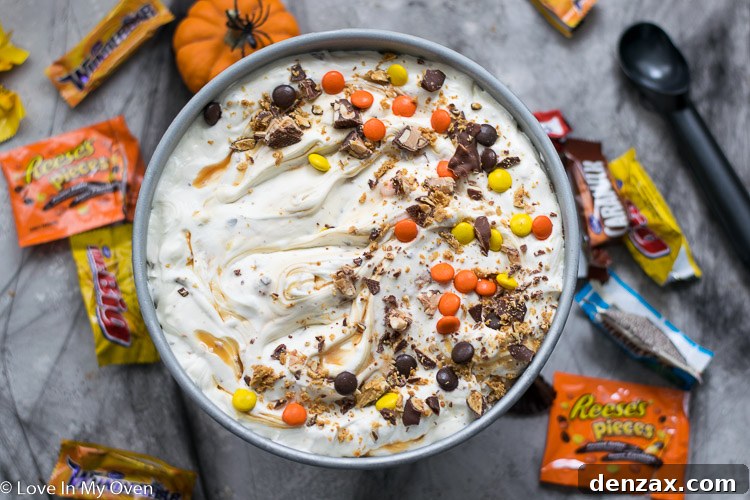
Transform your surplus Halloween candy into a spellbinding dessert! This ultimate no-churn Halloween ice cream recipe is the perfect, effortless solution for using up those miniature chocolate bars, smarties, and other delightful treats. Prepare for a cool, creamy, and irresistibly delicious experience!
Spooky Sweet Delight: The Ultimate No-Churn Halloween Candy Ice Cream
Halloween is a season brimming with delightful costumes, thrilling decorations, and, of course, an abundance of candy! While the joy of trick-or-treating or hosting a spooky party is unparalleled, many of us find ourselves with a significant stash of leftover candy once the festivities wind down. It’s a sweet problem to have, but what do you do with all those mini chocolate bars, chewy candies, and sugary delights before they disappear into the back of your pantry, perhaps only to be forgotten or slowly consumed day by day?
Instead of letting your candy haul linger, waiting for an opportune moment (or succumbing to daily snacking temptations!), why not transform it into something even more extraordinary and memorable? This is precisely where our incredible No-Churn Halloween Candy Ice Cream recipe shines. It’s a simple yet spectacular creation designed to repurpose your candy surplus into a creamy, dreamy frozen treat that the entire family will adore.
Forget the need for expensive, specialized ice cream machinery and endless churning; this recipe is a celebration of ease and maximum flavor, requiring just a few core ingredients and minimal effort. It’s a fantastic way to extend the magical Halloween spirit just a little longer, turning potential waste into a cherished, homemade dessert. Whether you’ve accumulated a mountain of Snickers, a pile of Skittles, or an eclectic assortment of everything in between, prepare to whip up one of the easiest, most satisfyingly delicious ice creams you’ve ever made. Get ready to scoop up some pure joy!
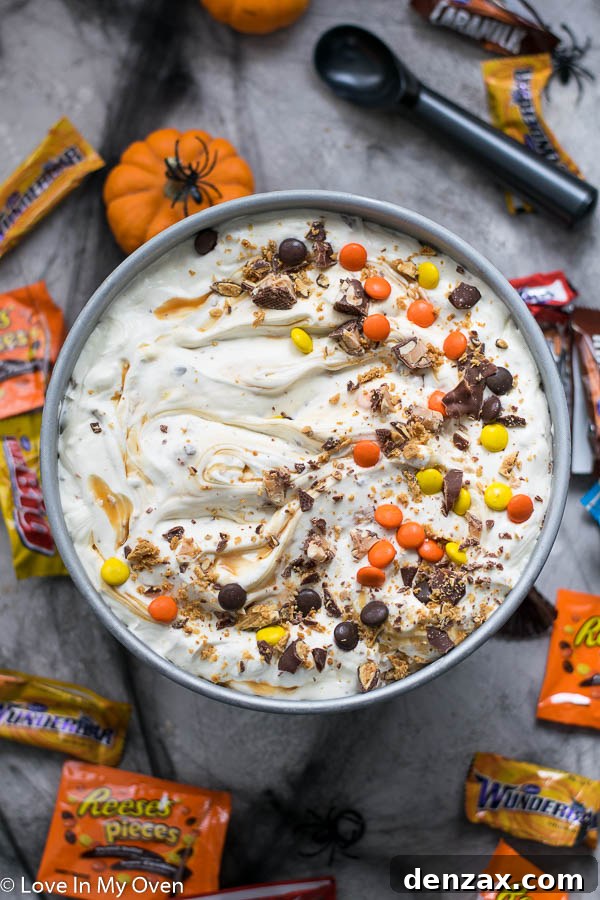
The Magic Behind No-Churn Ice Cream: Simplicity Meets Deliciousness
Perhaps you’re wondering, “How can I make rich, creamy ice cream without an expensive, bulky ice cream maker?” The secret lies in the incredible “no-churn” method, a culinary technique that has revolutionized homemade ice cream for countless dessert enthusiasts worldwide. My recipe collection, in particular, celebrates the beauty of no-churn recipes, and for good reason! This method consistently delivers a ridiculously good, ultra-creamy ice cream with minimal effort and just a handful of fundamental ingredients.
Traditional ice cream recipes typically require an ice cream churner to continuously break up ice crystals as the mixture freezes, resulting in that coveted smooth and scoopable texture. No-churn ice cream cleverly bypasses this step by utilizing a unique base primarily composed of whipped heavy cream and sweetened condensed milk. When heavy cream is whipped to stiff peaks, it incorporates a significant amount of air, which gives the final ice cream its light, airy, and luscious consistency. Furthermore, the high fat content inherent in heavy cream plays a crucial role in preventing the formation of large, undesirable ice crystals, contributing to a wonderfully smooth mouthfeel.
Sweetened condensed milk stands as the other unsung hero in this simple formula. It not only provides the necessary sweetness to balance the richness of the cream but, crucially, its thick, syrupy texture and high sugar content significantly lower the freezing point of the mixture. This harmonious combination allows the ice cream to freeze into a beautifully smooth, easily scoopable texture without the need for any churning whatsoever. It’s truly a foolproof method that saves valuable time, considerable effort, and eliminates the need for any specialized, single-use kitchen equipment. If you’re looking for more inspiration, you can find a roundup of 25 different no-churn flavors here, but for now, our focus is entirely on creating the ultimate Halloween candy version!
Essential Ingredients for Your Halloween Ice Cream Creation
This recipe prides itself on its remarkable simplicity, requiring only three main components to create a base that’s inherently rich, wonderfully smooth, and perfectly prepared for your custom candy additions. These are the fundamental building blocks that form the heart of almost all successful no-churn ice creams:
- Heavy Whipping Cream (36% or higher fat content): This is the crucial backbone of your ice cream, providing the necessary body and texture. When shopping, look for cream specifically labeled “heavy cream” or “heavy whipping cream,” ensuring it has at least 36% milk fat. When vigorously whipped, it creates the essential airy volume and luxurious, velvety texture that makes no-churn ice cream so delightfully palatable. For the best and quickest whipping results, ensure your heavy cream is very cold, straight from the refrigerator.
- Sweetened Condensed Milk (300 mL can): This ingredient is a dual-purpose marvel, contributing both the perfect level of sweetness and the unique, non-icy texture characteristic of no-churn ice cream. Its thick, viscous consistency and concentrated sugar content are key to preventing the mixture from freezing into a solid, unyielding block of ice. While any brand will work, my personal favorite for its consistent quality and flavor is Eagle Brand.
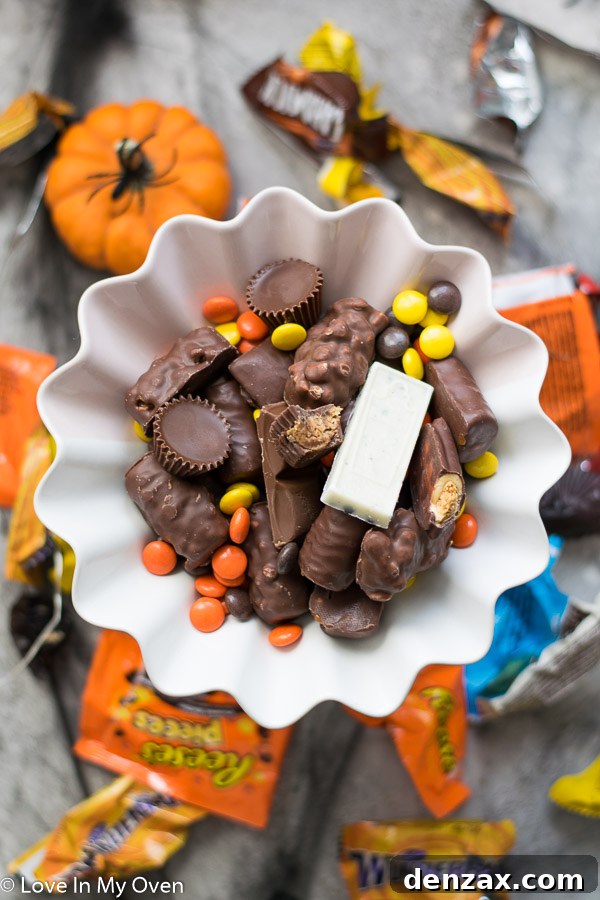
- Your Favorite Halloween Candy, Chopped (approximately 2 cups): The undeniable star of the show! This is your opportunity to unleash your creativity and efficiently utilize all those wonderful leftover treats. Approximately 2 cups of chopped candy serves as an excellent starting point, but feel entirely free to adjust this quantity based on your personal preference for a denser, more intensely candy-packed frozen dessert.
Mastering Your Halloween Candy Mix-Ins for Perfect Texture and Flavor
The true genius of this Halloween ice cream lies in its incredible versatility. You possess the freedom to incorporate almost any candy you have on hand, thereby crafting a unique and exciting flavor profile with every single batch. However, a small amount of thoughtful preparation can make an enormous difference, particularly when you’re dealing with specific types of candy that might otherwise present a challenge.
Selecting the Best Candies for Optimal Enjoyment
When choosing your mix-ins, aim for a diverse combination of textures and flavors to ensure each spoonful offers an exciting surprise. Consider incorporating:
- Classic Chocolate Bars: Miniature versions of beloved chocolate bars such as Snickers, Twix, Kit Kats, Reese’s Peanut Butter Cups, Milky Ways, 3 Musketeers, or even plain solid chocolate bars work exceptionally well. These additions provide a satisfying crunch and bursts of rich, melty chocolate goodness that everyone loves.
- Hard-Shell Candies: Candies like M&Ms (both plain and peanut varieties), Smarties (the chocolate-based variety), and similar hard-shelled confections add a delightful pop of color, a contrasting texture, and prevent clumping within the ice cream.
- Chewy Candies (with an Essential Pro Tip!): While incredibly delicious, soft, chewy candies and those with gooey centers, such as caramels, nougat-filled bars (like Cadbury Caramilk or certain Snickers bars), or even softer gummy candies, require a special step. Here’s a crucial Pro Tip: Unwrap and freeze these specific bars or candies for about an hour before you attempt to chop them up. This firming-up process is vital, as it prevents them from becoming a sticky, unmanageable mess on your hands and ensures you can chop them into clean, uniform pieces that integrate beautifully into the ice cream. This brilliant piece of advice is courtesy of my very own Etienne, who wisely intervened and saved me from a potentially very sticky situation!
- Other Fun & Festive Additions: Don’t limit yourself! Consider adding colorful Halloween-themed sprinkles for extra festivity, crushed chocolate sandwich cookies (like Oreos), mini chocolate chips, or even a handful of miniature marshmallows for an added layer of sweetness and texture.
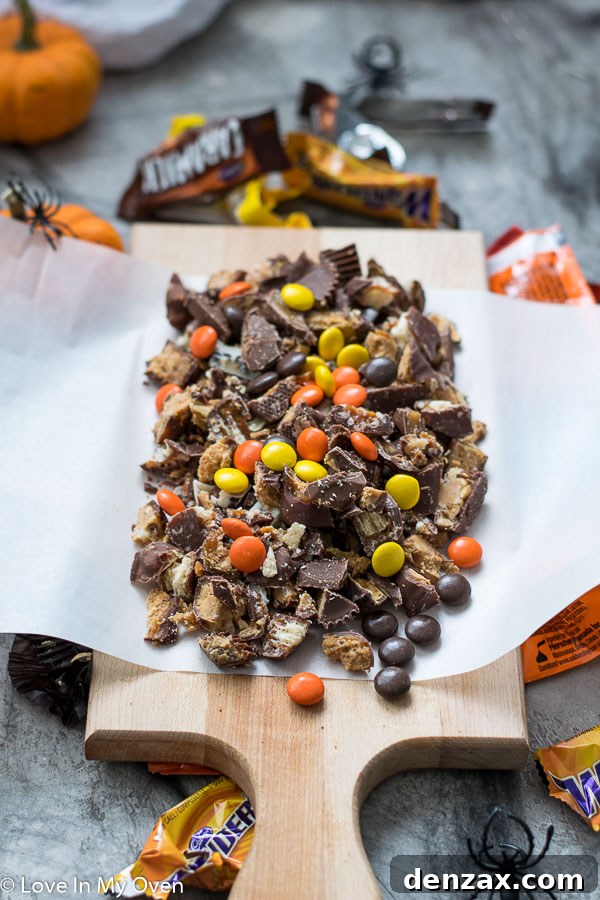
Once you’ve carefully chosen and prepped your desired candies, chop them into small, bite-sized pieces. Aim for relative consistency in size so that each spoonful of your homemade ice cream offers a perfectly balanced and delightful mix of all the wonderful flavors and textures you’ve included.
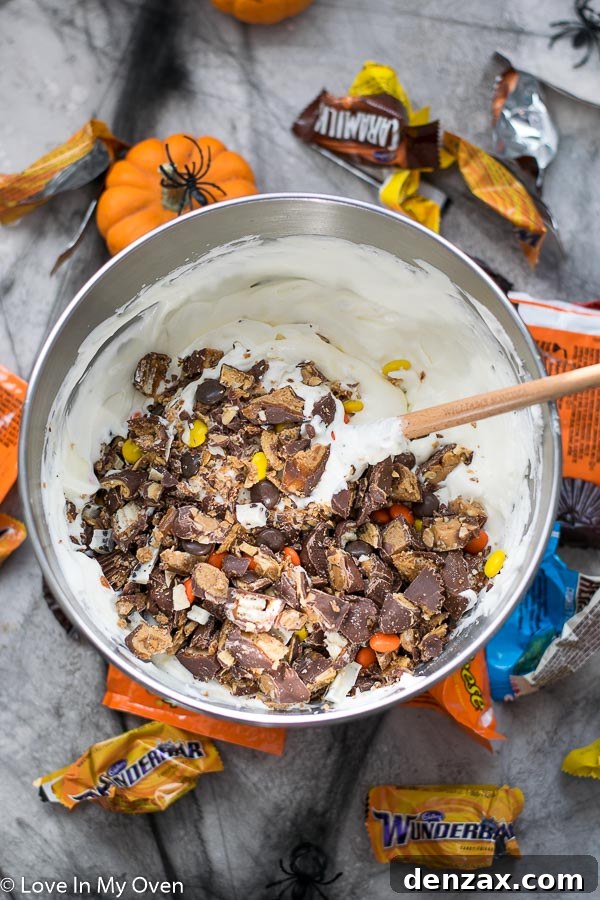
Step-by-Step: How to Make This Irresistible Halloween Candy Ice Cream
Making this no-churn ice cream is remarkably straightforward and requires minimal culinary expertise. Follow these simple steps precisely, and you’ll be on your way to a truly magical, homemade frozen dessert:
- Prepare Your Candy Mix-ins: Begin by selecting your desired mini chocolate bars and other festive candies from your Halloween haul. As previously emphasized, if any of your chosen candies contain soft, gooey nougat or runny caramel centers, remember to unwrap and freeze them for approximately one hour before proceeding. Once sufficiently chilled, chop all your candies into small, uniform, bite-sized pieces. Set these prepared candies aside in a bowl.
- Whip the Heavy Cream: Pour the very cold heavy whipping cream into the clean, dry bowl of a stand mixer. If you don’t have a stand mixer, a large bowl and a handheld electric mixer will work just as well. Fit your stand mixer with the whisk attachment, or use the beaters on your handheld mixer. Whip the cream on high speed for approximately 3 to 4 minutes, or until it forms stiff peaks. This means that when you lift the whisk or beaters, the peaks of cream should hold their shape firmly and not collapse. Exercise caution not to over-whip, as the cream can quickly turn into butter.
- Gently Fold in Sweetened Condensed Milk: Once the cream has reached stiff peaks, gently pour the entire can of sweetened condensed milk into the whipped cream mixture. Using a rubber spatula, carefully and slowly fold the condensed milk into the whipped cream. The goal here is to incorporate the condensed milk thoroughly without deflating too much of the precious air you’ve whipped into the heavy cream, which is crucial for the ice cream’s light and airy texture.
- Incorporate the Chopped Candy: Now, add all of your previously prepared chopped Halloween candy into the creamy base mixture. Again, use your rubber spatula to gently fold the candy throughout the ice cream base. Ensure the candy pieces are as evenly distributed as possible, guaranteeing that every single bite of your finished ice cream is packed with a delightful assortment of flavors and textures.
- Transfer to a Freezer-Safe Container: Carefully empty the entire contents of your mixing bowl into a suitable freezer-safe container. A standard 9×5-inch loaf pan works perfectly for this quantity, as its shape provides ample surface area for even freezing. Alternatively, you can use a round aluminum cake pan, a rectangular glass baking dish, or any other container specifically designed for freezer storage. Gently smooth out the top surface of the ice cream mixture with your spatula for an even and appealing finish.
- Freeze Until Set: Place the uncovered container into the freezer for a minimum of 5 to 6 hours. This duration allows the ice cream to set completely and achieve its signature smooth, scoopable, and creamy texture. After the initial freezing period (or ideally, after about a day or so), it’s highly recommended to cover the ice cream tightly with either plastic wrap directly touching the surface, aluminum foil, or by transferring it to an airtight plastic container with a fitted lid, to effectively prevent any freezer burn and preserve its fresh taste and texture for longer.
How Much Candy is Just Right? Finding Your Sweet Spot
The exact amount of candy you choose to incorporate into this recipe is truly up to your personal preference and how intensely candy-packed you desire your ice cream to be! However, a versatile and excellent rule of thumb to start with is approximately 2 cups of chopped candy. This quantity generally ensures a generous and satisfying distribution of treats throughout the entire batch of ice cream without making it overwhelmingly dense or difficult to scoop. To put it into perspective, two cups translates to quite a few mini chocolate bars, making this an incredibly efficient and delicious way to utilize a substantial portion of your leftover Halloween haul.
Optional Additions for an Extra Special Treat
Want to elevate your Halloween ice cream creation even further and make it truly unforgettable? Consider these delightful and easy additions:
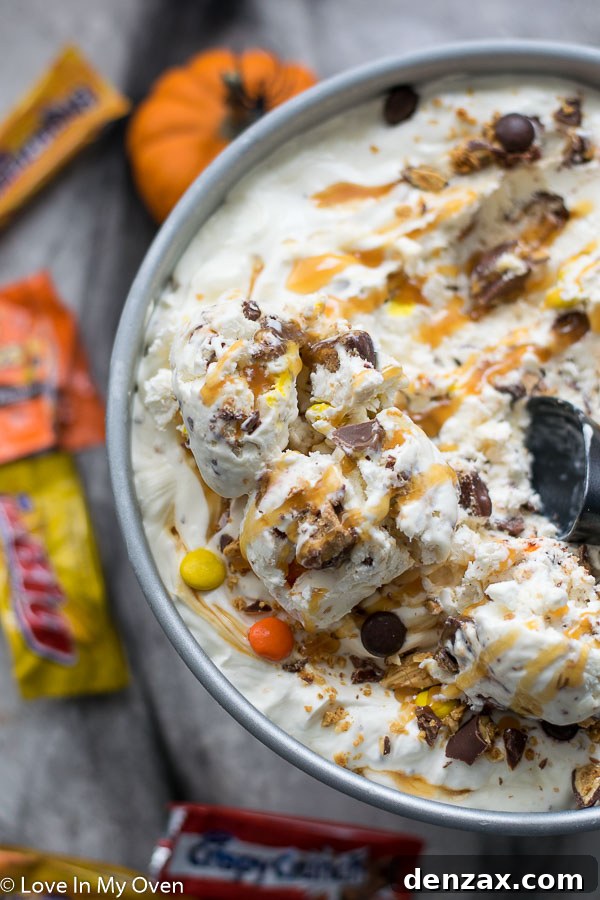
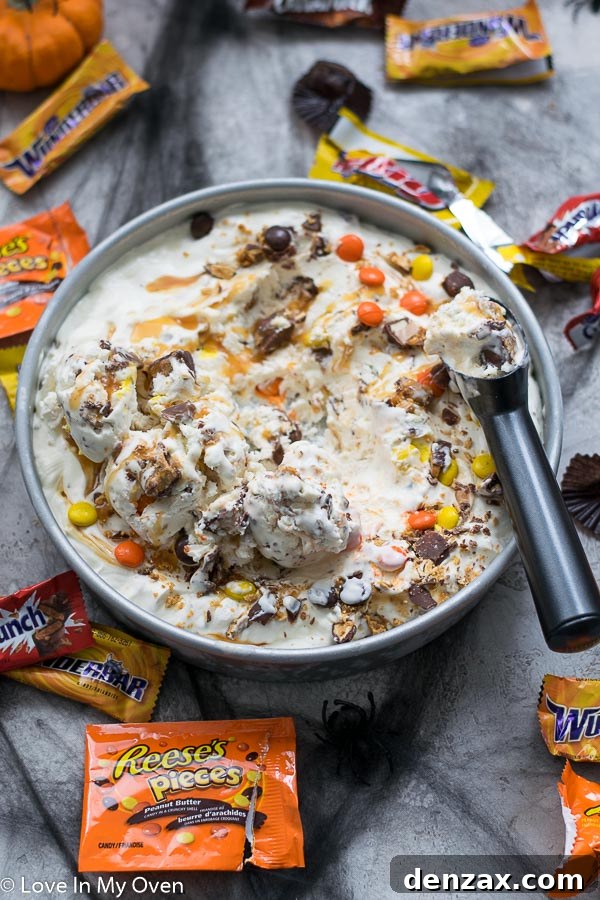
- Luxurious Caramel Swirl: For an EXTRA delicious and visually appealing experience, gently spoon some warm salted caramel sauce (homemade or store-bought) throughout the ice cream once it’s transferred into its freezer-safe container, but before you place it in the freezer. Use a knife or skewer to gently swirl the caramel through the base, creating beautiful, enticing ribbons that will be present in every scoop.
- Rich Chocolate Fudge Swirl: A decadent drizzle of chocolate fudge sauce can introduce another layer of deep, rich indulgence to your Halloween treat.
- Festive Food Coloring: For a truly spooky and eye-catching effect, you can divide your plain ice cream base (before adding candy) and add a few drops of vibrant orange, eerie green, or mystical purple food coloring to different portions. Then, layer and gently swirl these colored bases together with the candy to create a mesmerizing marbled effect.
- Flavor Extracts: Enhance the overall flavor profile with a splash of pure vanilla extract (even though condensed milk already contributes some vanilla notes) or try a festive hint of peppermint extract for a fun, seasonal twist.
Storage Tips for Your Homemade Halloween Ice Cream
This delightful Halloween ice cream is not merely for immediate enjoyment; it stores wonderfully, allowing you to savor the unique flavors of the season for weeks to come. When stored correctly, your homemade no-churn ice cream will maintain its quality for at least 2 weeks in your freezer, and often even longer if kept meticulously sealed.
It’s important to understand that the longer any homemade ice cream, particularly no-churn varieties, remains in the freezer, the firmer and harder its consistency will naturally become. This is a normal characteristic due to the lack of stabilizers found in commercial ice creams. To ensure optimal scoopability and a perfect serving texture, simply remove the ice cream from the freezer about 5 to 10 minutes before you plan to serve it. This brief softening period will allow it to reach that ideal, easily scoopable consistency.
Always ensure your ice cream is kept in an airtight, freezer-safe container. This critical step prevents the formation of undesirable ice crystals and, most importantly, protects against freezer burn, which can significantly diminish both the flavor and texture of your delicious creation. By following these simple storage guidelines, you can prolong the enjoyment of your spooky sweet treat!
So, whether you’ve successfully navigated a busy night of trick-or-treating, hosted an epic Halloween bash, or simply found yourself with an unexpected bounty of sweets, make sure you set aside some of those precious mini chocolate bars. With this incredibly easy and versatile recipe, you’re just a few simple steps away from transforming your candy surplus into a spectacular, creamy, and deeply satisfying indulgence that will impress everyone who tries it. Get ready to embrace the sweet side of resourcefulness!
More Sweet Treats for Halloween and Beyond!
If you’re eager for more ways to celebrate the season, planning future festivities, or simply looking to satisfy your persistent sweet tooth, check out these other fantastic recipes from my collection. From easy-to-make Halloween treats perfect for kids to more delightful no-churn ice cream variations, there’s certainly something here to inspire every dessert lover!
- Easy Halloween Treats to Make with Kids
- Tiger Tail No-Churn Ice Cream
- No-Churn Birthday Cake Ice Cream
- Spooky Halloween Cake Pops
- Delicious Spiderweb Sugar Cookies
And for those following a vegan diet or looking for dairy-free options, don’t miss this equally delightful Vegan Chocolate No-Churn Ice Cream – it’s just as creamy and satisfying!

Halloween Ice Cream
5 Stars
4 Stars
3 Stars
2 Stars
1 Star
5 from 13 reviews
- Author: Katherine | Love In My Oven
Total Time: 10 minutes
Yield: 1 pint 1x
Description
Wondering what to do with leftover Halloween candy? This Halloween ice cream is an easy way to use up those mini chocolate bars and smarties!
Ingredients
Scale
- 1 3/4 cup heavy cream (36%)
- 1 300 mL can sweetened condensed milk
- 2 cups various mini chocolate bars, chopped*
- optional: salted caramel sauce
Instructions
- In the bowl of a stand mixer fitted with the whisk attachment, or using a handheld electric mixer, whip the cream on high for 3-4 minutes, or until stiff peaks have formed. Pour the can of condensed milk into the bowl, then use a spatula to fold it in.
- Add the chopped chocolate bars and combine with the spatula. Pour the mixture into a freezer-safe container and smooth it out with a spatula. Place the ice cream into the freezer for 5-6 hours to freeze.
Leftover ice cream can be stored in the freezer-safe container for 2 weeks or more. It will get harder as time goes on.
Notes
*2 cups is a general rule of thumb; you can use more or less. If you are using chocolate bars with caramel or anything very soft, be sure to freeze the chocolate bars for an hour before chopping
- Prep Time: 10 minutes
- Cook Time: 0 minutes
- Category: ice cream
- Method: no-churn
- Cuisine: american